
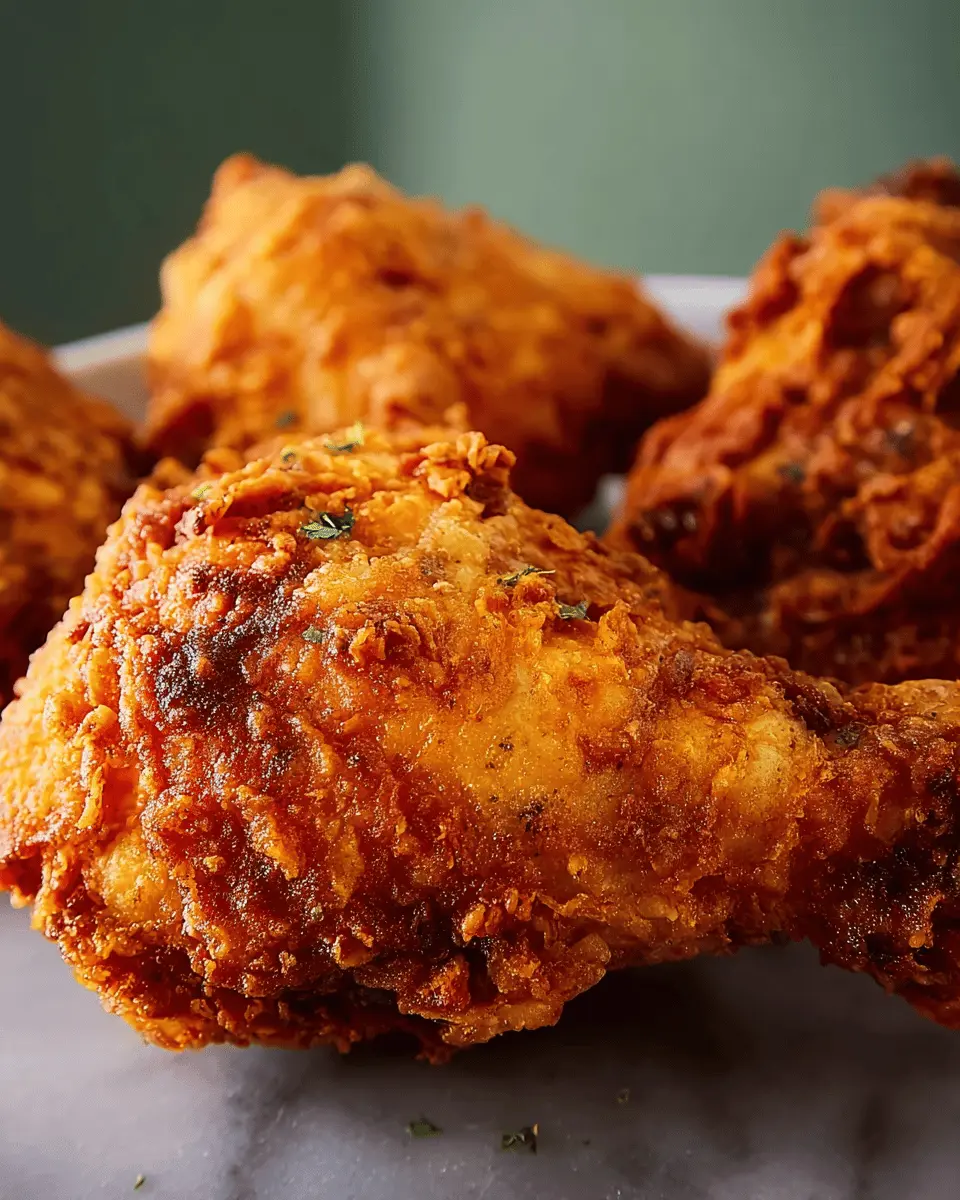
Introduction to Crispy Fried Chicken
Why Homemade Crispy Fried Chicken is a Game Changer
Crispy fried chicken isn't just a meal; it's pure comfort food that brings a burst of flavor and nostalgia. Making it at home is a total game changer for several reasons. First, you get to control every step of the process—from the choice of chicken to the spices you incorporate. This means you can customize each batch to fit your family's preferences. If you like it spicy, toss in some cayenne; prefer a smokier flavor? A hint of smoked paprika will do the trick!
The joy of biting into that perfectly crispy, golden-brown skin—crunching down to juicy, tender meat—is simply unmatched. Plus, preparing it at home tends to save you money compared to restaurant fried chicken, and you can cook a larger batch to feed friends or family gatherings.
Additionally, the aroma that fills your kitchen while frying chicken is something else entirely. It's inviting; it even tells a story of tradition and love. For those truly passionate about cooking, this is the kind of culinary adventure that can bring joy to your dining table. Ready to dive in? Let’s get started with the recipe that’s sure to impress!
For techniques and tips on frying chicken, check out Google's guide on frying temperatures and oil selection.
Ingredients for Crispy Fried Chicken
Creating the ultimate crispy fried chicken starts with the right ingredients. Here’s a breakdown of what you'll need to achieve that golden-brown crunch perfect for any gathering or family dinner.
-
4-pound chicken: Fresh, high-quality chicken cut into pieces is essential. Opt for a mix of dark and white meat for the best flavor.
-
Buttermilk (1 cup): This creamy ingredient not only adds richness but also helps to tenderize the chicken, ensuring a juicy bite.
-
All-purpose flour (2 cups): For that signature crispy coating, flour works wonders.
-
Paprika (1 teaspoon): A touch of paprika gives your chicken a beautiful color and adds a subtle warmth. Don’t skip this essential spice!
-
Salt and pepper: Seasoning is key! Adjust the amounts to your taste for a well-balanced flavor profile.
-
Vegetable oil (2 quarts): A neutral oil is ideal for frying. Cast iron skillets work wonderfully for even frying.
By gathering these simple ingredients, you're on your way to achieving crunchy, delightful crispy fried chicken. Check out Culinary Institute of America for more tips on cooking techniques!
Preparing Crispy Fried Chicken
Creating that perfectly crispy fried chicken is all about the right preparation and cooking techniques. Follow these straightforward steps, and you'll have a golden, crunchy delight that impresses at any gathering. Let’s get started!
Gather Your Chicken and Buttermilk
Begin your crispy fried chicken journey by selecting a fresh, high-quality chicken. Choose a whole chicken cut into pieces for optimal flavor and texture. Once you have your chicken, the next essential ingredient is buttermilk. This tangy wonder not only helps to tenderize the chicken but also adds a rich flavor.
- Tip: For even more flavor, consider marinating your chicken in the buttermilk overnight. This extra time can work wonders for moisture and taste!
Season the Flour and Coat the Chicken
Now, let’s prepare the coating! In a large plastic bag, combine 2 cups of all-purpose flour with some paprika (for that beautiful color) and season generously with salt and pepper. This mixture is where your chicken gets that sought-after crunch.
Once seasoned, dip your chicken pieces into the buttermilk one by one before transferring them into the flour bag. Seal the bag and shake it gently to coat each piece thoroughly. That’s where the magic happens!
- Inside Tip: You want your flour to form a paste-like consistency as it adheres to the chicken. This ensures that crispy crust we all crave.
Allow the Chicken to Rest for That Perfect Crust
After coating, place the chicken on a tray and cover it with a clean dish towel. Let it rest for at least 30 minutes. This step is crucial as it allows the flour to set and sticks to the chicken, enhancing that crispy texture when you fry.
Heat the Oil for Frying
While the chicken is resting, it’s time to prepare the frying oil. Choose a heavy, cast-iron skillet filled with ⅓ to ½ of vegetable oil. Heat the oil to about 350°F to 375°F.
- Cooking Note: If you don’t have a thermometer, you can test the oil by dropping in a small bit of flour — it should sizzle right away. If it browns too fast, lower the heat slightly.
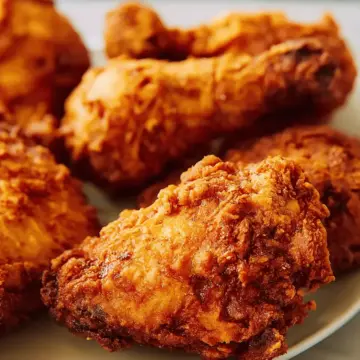
Fry the Chicken to Golden Perfection
Once your oil is hot, add the chicken pieces carefully. Don’t overcrowd the pan; you want them to fry up nicely without steaming. Cook until golden brown on both sides, about 5-7 minutes per side.
After initially browning the chicken, reduce the heat, cover the skillet, and let it cook for another 20-30 minutes. This method ensures the chicken cooks thoroughly while staying moist inside. When it’s time, remove the cover, raise the heat, and fry for an additional few minutes until the crust is crispy.
Lastly, drain the chicken on paper towels to remove excess oil before serving.
With these steps, you’ll have delicious crispy fried chicken that brings joy to any table! Want to experiment with flavors? Consider adding spices like garlic powder or cayenne for an extra kick! Check out sources like Serious Eats for more frying tips and techniques. Happy frying!

Variations on Crispy Fried Chicken
Spicy Crispy Fried Chicken
For those who crave a little heat, spicy crispy fried chicken is the way to go! Simply add cayenne pepper or your favorite hot sauce to the buttermilk marinade for an extra kick. You might also consider incorporating chili powder into the flour mixture for that flavorful depth. This variation pairs perfectly with a cooling dip, like ranch dressing or a tangy yogurt sauce.
Herb-Infused Crispy Fried Chicken
If you prefer a more aromatic twist, try herb-infused crispy fried chicken. Mixing dried herbs such as thyme, oregano, or rosemary into the flour will impart a delightful fragrance and taste. Fresh herbs can enhance the experience even more—just think about how delicious this chicken could be alongside a fresh garden salad or a classic coleslaw.
For further inspiration, check out more variations on crispy fried chicken at Food Network or Serious Eats.
Cooking Tips and Notes for Crispy Fried Chicken
Achieving crispy fried chicken is all about technique and attention to detail. Here are some vital tips to help elevate your frying game:
-
Let the Flour Rest: After coating the chicken, allow it to sit until the flour turns paste-like. This process helps the coating to adhere better during frying.
-
Oil Temperature is Key: Make sure your oil is hot enough before adding the chicken. A good test is to drop a piece of bread in; if it browns in 60 seconds, you’re good to go!
-
Don't Crowd the Pan: Fry chicken in batches to maintain temperature and ensure each piece gets that perfect golden-brown crust.
With these tips, you'll be well on your way to impressing friends and family with your delicious crispy fried chicken! For more cooking tips, check out Serious Eats for expert advice.

Serving Suggestions for Crispy Fried Chicken
When it comes to enjoying your crispy fried chicken, the sides can truly elevate your meal. Here are some delightful pairings to consider:
Classic Pairings
- Coleslaw: The crunch of coleslaw balances the chicken's crunch perfectly. Try a creamy vinaigrette for extra zest.
- Cornbread: A slice of warm cornbread adds a cozy, comforting element—perfect for soaking up any leftover juices.
- Biscuits: Fluffy biscuits with a drizzle of honey complement the savory flavors beautifully.
Fresh Alternatives
- Green Salad: A light, fresh salad sprinkled with nuts and a tangy dressing can provide a nice contrast.
- Pickles: The acidity of pickles cuts through the richness of the chicken, offering a refreshing bite.
For a complete meal experience, serve your fried chicken alongside some of these delicious sides. Don’t forget to check out these fun serving ideas to inspire your next gathering!
Time breakdown for Crispy Fried Chicken
Preparation time
Preparing your crispy fried chicken takes about 15 minutes. This includes skinning the chicken, mixing the flour, and coating the pieces.
Cooking time
The actual cooking will require around 35 minutes. You’ll want to ensure each piece is perfectly browned and crispy!
Total time
In total, you're looking at around 1 hour and 20 minutes. This includes additional time for letting the flour set, ensuring that every bite is deliciously crisp.
Getting your timing right will make a big difference in achieving that perfect crunch! Happy frying!
For more insights on cooking chicken, check out The Spruce Eats or Serious Eats.
Nutritional Facts for Crispy Fried Chicken
Exploring the nutritional facts of crispy fried chicken can help you enjoy this delicious dish mindfully. Here’s a quick snapshot:
Calories
One serving of this crispy fried chicken contains about 489 calories. It's always good to balance indulgence with your daily calorie goals.
Protein
Packed with flavor, this dish boasts a hearty 41 grams of protein, making it a satisfying choice for battling hunger.
Sodium
With approximately 140 milligrams of sodium, this recipe is relatively moderate in salt compared to many fried foods, giving you room to enjoy without worrying too much about sodium intake.
By being mindful of these nutritional aspects, you can savor your crispy fried chicken without the guilt. Enjoy it with a fresh salad or steamed vegetables for a balanced meal! For more detailed nutritional guidance, check out the USDA FoodData Central.
FAQs about Crispy Fried Chicken
What is the secret to crispy fried chicken?
The key to achieving that perfectly crispy exterior lies in the flour coating process. After dipping your chicken in buttermilk, let it rest coated in flour until it reaches a paste-like consistency. This step ensures the coating adheres well while frying, resulting in a crunchier finish. Additionally, frying in very hot oil creates that enticing golden crust.
Can I bake crispy fried chicken instead of frying?
Absolutely! If you're looking for a healthier option, you can bake your chicken. For that coveted crispiness, coat the chicken as instructed and place it on a greased baking rack over a tray. Bake at 425°F (220°C) for about 35-45 minutes, turning halfway through. The heat circulation combined with the rack helps achieve a closer texture to fried chicken.
How do I store leftover crispy fried chicken?
To keep your crispy fried chicken tasting fresh, allow the chicken to cool completely, then store it in an airtight container in the refrigerator. For best results, avoid stacking the pieces, as this can make them soggy. When reheating, a quick 10-15 minutes in a hot oven will help restore the crunch.
Conclusion on Crispy Fried Chicken
In summary, mastering crispy fried chicken involves a few essential steps: proper marination, a well-seasoned flour mixture, and the right cooking technique. Your efforts will deliver an irresistible crunch and mouthwatering flavor, perfect for any meal. Try it out, and impress your loved ones with this classic dish!
Crispy Fried Chicken
Equipment
- Large skillet
- cookie sheet
- plastic bag
Ingredients
Chicken
- 1 4 pound chicken, cut into pieces
Coating
- 1 cup buttermilk
- 2 cups all-purpose flour for coating
- 1 teaspoon paprika
- salt and pepper to taste
- 2 quarts vegetable oil for frying
Instructions
Preparation
- Take your cut up chicken pieces and skin them if you prefer.
- Place flour in a large plastic bag. Season with paprika, salt, and pepper.
- Dip chicken pieces in buttermilk, then transfer them into the bag with flour; seal the bag and shake to coat well.
- Place the coated chicken on a cookie sheet or tray, cover, and let sit until the flour is of a paste-like consistency.
- Fill a large skillet about ⅓ to ½ full with vegetable oil and heat until very hot.
- Put in as many chicken pieces as the skillet can hold. Brown the chicken on both sides.
- When browned, reduce heat and cover; let cook for 30 minutes. Remove cover and continue to fry until crispy.
- Drain fried chicken on paper towels. Keep finished chicken warm in a slightly warm oven while preparing the rest.
Leave a Reply