
Introduction to Danish Butter Cookies
What are Danish Butter Cookies and their history?
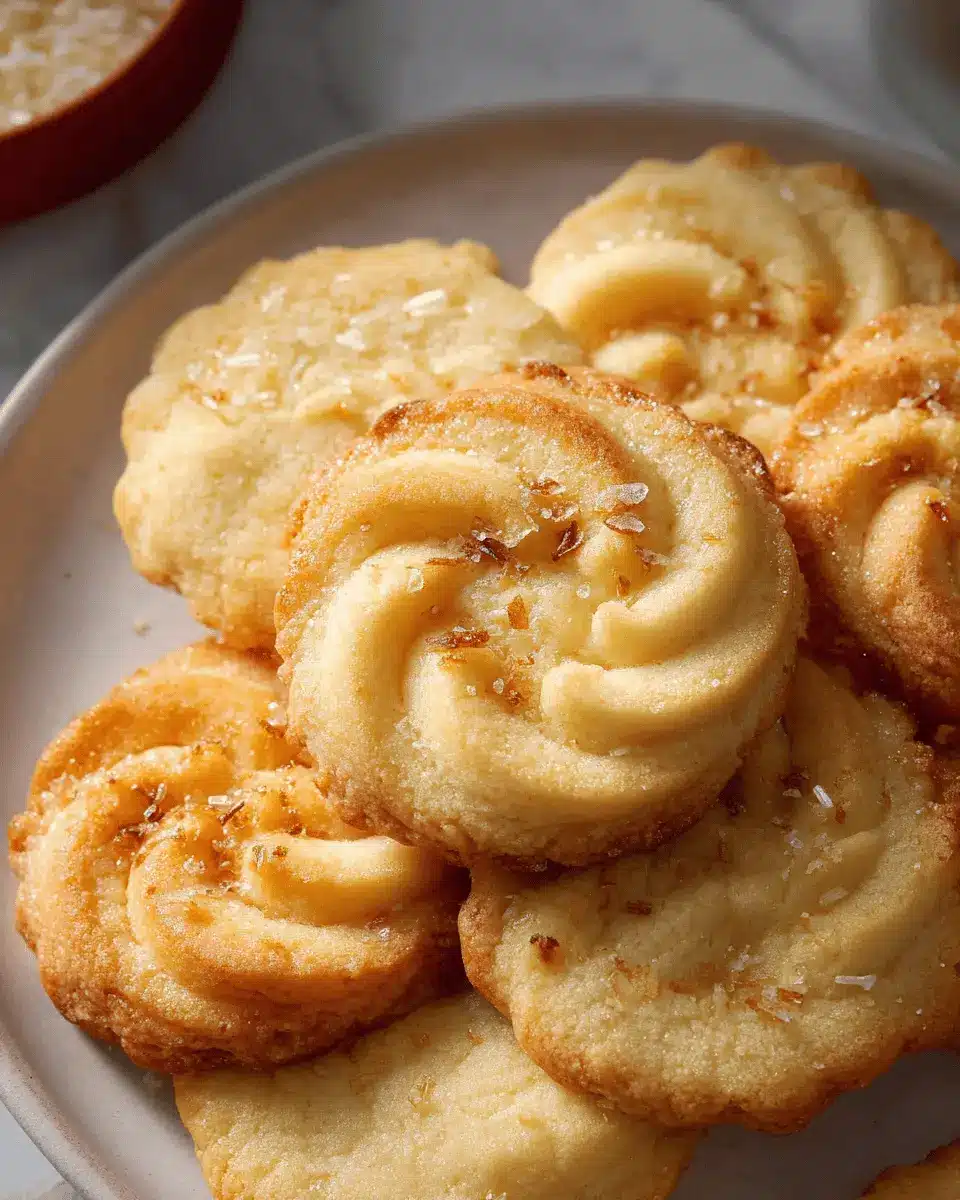
Danish Butter Cookies are delightful little gems of the baking world, known for their rich flavor and melt-in-your-mouth texture. Originating from Denmark, these cookies have become a beloved treat in many countries, especially around the holidays. Traditionally made with a base of butter, sugar, and flour, their simple ingredients allow the quality of butter to shine through, creating a rich, buttery taste that pairs perfectly with a steaming cup of tea or coffee.
The history of these cookies dates back centuries, and they are often enjoyed during celebrations, particularly Christmas. In Denmark, they are typically presented in beautifully decorated tins, showcasing a design of intricate cookies ranging from simple rounds to elegant shapes. Families often pass down these cookie recipes, creating a sense of nostalgia and warmth with each batch.
If you’re curious about their origin, you'll find that Danish Butter Cookies were heavily influenced by the country’s baking traditions, making them an integral part of Danish culture. A deeper dive into their history can be explored here. Whether you're old or young, the comforting texture and flavor of these cookies will surely evoke lovely memories and create new ones.
With that introduction, let’s dive into our recipe for Danish Butter Cookies that promise to be delightful!
Ingredients for Danish Butter Cookies
Essential ingredients
Creating the perfect batch of Danish butter cookies starts with a handful of essential ingredients that come together to create that signature melt-in-your-mouth experience. Here's what you'll need:
- European salted butter (1 cup): The rich flavor of European butter adds a luxurious touch—don’t skip it!
- Granulated sugar (½ cup): This sweetener enhances the cookies while balancing the richness of the butter.
- Salt (⅛ teaspoon): A pinch of salt elevates all the flavors, making each bite truly delightful.
- Egg yolks (2): These enrich the dough, imparting a tender texture.
- Vanilla extract (2 teaspoons): It’s an essential element that brings warmth and sweetness.
- Whole milk (1 tablespoon): This helps to achieve the perfect consistency, keeping the batter easy to pipe.
- All-purpose flour (2 cups) and cake flour (½ cup): This mix yields the ideal softness and creates that melt-in-your-mouth characteristic.
Optional toppings and variations
While the classic Danish butter cookies shine on their own, you can easily customize them to suit your taste or occasion. Here are some ideas for toppings and variations:
- Coarse sugar: Sprinkling this on top before baking gives a lovely crunch and a sparkling finish.
- Sprinkles: Perfect for holiday gatherings, add colorful sprinkles for a festive touch.
- Chocolate drizzle: Drizzle melted chocolate over cooled cookies for an indulgent twist.
- Nuts or dried fruit: Incorporate chopped nuts or dried fruit for an extra layer of flavor and texture.
For more ideas on customizing your cookies, check out resources like Baker's Illustrated for inspiration!
Preparing Danish Butter Cookies
There's something infinitely delightful about Danish butter cookies—the way they just melt in your mouth, bringing back memories of holiday gatherings and cozy evenings. Making these treats is not only rewarding but also surprisingly simple! Let’s dive into the steps for preparing these delicious cookies that are sure to impress friends and family alike.
Gather and prepare your ingredients
First off, a well-prepared kitchen is a happy kitchen! Before you even think about mixing, make sure you have everything laid out. Gather the following ingredients:
- 1 cup (227 g) of room temperature European salted butter
- ½ cup (100 g) granulated sugar
- 2 egg yolks
- 2 teaspoons (10 g) vanilla extract
- 1 tablespoon (15 g) whole milk (and perhaps a bit more for softening)
- 2 cups (220 g) all-purpose flour
- ½ cup (50 g) cake flour
Don’t forget the coarse sugar for that extra festive touch! Having your ingredients ready will make the process smoother and more enjoyable.
Creaming the butter and sugar
Now it’s time to create a luscious base. In the bowl of a stand mixer fitted with a paddle attachment, cream the room temperature butter. You want it to become smooth before gradually adding in that lovely granulated sugar and a pinch of salt. Keep mixing until the mixture is light and fluffy, about 3-5 minutes. This adds air—essential for that melt-in-your-mouth texture.
For more on the science of creaming, check out King Arthur Baking which offers valuable insights!
Incorporate the eggs and wet ingredients
Once your butter and sugar are perfectly combined, it’s time to introduce the eggs, vanilla extract, and milk. Mix on medium speed until everything is well integrated. Don’t forget to scrape down the sides of the bowl for an even mix. This step ensures your Danish butter cookies are uniform in flavor.
Mixing the dry ingredients
In a separate bowl, whisk together the all-purpose and cake flour. Then, carefully add this dry mixture into your butter mixture in two increments, mixing on low speed. This gradual incorporation prevents clumping and keeps your batter smooth. Should the batter seem too thick to pipe, a splash of milk can work wonders, making your dough just right.
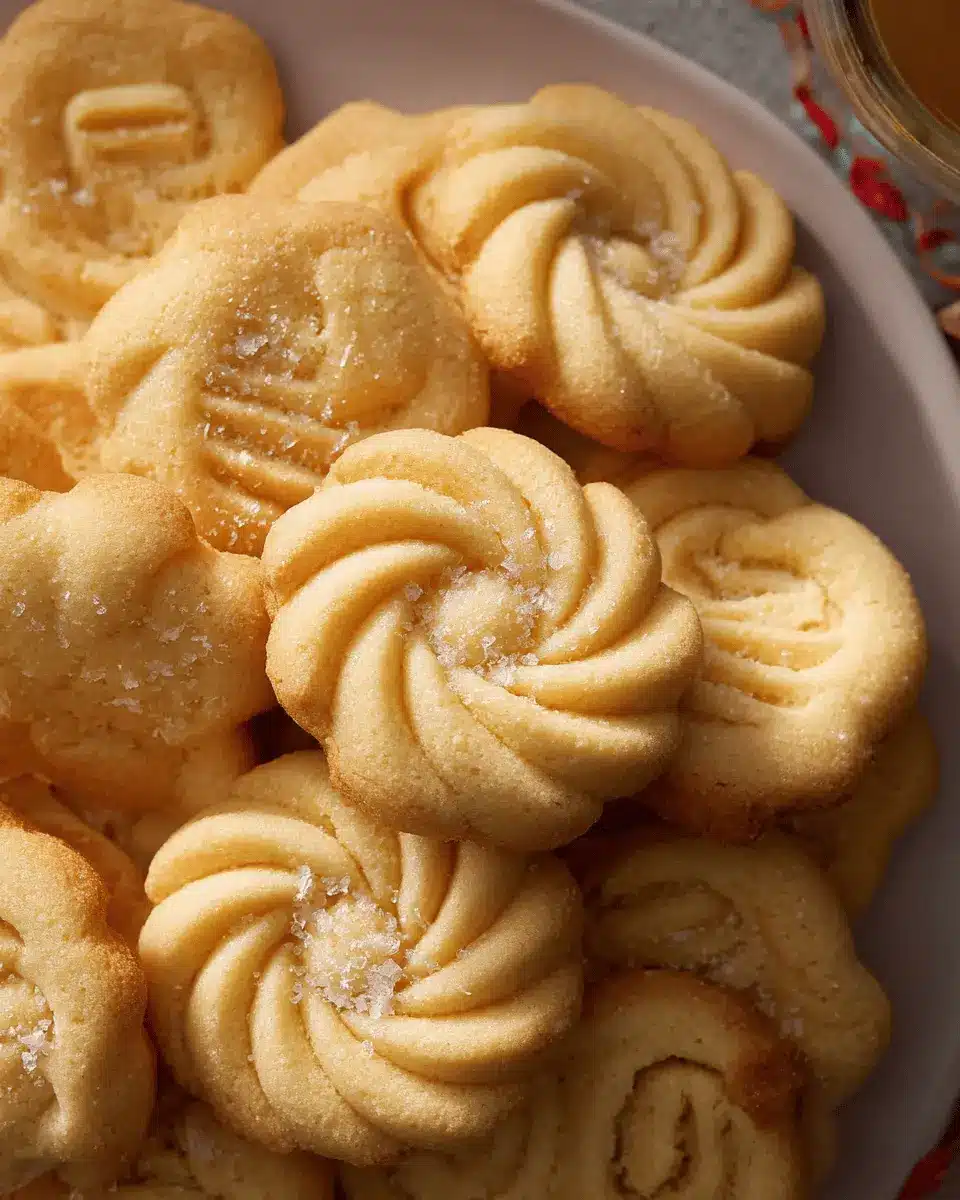
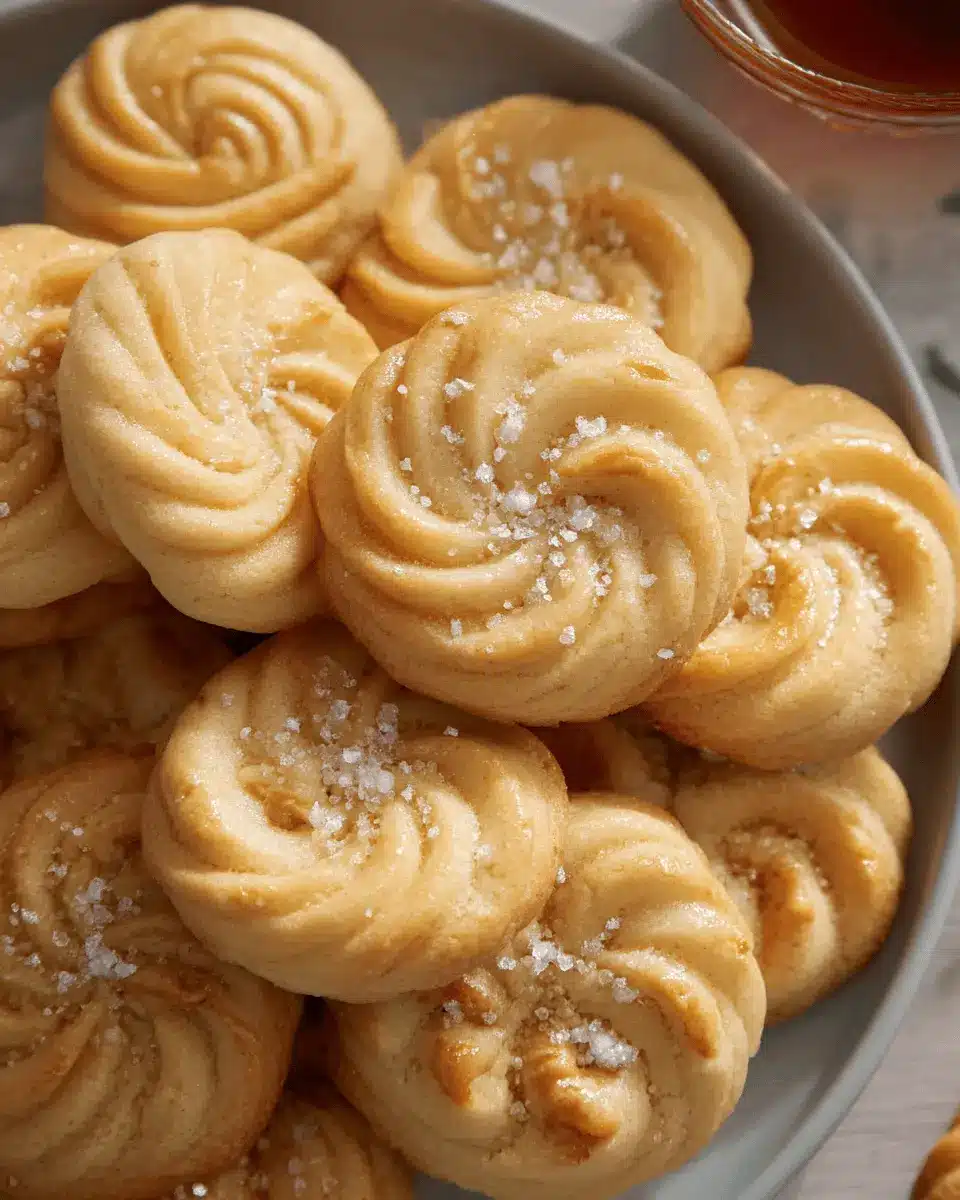
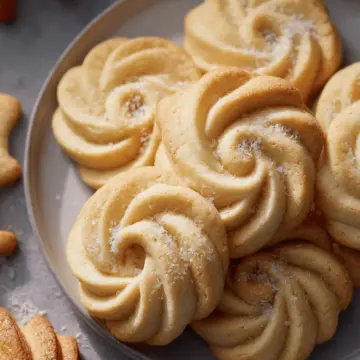
Piping the cookies onto the baking sheet
With your batter ready, transfer it into a piping bag fitted with a ½-inch open star tip. Start piping 2-inch rounds, rosettes, or even pretzel-shaped cookies onto a prepared baking sheet lined with parchment paper or a silicone mat. Give them some space—about 2 inches apart is ideal to prevent spreading.
Chilling the cookies before baking
Chilling is a crucial step you might be tempted to skip, but don’t! Pop your piped cookies into the refrigerator for 20-30 minutes. This helps them retain their shape during baking and enhances the flavor.
Baking the cookies to perfection
Now comes the moment of truth! Preheat your oven to 350°F, ensuring your baking rack is centered. Bake the chilled cookies for 10-15 minutes until their edges are just lightly golden. Resist the urge to pull them out too early!
Once they've baked, allow the cookies to cool on the sheet for about five minutes before transferring them to a wire rack.
Enjoy your Danish butter cookies fresh with a cup of coffee or package them as holiday gifts. Your taste buds—and your friends—will thank you!
Variations on Danish Butter Cookies
Classic Vanilla Danish Cookies
If you're a fan of the traditional taste, classic vanilla Danish butter cookies are a must. Their rich, buttery flavor combined with a hint of vanilla creates a comforting treat perfect for any occasion. Whether you're enjoying them with a cup of coffee or offering them as gifts, these cookies never fail to impress. You can even personalize them by adding a pinch of cinnamon for a warm twist.
Chocolate-Dipped Danish Butter Cookies
For a decadent touch, try chocolate-dipped Danish butter cookies. Simply melt dark chocolate or milk chocolate and dip half of each cooled cookie. Let them set in the refrigerator for a delightful contrast of flavors and textures. Not only do they look sophisticated, but they also add an indulgent element that’s perfect for chocolate lovers. For ideas on other cookie variations, check out Serious Eats!
Experimenting with these variations can elevate your Danish butter cookies game to a whole new level. So go ahead, have some fun in the kitchen!
Baking Notes for Danish Butter Cookies
Tips for Perfect Texture and Flavor
To achieve the ultimate melt-in-your-mouth experience with your Danish butter cookies, here are a few friendly tips:
- Room Temperature Ingredients: Ensure your butter and eggs are at room temperature for easy mixing and a smoother batter. This simple step can really elevate the final texture!
- Flour Measurement: Measure your flour correctly—too much can lead to tough cookies. A kitchen scale is your best friend here, but if you don’t have one, fluff the flour before spooning it into your measuring cup.
Storing and Freezing Your Cookies
These delightful cookies can be stored easily:
- Airtight Container: Keep them in an airtight container at room temperature for up to 5 days to maintain crispness.
- Freezing: To enjoy your Danish butter cookies later, freeze them in an airtight container for up to 3 months. You can even freeze the shaped dough and bake straight from the freezer. Just add a few extra minutes to the baking time!
For more tips on storing baked goods, check out this guide.
Serving suggestions for Danish Butter Cookies
Pairing with beverages
Enhance your Danish Butter Cookies experience by pairing them with comforting beverages. A warm cup of chai tea or herbal tea complements these buttery delights perfectly. For coffee lovers, a latte or cappuccino makes for an exquisite match, elevating the flavors of the cookies. If you're looking for something more refreshing, consider an iced matcha or fresh juice—both offer a vibrant contrast to the cookies’ rich taste.
Presenting for gifting
These delectable Danish Butter Cookies are ideal for gifting, especially during the holiday season. Present them in a beautifully decorated tin, or stack them in a clear cellophane bag tied with a festive ribbon. For an extra touch, include a handwritten note with serving suggestions or tips on enjoying the cookies. You can even add themed decorations based on upcoming holidays, making your gift both thoughtful and delightful.
By making these small adjustments, you can transform your cookie exchange into a cherished tradition!
Tips for Making Perfect Danish Butter Cookies
Importance of Ingredient Temperature
Using room temperature butter and eggs is crucial for achieving a smooth, well-mixed batter. Cold ingredients can lead to uneven mixing and a denser cookie. Ideally, let your butter sit out for about 45 minutes before baking. Just like the temperature can affect baking times, it also influences the texture. For tips on why this matters, check out The Science of Baking.
Common Pitfalls to Avoid
To ensure your Danish Butter Cookies turn out flawlessly, be mindful of a few common mistakes. Over-mixing the batter can activate gluten, making cookies tough instead of melt-in-your-mouth. Also, be cautious with flour measurements—too much flour is a leading cause of dense cookies. If you’re unsure, a kitchen scale can help ensure accurate portions. Happy baking!
Time Details for Danish Butter Cookies
Preparation Time
Get ready to indulge in the delightful world of Danish Butter Cookies with just 15 minutes of prep time. Gather your ingredients, set up your workspace, and cream that luscious butter to begin your buttery journey.
Baking Time
Once you’ve piped out those delightful shapes, let your cookies bake for about 10 to 15 minutes. Keep a close eye on them, as you'll want them to achieve just a light golden edge for the perfect melt-in-your-mouth texture.
Total Time
From start to finish, you’re looking at an hour and a half to make these delectable Danish Butter Cookies. This includes prep, baking, and cooling time—so you can plan accordingly and enjoy these treats in no time!
If you're curious about variations or tips, consider checking out this article on cookie making techniques. Happy baking!
Nutritional Information for Danish Butter Cookies
Calories per Cookie
Each Danish butter cookie packs a delightful 374 calories. While they’re a treat for the senses, it’s always good to enjoy them mindfully, especially during the holiday season when snacking can become a little more frequent.
Breakdown of Macronutrients
These cookies are balanced in macronutrients, making them both delicious and satisfying. Here’s a quick breakdown per cookie:
- Carbohydrates: 65g
- Protein: 11g
- Fat: 22g (of which Saturated Fat: 3g)
This makes them a fun indulgence that you can savor during celebrations or cozy nights in. For more detailed nutrition insights, consider checking out resources like the USDA FoodData Central for comprehensive nutrition data. Enjoy responsibly!
FAQs about Danish Butter Cookies
How can I ensure my cookies are fluffy?
To achieve those delightfully fluffy Danish butter cookies, it’s essential to start with room-temperature butter and eggs. This temperature ensures a smooth mix, allowing air to incorporate easily. Don’t rush the creaming process; aim for a light and fluffy texture by beating the butter and sugar together until pale and airy. Also, remember to avoid over-mixing once you add the flour; this can create a denser cookie by developing gluten.
Can I use different types of flour?
Absolutely! While the combination of all-purpose and cake flour yields the best texture, you can use just all-purpose flour if you’re in a pinch. It’s crucial to measure your flour accurately—too much flour can lead to a dry cookie. For more tips on measuring flour correctly, check out this guide from King Arthur Baking.
How do I store my cookies for freshness?
To keep your Danish butter cookies fresh, store them in an airtight container at room temperature for up to five days. If you want to prolong their life, consider freezing them—stored properly, they can last up to three months. Just remember to let them cool completely before wrapping them up!
Conclusion on Danish Butter Cookies
These delightful Danish Butter Cookies are not just treats; they evoke a sense of warmth and togetherness. Perfect for sharing with loved ones or enjoying during cozy moments, they truly melt in your mouth. Try this recipe for a taste of nostalgia this holiday season! Happy baking!
Danish Butter Cookies (Melt in Your Mouth)
Equipment
- stand mixer
- piping bag
- baking sheets
- parchment paper
Ingredients
Butter and Sugars
- 1 cup European salted butter room temperature
- ½ cup granulated sugar
- ⅛ teaspoon salt
Wet Ingredients
- 2 large egg yolks
- 2 teaspoons vanilla extract
- 1 tablespoon whole milk or more to soften
Flours
- 2 cups all-purpose flour
- ½ cup cake flour
Decoration
- coarse sugar for decorating
Instructions
Preparation
- Make space in the refrigerator and prep the baking mats.
- Line two baking sheets with parchment paper or a silicone baking mat.
Mixing
- Cream butter, sugar, and salt in a stand mixer until light and fluffy.
- Incorporate egg yolks, vanilla, and milk, and mix until well combined.
- Mix flour and cake flour together, then add into the mixer in two additions.
- If the batter is too thick, add another tablespoon of milk.
Shaping
- Transfer cookie batter to a piping bag and pipe cookies onto the prepared baking sheet.
- Space cookies at least 2 inches apart and chill in the refrigerator for 20-30 minutes.
Baking
- Preheat oven to 350°F.
- Bake for 10-15 minutes or until edges are lightly golden.
- Let cookies cool on the baking sheet for about 5 minutes.
Leave a Reply