
Introduction to Homemade Apple Cider
There's something magical about cozying up with a warm mug of homemade apple cider, especially as the leaves start to change and the air turns crisp. This delightful fall beverage can easily be crafted in your own kitchen, making it the ideal project for busy young professionals looking to unwind after a long day.
Why Homemade Apple Cider is Perfect for Young Professionals
As a young professional, you might find it challenging to carve out time for fun activities, but making cider is not just enjoyable — it’s also a great way to decompress. Unlike store-bought options, homemade cider allows you to customize flavors that suit your palate. Plus, the cooking process fills your home with the warm, inviting scents of cinnamon and apples, creating a cozy atmosphere for you and your guests.
Did you know that cooking at home can also lead to healthier choices? When you make homemade apple cider, you're in control of the ingredients. You can adjust the sweetness and spice levels to your liking, ensuring that your cider is not only delicious but also made with care. So, why wait? Let’s dive into this easy and rewarding recipe that'll have you sipping in no time!

Ingredients for Homemade Apple Cider
Main Ingredients Overview
Creating a delightful batch of homemade apple cider is a fantastic way to embrace the flavors of fall. The ingredients are simple yet lead to a rich, aromatic beverage you'll cherish. Here's what you'll need:
- Apples: Starting with about 10 medium apples will form the base of your cider.
- Orange: A zesty orange adds a citrusy brightness that complements the apples.
- Spices: The warmth of cinnamon and cloves brings a cozy touch to your cider.
- Sugar: Adjust it to your taste for that perfect sweetness.
- Water: Essential for cooking down the fruit.
Suggested Varieties of Apples for Best Flavor
To elevate your cider, consider mixing sweet and tart apples:
- Honeycrisp: Sweet and juicy, ideal for the base.
- Granny Smith: This tart apple helps balance the sweetness.
- Fuji or Gala: Their natural sweetness adds depth.
Using a blend of these will create a well-rounded homemade apple cider that friends and family will love. For more apple varieties and cider tips, check out Washington Apple Commission.
Step-by-Step Preparation for Homemade Apple Cider
Creating your own homemade apple cider is a delightful way to celebrate the flavors of fall. Follow along as we take you through each step, ensuring that by the end, you'll have a delicious drink tailored to your taste.
Preparing Your Ingredients
Start by selecting your apples—aim for a combination of sweet and tart varieties. I recommend using about 10 medium apples, such as Honeycrisp and Granny Smith, for a delicious balance. Don’t forget an orange to add a zesty twist!
Gather the following ingredients:
- 10 medium apples (mixed varieties)
- 1 orange
- 4 cinnamon sticks (or 1 tablespoon ground cinnamon)
- 1 teaspoon ground cloves
- 6 tablespoons granulated sugar (adjust to taste)
- Water to cover
Make sure to rinse your apples thoroughly and cut them into quarters, discarding the cores. Thinly peel the orange and separate the segments—this will enhance the flavor of your cider.
Combining Ingredients in the Slow Cooker
In a 4-quart or larger slow cooker, add the orange segments, along with the quartered apples. Sprinkle in the cinnamon sticks, ground cloves, and sugar. If you have a preference for sweetness, feel free to adjust the sugar (more on that later).
Now, add water—just enough to cover the fruit. This will help create a rich, flavorful base for your cider as it cooks.
Cooking the Mixture to Perfection
Cover your slow cooker and set it to low heat for about 6 to 7 hours or high heat for about 4 hours. If you have the luxury of time, I strongly recommend the low setting as it gently mellows the flavors. When you check on it, you'll notice the delightful aroma wafting through your home!
Mashing the Fruit
After the cooking time is up, you’ll find your fruits are beautifully soft. Carefully use tongs or a large slotted spoon to remove the cinnamon sticks from the mixture. Using a sturdy spoon or a potato masher, mash the apples and oranges together to release their juices even further. Once well-mashed, return the cinnamon sticks to the slow cooker and cover it for an additional hour to let those flavors meld beautifully.
Straining for Smooth Cider
This is one of the most rewarding steps in crafting your homemade apple cider. Slowly strain the mixture through a fine mesh sieve into a large pot or heat-safe pitcher. The goal is to remove those chunky bits, leaving you with smooth cider.
For the best results, consider straining it twice to ensure any remaining solids are eliminated—a clear cider is more appealing and enjoyable.
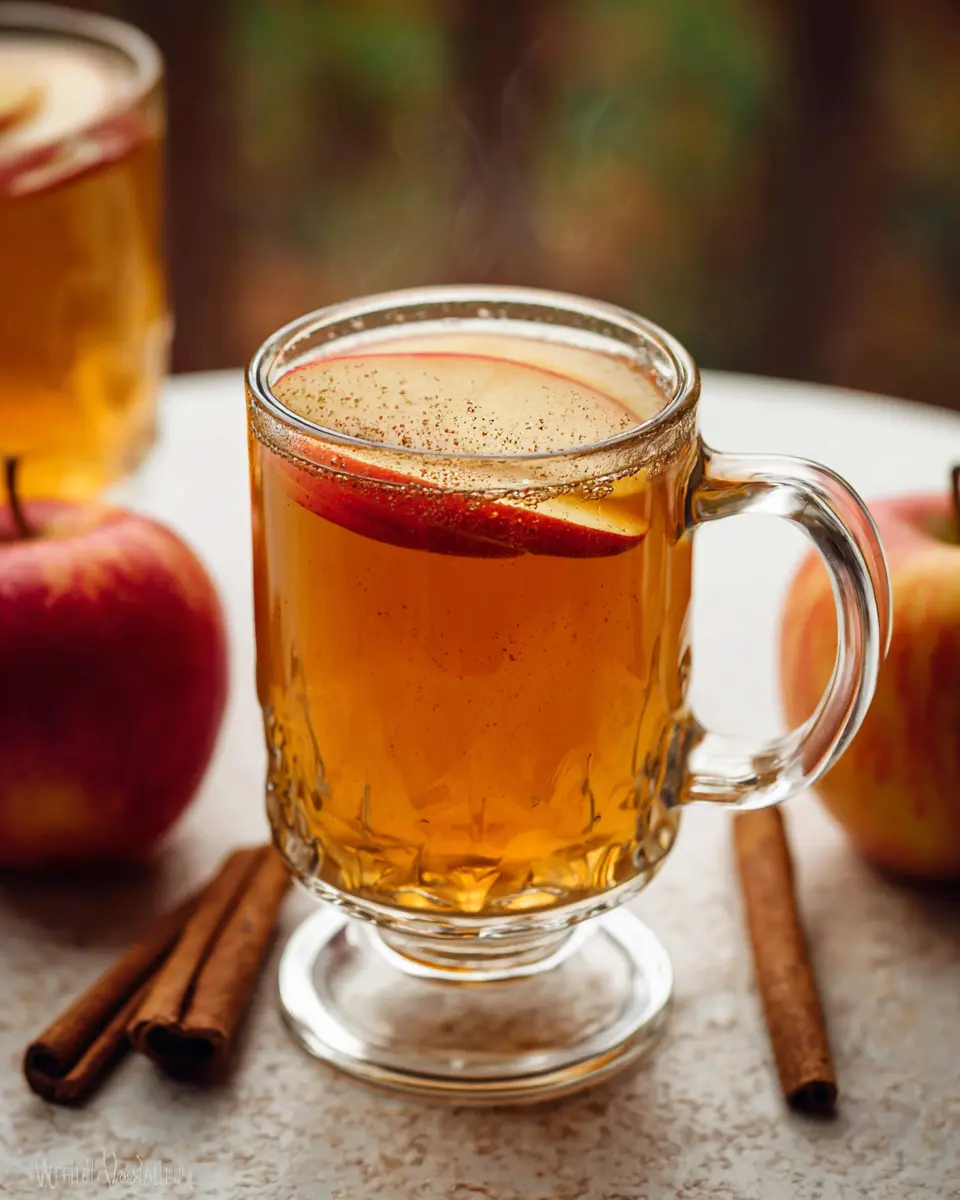
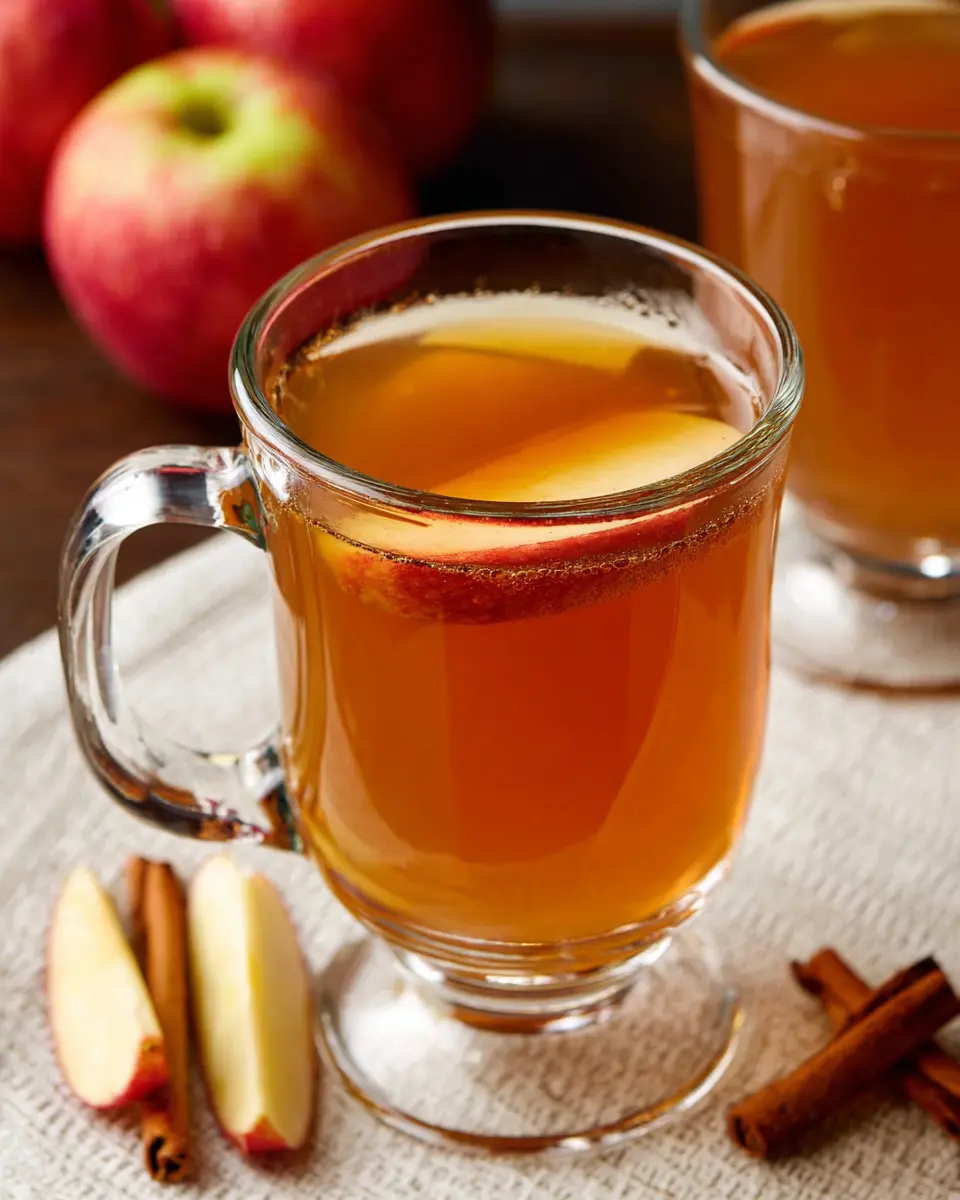
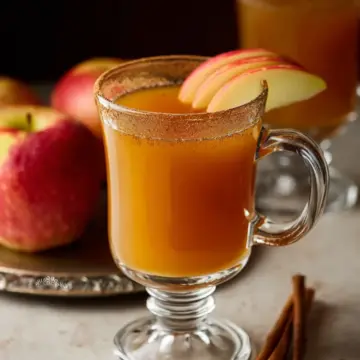
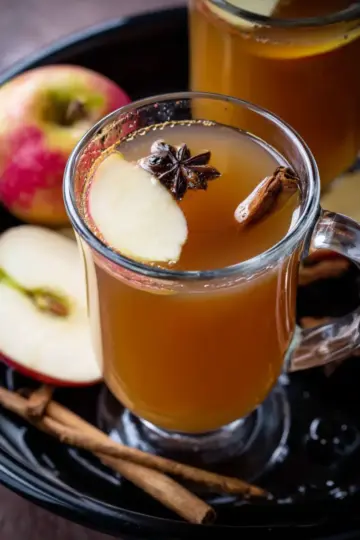
And just like that, you can serve your homemade apple cider warm or chilled, making it the perfect treat for cozy gatherings or quiet evenings at home. As you enjoy your refreshing drink, you might even want to share your experience on social media!
Happy sippin’!
Variations on Homemade Apple Cider
Spiced Apple Cider with Unique Flavor Profiles
Take your homemade apple cider to the next level by experimenting with different spices. Beyond the classic cinnamon and cloves, consider adding a pinch of nutmeg or allspice for warmth. For a zestier flair, try incorporating fresh ginger. These variations can enhance the overall taste, creating a comforting drink that’s perfect for crisp fall evenings.
Adding Fruits or Herbs for a Twist
Want to switch things up? Introduce fruits like pears or cranberries for a fruity twist. Even a handful of fresh herbs like rosemary or thyme can add intriguing layers of flavor. By melding these ingredients into your homemade apple cider, you’ll surprise your palate while enjoying a cozy cup that reflects your unique taste! For more creative ideas, check out this guide on flavor pairings.
Cooking Tips and Notes for Homemade Apple Cider
Adjusting Sugar to Your Preference
One of the great joys of making homemade apple cider is how customizable it is! Adjust the sugar level based on your taste—start with 6 tablespoons and taste before adding more. If you prefer a sweeter cider, try increasing to ½ cup (100g) of granulated sugar. Want it spicier? Just drop down to ¼ cup (50g) for a more robust flavor.
Best Tools for Preparing Cider
To make the process smoother, having the right tools can make all the difference. A slow cooker is invaluable, allowing for even heating and a rich flavor. A large wooden spoon is perfect for mashing the apples, while a fine mesh sieve helps to achieve that silky smooth cider. If you’re interested in enhancing your cider-making game further, check out some essential kitchen tools and gadgets that can elevate any home recipe!
Serving Suggestions for Homemade Apple Cider
How to Serve Warm Cider
Nothing warms you up quite like a mug of homemade apple cider. To serve it warm, simply reheat in a saucepan over low heat until steaming. For an extra flavor boost, consider adding a splash of vanilla extract or a sprinkle of nutmeg. Garnish with a cinnamon stick or a slice of orange to elevate the presentation. Hosting a gathering? Set up a cider bar with whipped cream, caramel sauce, and apple slices for guests to personalize their drinks!
Creative Ways to Use Leftover Cider
Don’t let your delicious cider go to waste! Here are some fun ideas:
- Cider Glaze: Reduce cider in a saucepan to create a flavorful glaze perfect for roasted chicken or veggies.
- Cider Marinade: Use cider as a base for marinades with soy sauce or mustard for a zesty kick.
- Cider Pops: Freeze leftover cider in molds for refreshing, kid-friendly popsicles on warm days.
With these options, your homemade apple cider will bring joy long after the first sip!
Time Breakdown for Homemade Apple Cider
Preparation Time
Getting started on your homemade apple cider doesn’t take long! You'll need about 20 minutes to prep the oranges and apples, gather your spices, and set everything up in the slow cooker.
Cooking Time
Once everything is in the pot, the slow magic happens. You’ll want to let your cider cook for 8 hours on low heat. This long simmer is essential for achieving that rich, deep flavor we all love.
Total Time
In total, the entire process will take roughly 8 hours and 30 minutes. But don’t worry; most of that time is hands-off! Just let those delicious aromas fill your home while you go about your day. Plus, the result is totally worth it.
Making your own cider is so rewarding! For tips on choosing the best apples or experimenting with flavors, check out this guide on apple varieties and find your favorite blend to create a personalized homemade apple cider. Happy brewing!
Nutritional Facts for Homemade Apple Cider
Calories per Serving
One serving of homemade apple cider (about 1 cup) typically contains around 120 calories. This makes it a cozy, guilt-free indulgence to sip during those crisp fall evenings.
Sugar Content
With about 24 grams of sugar per serving (depending on how much granulated sugar you add), this beverage is naturally sweetened by the apples and orange, which deliver delicious flavor without being too processed.
Other Nutritional Benefits
Besides being a tasty treat, homemade apple cider is packed with antioxidants and vitamin C from the fruit. Plus, the spices like cinnamon and cloves can offer anti-inflammatory properties, making it a delightful choice for your health as well! For more on the health benefits of these spices, check out this Healthline article.
FAQs about Homemade Apple Cider
Can I Use Other Fruits Besides Apples?
Absolutely! While homemade apple cider is best with a variety of apples, you can experiment by adding fruits like pears or cranberries for a twist. Just remember that different fruits will alter the flavor profile.
How Long Does Homemade Apple Cider Last?
Your delicious homemade apple cider can last in the refrigerator for about 5 to 7 days. When stored properly in an airtight container, it retains its warm, cozy flavors.
Can Homemade Apple Cider be Frozen?
Yes, you can freeze homemade apple cider! It keeps well for up to 3 months in the freezer. Just remember to thaw it in the refrigerator when you're ready to enjoy it again. For more tips on refrigeration and freezing, check out this guide on food storage.
Feel free to reach out with any other questions or share your own cider-making experiences!
Conclusion on Homemade Apple Cider
Creating your own homemade apple cider is not only rewarding but also a cozy way to celebrate the season. By experimenting with different apple varieties and spices, you can customize the flavor to your liking. Serve it warm for a delightful experience, and enjoy the leftovers throughout the week!
Homemade Apple Cider
Equipment
- slow cooker
- Large Wooden Spoon
- Potato Masher
- fine mesh sieve
Ingredients
- 10 medium apples use a variety—I use Honeycrisp and Granny Smith
- 1 whole orange peeled and segmented
- 4 sticks cinnamon or 1 Tablespoon ground cinnamon
- 1 teaspoon ground cloves
- 6 Tablespoons granulated sugar adjustable to taste
- water enough to cover the fruit
Instructions
- Peel the orange and place the segments in a 4-quart or larger slow cooker. Rinse the apples and cut into quarters (discard the cores), and place in the slow cooker. Add the cinnamon sticks, ground cloves, and sugar. Add just enough water to cover the fruit.
- Cover and cook on low heat for 6–7 hours, or on high heat for 4 hours.
- After this time, the fruit should be very soft. With tongs or a large slotted spoon, remove the cinnamon sticks. With a large sturdy spoon or a potato masher, mash the fruit. Return the cinnamon sticks to the mixture and cover.
- Cook on low heat or high heat for 1 more hour.
- Very slowly strain the chunky liquid through a fine mesh sieve into a large pot or heat-safe pitcher. You can discard the solids. Strain the cider one more time to rid any other solids. Serve the cider warm.
- Leftover cider keeps well in the refrigerator for up to 5–7 days. Warm up on the stove before serving or enjoy it cold.


Leave a Reply