
Introduction to Dutch Oven No-Knead Bread
If you're a young professional juggling the demands of work, social life, and personal time, the idea of making homemade bread may feel daunting. Enter Dutch oven no-knead bread—your new best friend in the kitchen! This recipe is not just easy; it transforms into a delicious loaf with minimal active effort. You can whip it up in mere 5 minutes, then let it rise while you catch up on your favorite series or tackle that to-do list.
What makes this method so appealing is its simplicity. You won’t need any fancy tools or extensive baking skills. Just a large mixing bowl, your trusty Dutch oven, and some basic ingredients will get you there. The long, gentle rise time (about 3 hours) allows the dough to develop flavor without your constant attention, making it perfect for busy schedules.
Many successful bakers swear by this technique, often citing the delectable crust and airy interior as irresistible benefits. So, whether you’re hosting friends for brunch or simply indulging in a cozy night in, this easy and foolproof recipe will leave your kitchen smelling divine and your heart content. Ready to impress everyone with a loaf that looks and tastes artisanal? Let’s dive in!
Ingredients for Dutch Oven No-Knead Bread
Essential Ingredients for a Simple Recipe
Creating the perfect Dutch oven no-knead bread requires just a handful of essential ingredients, making it a delight for both seasoned bakers and novices alike. Here’s what you’ll need:
- 3½ cups all-purpose flour: This forms the base and gives structure to your bread.
- 2¼ teaspoons instant yeast: The secret agent behind that lovely rise.
- 2 teaspoons kosher salt: Enhances the flavor and balances the bread’s sweetness.
- 2 cups warm water: Activates the yeast and hydrates the flour, making everything come together effortlessly.
With these simple staples, you’re well on your way to baking a beautiful loaf that has a crunchy crust and a soft, airy interior.
Optional Toppings for Extra Flavor
Now that you have your essentials, feel free to elevate your Dutch oven no-knead bread with some optional toppings for an extra kick:
- Flaky sea salt: Adds a delightful crunch and a burst of flavor on top.
- Coarse ground pepper: For a bit of spice and sophistication.
Thinking of adding herbs or garlic powder? Go for it! Personalizing your bread is part of the fun. Enjoy experimenting and don’t hesitate to share your variations!
Preparing Dutch Oven No-Knead Bread
Making Dutch oven no-knead bread might just be one of the easiest and most rewarding baking adventures you can embark on. Not only is it simple, but the aroma of fresh bread fills your home, creating a warm and inviting atmosphere. Ready to dive in? Let’s break down the steps together.
Combine Dry Ingredients
First things first, grab your large mixing bowl and add the following dry ingredients:
- 3½ cups of all-purpose flour
- 2¼ teaspoons of instant yeast
- 2 teaspoons of kosher salt
Using a whisk, mix these together until they’re well combined. This step is crucial; it ensures that the yeast and salt are evenly distributed throughout the flour, setting the foundation for your bread’s rise.
Add Warm Water and Mix
Now here comes the fun part! Make a well in the center of the dry mixture and pour in 2 cups of warm water. The water should feel pleasantly warm to the touch—too hot could kill the yeast, and too cold will inhibit rising. Using a spatula, stir everything together until a shaggy dough forms. It’ll be sticky and messy, but that’s absolutely okay! Once mixed, cover your bowl with plastic wrap or a clean kitchen towel, and let it rest for about 3 hours at room temperature.
Allow Dough to Rise
Ah, the waiting game! During this time, the yeast will do its magic, creating bubbles that will give your final loaf that delightful texture. If you want to geek out on yeast, check out this detailed guide to baking with yeast.
Preheat the Oven and Dutch Oven
When your dough has doubled in size, it’s time to get serious about baking. Preheat your oven to 450°F and place your Dutch oven (with its lid) inside. This step not only heats up the pot but will also create a steamy environment perfect for baking crusty bread.
Shape the Dough and Score
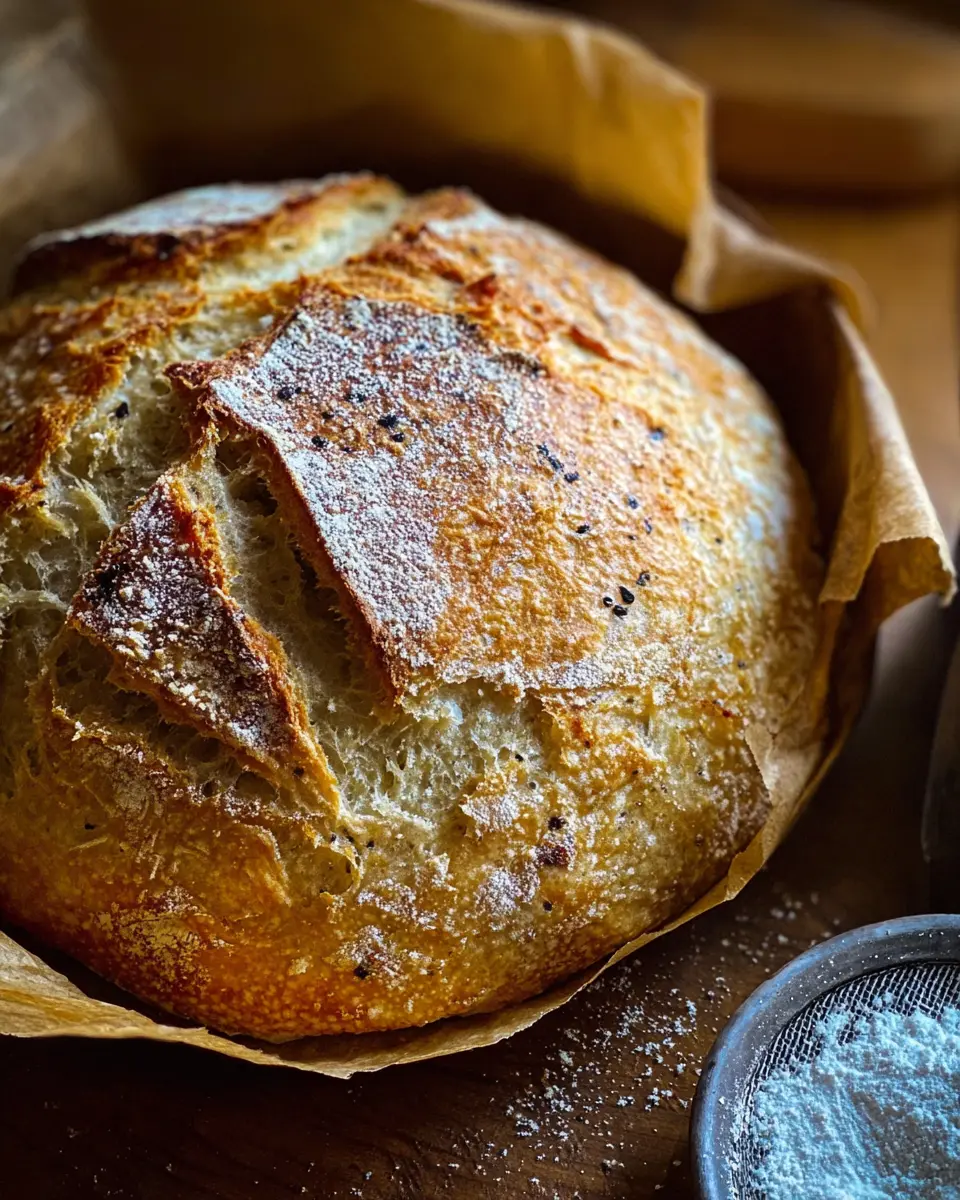
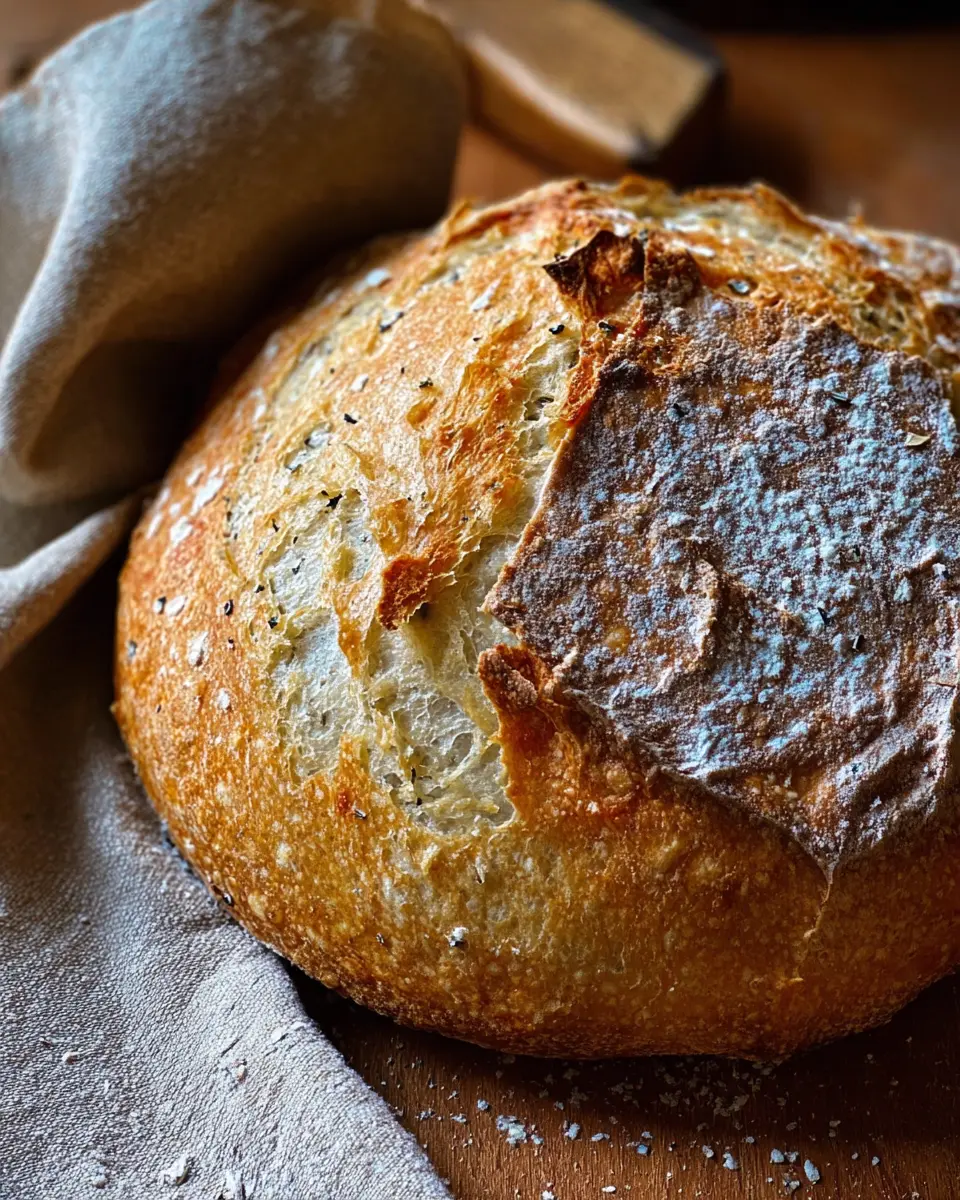
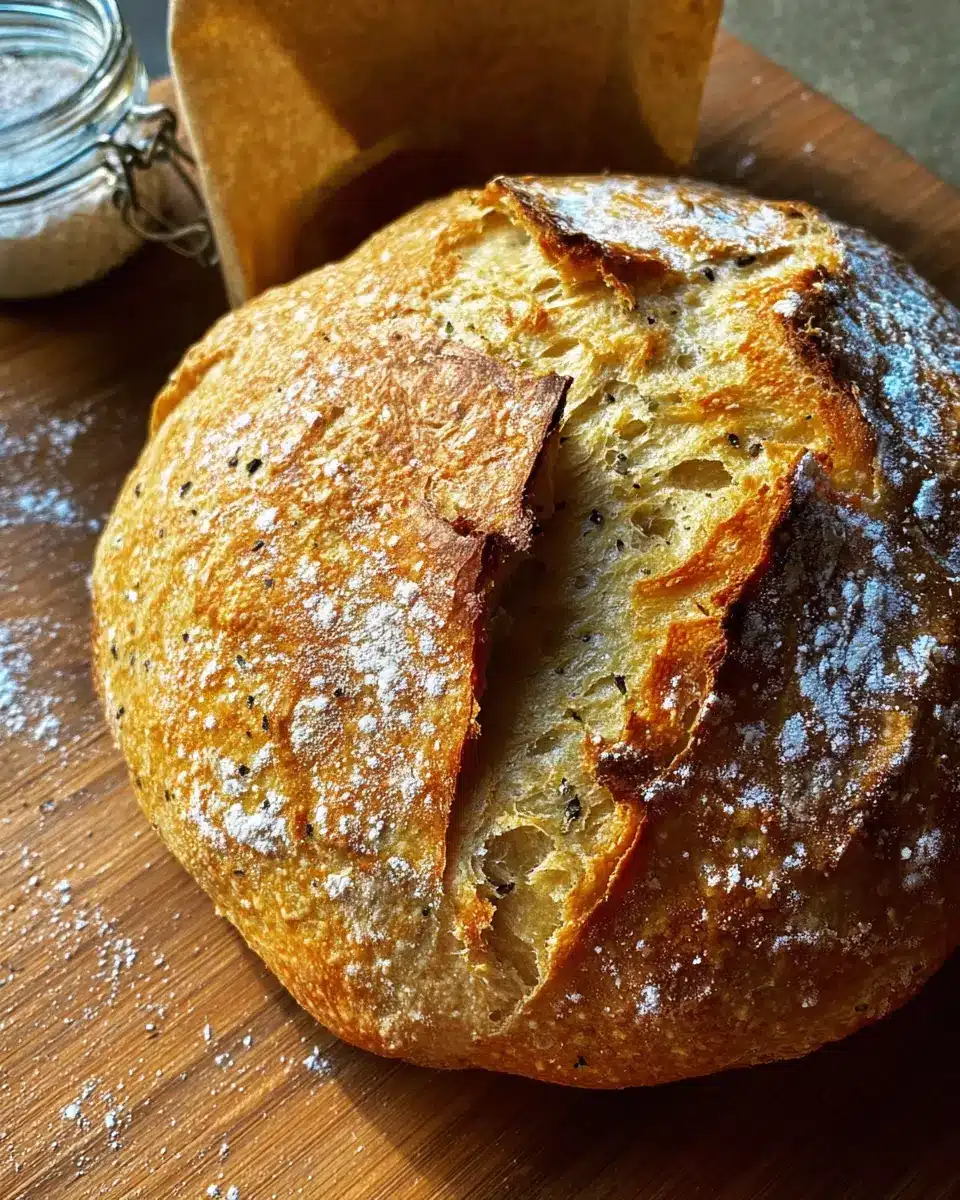
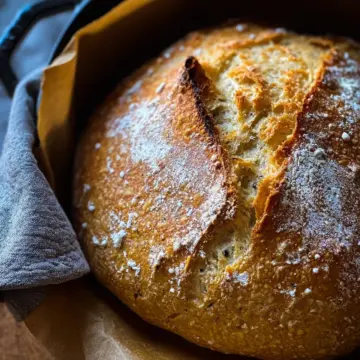
After about 45 minutes of preheating, carefully scrape your dough onto a well-floured surface. Ensure your hands are floured to manage its stickiness. Gently shape it into a ball, taking care not to deflate it too much. Transfer it to a piece of parchment paper, then score the top with a knife or blade. This cut is crucial for a good oven spring. Sprinkle a little flaky sea salt and course ground pepper if you like.
Bake in the Dutch Oven
With everything prepped, it’s time to bake! Carefully remove the lid from your scalding hot Dutch oven and place the parchment paper with the dough inside. Cover again and let it bake for 30 minutes. After that, take off the lid and bake for an additional 15 minutes until beautifully golden brown.
Cool and Enjoy
Once your Dutch oven no-knead bread smells irresistibly good, promptly remove it from the oven. Let it cool on a rack for at least 15 minutes—if you can manage the wait! This cooling time will help solidify the crumb structure, making every slice perfect. Now, slice, slather with your favorite spread, and enjoy the fruits of your labor!
Variations on Dutch Oven No-Knead Bread
Herbed Bread for Extra Flavor
Elevate your Dutch oven no-knead bread by incorporating fresh or dried herbs like rosemary, thyme, or oregano into your dough. Simply add about a tablespoon of your chosen herbs during the mixing phase, and let your kitchen fill with tantalizing aromas as it bakes. This herbed bread pairs perfectly with soups or can be enjoyed on its own with a drizzle of olive oil.
Whole Wheat Option for Nutritional Boost
If you’re looking to make a healthier version, substitute half of the all-purpose flour with whole wheat flour. This variation not only adds a nutty flavor but also increases the nutritional value, packing in more fiber and vitamins. Just note that you may need to adjust the water content slightly, as whole wheat flour can absorb more liquid. Enjoy the wholesome goodness of whole wheat without sacrificing the simplicity of this no-knead bread!
Baking Tips and Notes for Dutch Oven No-Knead Bread
Importance of Proper Dough Rising
Allowing your dough to rise adequately is crucial for achieving that delightful airy texture in your Dutch oven no-knead bread. The long resting period, about three hours, activates the yeast, creating those lovely bubbles. Make sure your kitchen is warm—ideally around 75°F to 80°F—to encourage a productive rise. If your space is cooler, try placing the dough in a turned-off oven with the light on. This gentle warmth will do wonders for your bread!
Tips for Scoring the Dough
Scoring your dough might seem optional, but it’s a vital step for a perfect crust. Use a sharp knife or bread lame to create shallow cuts on the surface. Not only does this enhance the bread’s visual appeal, but it also ensures proper "oven spring," allowing steam to escape and the bread to expand beautifully. Aim for a simple design; even a few slashes will work wonders. Remember, it doesn’t have to be perfect—just don’t skip it! Scoring adds character and flavor.
Happy baking!
Serving Suggestions for Dutch Oven No-Knead Bread
Pairing with Homemade Soups or Stews
There’s nothing quite like enjoying Dutch oven no-knead bread alongside a warm bowl of homemade soup or stew. The crusty exterior and soft interior make it perfect for dipping. Try it with hearty vegetable soup or a rich beef stew; the combination is satisfying and comforting. Don’t forget to whip up a quick herb butter to elevate your meal!
Bread for Breakfast with Toppings
Kickstart your day with slices of freshly baked bread topped with your favorite ingredients. Opt for avocado and a sprinkle of sea salt for a healthy option or slather on some cream cheese and sliced tomatoes for a savory treat. For a sweet breakfast, consider using almond butter and banana slices. The possibilities are endless, and each will give your no-knead bread a delightful twist!
For more inspiration, check out Bon Appétit’s breakfast ideas.
Time Breakdown for Dutch Oven No-Knead Bread
Preparation Time
Quick and easy, this Dutch oven no-knead bread only requires 5 minutes of your time for prep. It's perfect for busy schedules!
Rising Time
Patience pays off! Allow the dough to rise for about 3 hours. This crucial step is what helps develop that wonderful flavor and texture.
Total Baking Time
Once ready to bake, expect about 45 minutes in the oven. With a preheat and two stages of baking, your delicious, golden crust will emerge in no time.
This bread is not just a recipe, it's an experience—your home will smell heavenly! If you’re curious about the science behind rising, check out this guide to deepen your baking skills. Happy baking!
Nutritional Facts for Dutch Oven No-Knead Bread
Calories Per Serving
Each serving of this delightful Dutch Oven No-Knead Bread contains approximately 140 calories. It's a wonderful option for those craving a hearty loaf without overindulging.
Key Nutritional Information
This easy yet satisfying bread offers essential nutrients:
- Carbohydrates: 29g
- Protein: 5g
- Fat: 1g
- Fiber: 2g
- Sodium: 389mg
With such a well-rounded profile, it's perfect for sandwiches or as a side for soups and salads. Plus, you can find more insights on bread nutrition here. Enjoying food that’s both delicious and nutritious is a win-win!
FAQs about Dutch Oven No-Knead Bread
Can I use different types of flour?
Absolutely! While this dutch oven no-knead bread recipe calls for all-purpose flour, you can experiment with other types like whole wheat, spelt, or even gluten-free blends. Just keep in mind that some flours absorb more water than others, so you might need to adjust the liquid slightly to achieve the desired dough consistency. For more information on how different flours behave, you can check out King Arthur Baking.
How can I store leftover bread?
To keep your crusty masterpiece fresh, store your no-knead bread in a paper bag or wrapped in a kitchen towel at room temperature for up to three days. If you want it to last longer, slice the bread and pop it in an airtight container in the freezer. When you're ready to enjoy it again, just let it thaw on the counter or warm it briefly in the oven.
Why is scoring important before baking?
Scoring the dough before baking isn’t just for aesthetics; it develops the bread's character by allowing steam to escape. This essential cut promotes "oven spring," leading to a lighter, airier texture. Plus, it’s a fun way to get creative! Don’t skip this crucial step if you want your dutch oven no-knead bread to rise beautifully.
Conclusion on Dutch Oven No-Knead Bread
There's something truly magical about baking your own bread, especially when it comes to this dutch oven no-knead bread. With minimal effort and just a few simple ingredients, you’ll enjoy a crusty loaf that rivals bakery quality. Remember, the key is patience — allow the dough to rise fully for standout results. Happy baking!
Dutch Oven No-Knead Bread (Easy & Foolproof!)
Equipment
- large mixing bowl
- spatula
- Measuring cups
- Measuring spoons
- Dutch oven
- parchment paper
Ingredients
- 3.5 cups all-purpose flour
- 2.25 teaspoons instant yeast
- 2 teaspoons kosher salt
- 2 cups warm water
- flaky sea salt optional for topping
- course ground pepper optional for topping
Instructions
Dough Prep
- Add flour, yeast, and salt to a large mixing bowl and whisk together.
- Make a well in the middle of the flour and add the warm water.
- Mix until a shaggy dough forms. Cover with plastic wrap. Let rise for 3 hours.
Preheat the Oven
- When you have about 45 minutes left of rise time, preheat the oven to 450° F with your dutch oven and the lid.
Dough Formation
- Scrape the dough out onto a well-floured surface. Make sure your hands are well floured. The dough is very sticky and loose.
- Form the dough into a very simple ball being as delicate as you can be.
- Carefully, place the dough ball down in the middle of a piece of parchment paper. Score it with either a bread lame or a very sharp knife. I did a simple cross.
- Sprinkle with a little flaky sea salt and course ground pepper.
First Bake
- CAREFULLY, remove the lid from the VERY HOT dutch oven and gently lay the parchment paper and dough inside. CAREFULLY, put the lid back on and let this bake for 30 minutes.
Second Bake
- After 30 minutes, CAREFULLY remove the lid from the VERY HOT dutch oven and bake uncovered for an additional 15 minutes.
- CAREFULLY remove the VERY HOT dutch oven and let the bread cool on a cooling rack for at least 15 minutes...if you can wait that long.
- Enjoy!


Leave a Reply