
Introduction to Chocolate Espresso Pie
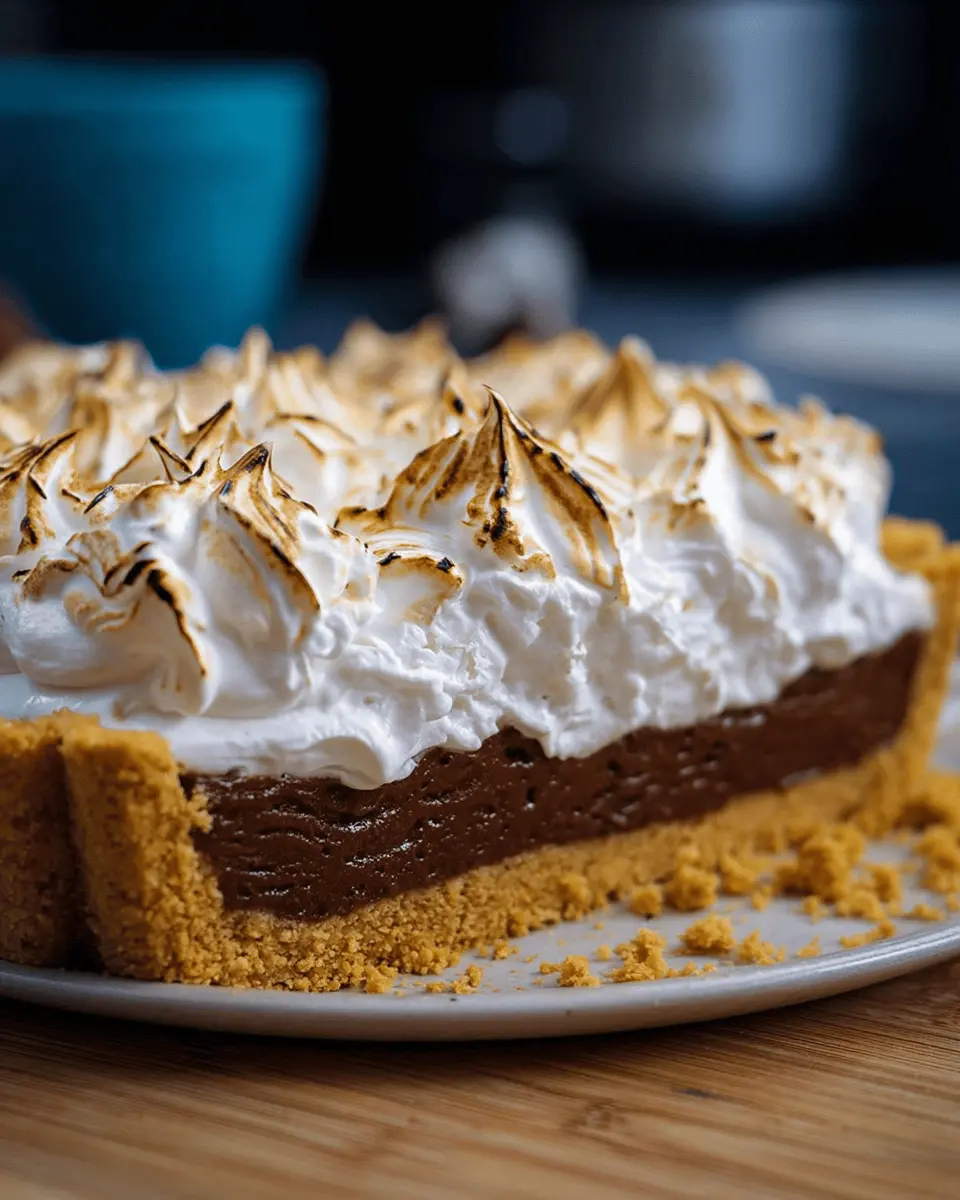
When it comes to homemade desserts, few offerings can rival the sheer decadence of a chocolate espresso pie. This delightful treat harmoniously blends rich chocolate with the boldness of espresso, resulting in an indulgent experience that’s perfect for any occasion. Imagine serving this delicious pie at a dinner party or enjoying a slice with your morning coffee — it truly elevates the moment.
Not only is this pie visually stunning, but it also comes together relatively easily, making it an excellent choice for novice bakers and experienced pastry chefs alike. The combination of a buttery biscuit base, luscious chocolate filling, and fluffy meringue can impress your guests without keeping you in the kitchen for hours. Plus, homemade desserts have a way of warming hearts and bringing people together.
According to food historians, the marriage of chocolate and coffee has been beloved for generations. Their complementary flavors can create a dessert that’s more than the sum of its parts. For a more in-depth look at the benefits of homemade desserts, check out the National Institute of Health’s article on the emotional impacts of food.
Ready to impress your friends with a slice of this incredible chocolate espresso pie? Let’s dive into the recipe!
Ingredients for Chocolate Espresso Pie
Creating a delicious Chocolate Espresso Pie may seem daunting, but with the right ingredients, you'll master this delightful dessert in no time. Let’s break it down!
Base Ingredients
To begin with, you’ll need the perfect crust to hold all that delightful filling:
- 275g (9.7oz) Digestive Biscuits: These provide a buttery and slightly sweet base.
- 100g (3.5oz) Unsalted Butter, Melted: This binds the biscuits together beautifully.
- ½ teaspoon (2.5g) Sea Salt Flakes: A touch of salt enhances the flavor of the crust.
Chocolate Espresso Filling Ingredients
Next up, the star of the show—the filling:
- 350g (12oz) Dark Chocolate Chips: Opt for high-quality chocolate to elevate your pie.
- 2 ½ tablespoon (35g) Unsalted Butter, Cubed: This adds richness to the chocolate.
- 1 ¼ Cups + 1 tablespoon (330ml) Thickened Cream: Creaminess is key for that luscious texture.
- 3 ½ tablespoon (20g) Freshly Ground Coffee Beans: For that espresso kick!
- 2 tablespoon (40ml) Water: To help infuse flavors seamlessly.
Meringue Ingredients
To crown your pie, we need the perfect meringue:
- 4 Egg Whites, Room Temperature: These are essential for achieving that airy texture.
- ¾ Cup (160g) Caster Sugar: This helps create those glossy, stiff peaks.
With these ingredients in hand, you're one step closer to impressing your friends and family with a homemade Chocolate Espresso Pie. Happy baking!
Preparing Chocolate Espresso Pie
Creating a delightful chocolate espresso pie is not just about following a recipe; it's an experience that combines rich flavors and a bit of culinary artistry. Here’s a detailed guide to help you master this indulgent dessert, ensuring every bite is filled with chocolatey goodness and a hint of coffee.
Prepare the base
The foundation of your chocolate espresso pie starts with a crunchy, buttery base. To make it, simply gather your ingredients: Digestive biscuits, melted unsalted butter, and sea salt flakes. Place the biscuits in a food processor and blend until you reach a fine, wet sand-like consistency. This creates the perfect texture for your pie crust.
Next, grease a 24cm pie dish with a touch of softened butter. Pour in the base mixture and firmly press it into the dish, spreading it up the sides to create a lovely border. Chill the base in the fridge for 30 minutes so it can set properly—this step is crucial for a sturdy pie once we add that rich filling!
Make the chocolate espresso filling
Now for the star of the show! Combine dark chocolate chips and cubed unsalted butter in a mixing bowl. Meanwhile, in a small saucepan, bring water and freshly ground coffee beans to a boil. Once it's boiling, add thickened cream and stir over medium-low heat for about three minutes or until it's hot, but not boiling. Let this coffee-infused cream steep for five minutes to deepen its flavor.
Afterward, pour the cream and coffee mixture through a fine sieve into the bowl with chocolate and butter. Discard the coffee grounds, and give everything a gentle stir until the chocolate has melted and the mixture is silky smooth. Pour this luscious filling into your chilled base and return the pie to the fridge for 1 to 1.5 hours, allowing it to set beautifully.
Chill the pie
This step is crucial! Chilling the pie not only sets the chocolate filling but also intensifies the flavors, making every bite utterly satisfying. While it chills, you can use this time to clean up or prepare sides for a delicious dinner.
Prepare the meringue
Once the pie is set, it’s time for the crowning glory—meringue! Using a stand mixer, beat the egg whites on medium speed until they start to froth. Gradually add in caster sugar, continuing to beat until the peaks become stiff and glossy. This lovely meringue will add a delightful texture contrast to your creamy chocolate filling.
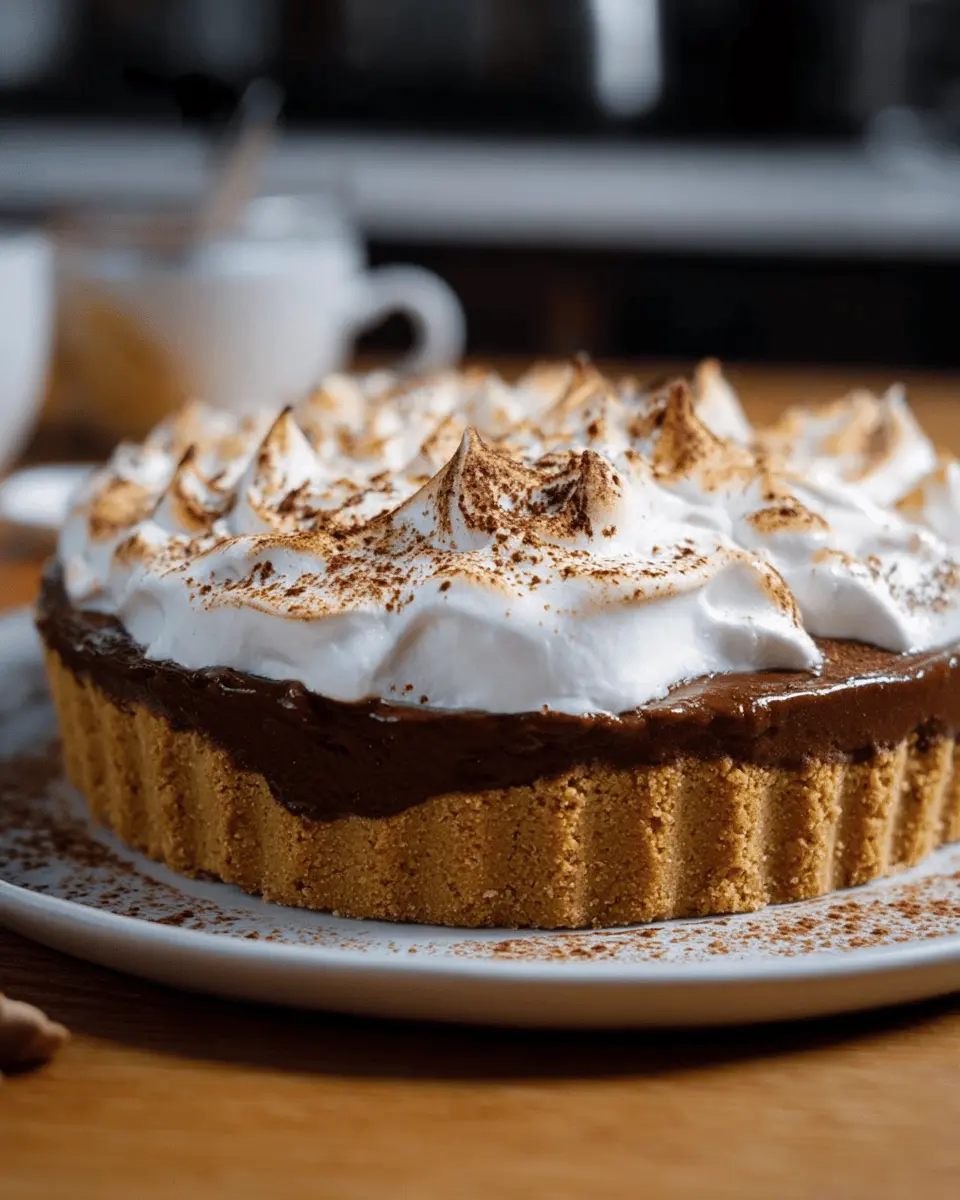
Assemble and toast the meringue
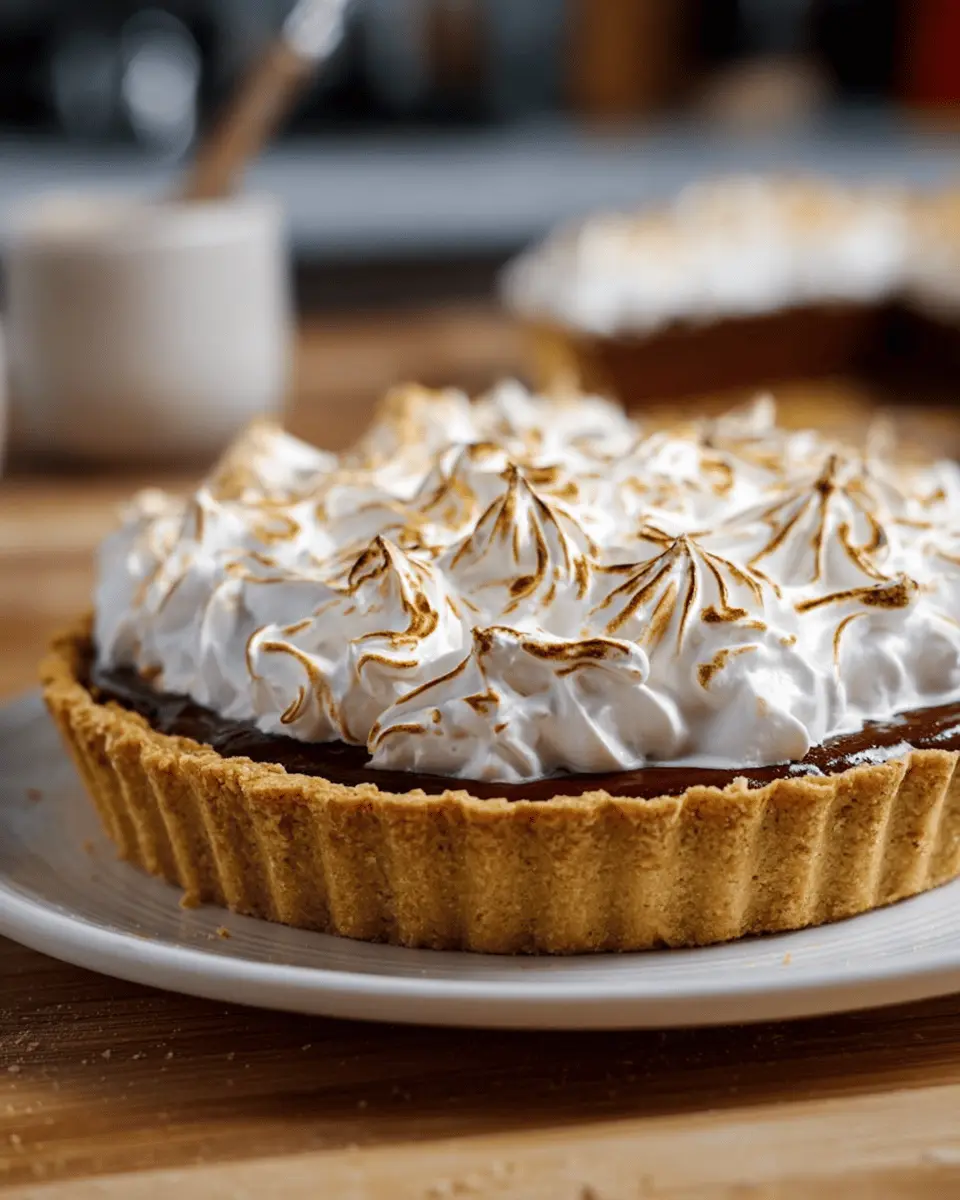
Now comes the fun part! Spoon the meringue over the set chocolate, swirling it with a spatula to create beautiful peaks and valleys. This not only adds visual appeal but also a textural element that’s simply delightful.
If you have a kitchen blow torch, use it to toast the meringue until it’s a beautiful golden brown. Not only does this give a burnt-sugar flavor, but it also enhances the aesthetic. Once done, slice your chocolate espresso pie and serve it to your guests. They'll be craving this decadent dessert again and again!
For more delicious chocolate recipes, consider checking out The Chocolate Lovers' Cookbook for inspiration and ideas!
Variations on Chocolate Espresso Pie
Adding a flaky crust
While the traditional chocolate espresso pie features a biscuit base, a flaky crust can elevate its texture and flavor profile. Consider using a store-bought or homemade pie crust for a buttery, crispy bite. Just roll it out, fit it into the pie dish, and blind-bake it for about 10 minutes before adding your espresso filling. This simple twist can make your dessert feel even more indulgent!
Swapping in different chocolates
Chocolate lovers, rejoice! Experimenting with chocolate types in your chocolate espresso pie can yield delightful results. Try using milk chocolate for a sweeter, creamier filling or opt for white chocolate for a more unique flavor contrast. You may also mix different chocolate varieties for a complex taste profile that keeps everyone guessing. Just remember to adjust the sweetness accordingly—it's all about finding that perfect balance!
For more pie inspiration, check out Serious Eats for a wealth of dessert ideas.
Cooking tips and notes for Chocolate Espresso Pie
Using fresh ingredients for best flavor
For an indulgent Chocolate Espresso Pie, always opt for fresh ingredients. High-quality dark chocolate makes a noticeable difference, enhancing the richness of your pie. Freshly ground coffee beans provide that vibrant punch of flavor that pre-ground coffee simply can’t match. When it comes to butter, use unsalted for better control over the final taste!
Avoid common mistakes when making meringue
Creating the perfect meringue for your chocolate espresso pie can be tricky. Make sure your mixing bowl and beaters are clean and free from any grease, which can prevent your egg whites from whipping properly. Remember to use room temperature egg whites; they whip up to a fluffier texture compared to cold ones. Lastly, add sugar gradually to ensure a glossy finish and stiff peaks. Happy baking!
For more expert tips, check out Serious Eats for a deep dive into meringue techniques.
Serving suggestions for Chocolate Espresso Pie
Pairing with whipped cream
Nothing elevates the richness of your chocolate espresso pie like a dollop of freshly whipped cream. The light, airy texture beautifully contrasts the pie's dense filling. For a fun twist, you might consider flavoring your whipped cream with a hint of vanilla or even a sprinkle of cocoa powder. It’s an effortlessly indulgent addition that will have your guests asking for seconds!
Serving alongside fresh berries
Another delightful way to serve your chocolate espresso pie is with a side of fresh berries. Strawberries, raspberries, or blueberries add a burst of tartness that complements the sweetness of the pie perfectly. Plus, the vibrant colors make for a stunning presentation. This combination not only looks gorgeous on the plate but also enhances the overall flavor experience. What’s your favorite berry to enjoy with chocolate desserts?
Time Breakdown for Chocolate Espresso Pie
Preparation Time
Get started on your Chocolate Espresso Pie with just 30 minutes of prep time. This includes gathering ingredients and mixing up that delicious base.
Chilling Time
Once your pie base and filling are assembled, it's time to chill! Allow 1 hour and 30 minutes for the pie to set properly in the fridge, ensuring that each slice holds its shape beautifully.
Total Time
In total, you're looking at around 2 hours from start to finish, which includes both prep and chilling times. Perfect for a weekend dessert or a special gathering!
If you're looking for more tips on pie baking or alternative recipes, check out Bon Appétit or BBC Good Food!
Nutritional Facts for Chocolate Espresso Pie
When indulging in a slice of Chocolate Espresso Pie, it’s good to be aware of what you’re treating yourself to. Here are some important nutritional facts:
-
Calories per slice: Each slice contains approximately 487 calories, making it a rich dessert that rewards you for your hard work throughout the day.
-
Sugar content: With about 25 grams of sugar per slice, it's a sweet treat sure to satisfy your cravings.
-
Protein content: This pie offers around 5 grams of protein per slice, thanks to the wholesome ingredients like egg whites and dark chocolate.
If you’re looking for ways to balance this dessert with your diet, consider pairing it with a fresh fruit salad or a cup of coffee, which can complement the flavors beautifully. For more insights into nutritional choices, check out Nutrition.gov for valuable resources.
FAQs about Chocolate Espresso Pie
Can I make this pie ahead of time?
Absolutely! In fact, making your chocolate espresso pie the day before is a great idea. Its flavors deepen as it chills, enhancing the overall taste. Just prepare it as directed, allow it to set in the fridge, and it’ll be ready to impress your guests the next day!
How do I store leftovers?
If you’re lucky enough to have leftovers, simply cover the pie with plastic wrap or store it in an airtight container. It can be stored in the fridge for about 3 to 4 days. This velvety dessert holds up well, so you can enjoy it for a few more days without losing flavor or texture.
Is there a way to make it dairy-free?
Yes, you can easily adapt the chocolate espresso pie for a dairy-free diet. Use dairy-free chocolate, coconut cream instead of thickened cream, and swap out the butter for a dairy-free alternative like margarine or coconut oil. This way, you can savor this delicious dessert without compromising on dietary needs. For more tips on dairy substitutions, check out Healthline's guide.
Conclusion on Chocolate Espresso Pie
Recap of why you’ll love this dessert
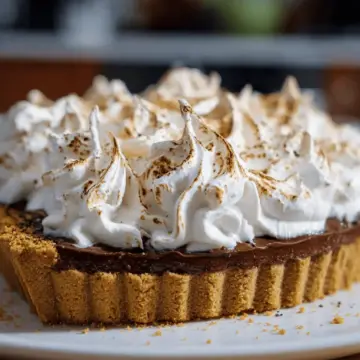
Indulging in this Chocolate Espresso Pie is a truly delightful experience. Its rich chocolate filling harmonizes perfectly with deep coffee notes, while the airy meringue adds a textural contrast that’s simply irresistible. Perfect for impressing guests or treating yourself, this pie guarantees satisfaction in every slice! For more chocolate-inspired treats, check out King Arthur Baking for other recipes that will elevate your dessert game.
Chocolate Espresso Pie
Equipment
- food processor
- mixing bowl
- stand mixer
- 24cm Pie Dish
- small saucepan
- Kitchen Blow Torch
Ingredients
Base
- 275 g Digestive Biscuits
- 100 g Unsalted Butter Melted
- 0.5 teaspoon Sea Salt Flakes
Chocolate Espresso Filling
- 350 g Dark Chocolate Chips
- 2.5 tablespoon Unsalted Butter Cubed
- 330 ml Thickened Cream 1 ¼ Cups + 1 Tbsp
- 3.5 tablespoon Freshly Ground Coffee Beans
- 2 tablespoon Water
Meringue
- 4 Egg Whites Room Temperature
- 160 g Caster Sugar
Instructions
Preparation
- Place the base ingredients into a food processor and blend into a fine wet sand-like consistency.
- Grease a 24cm pie dish with softened butter & pour in the base mix. Firmly press the base mix into the pie dish & spread up the sides. Chill in the fridge for 30 minutes to set.
- Place the dark chocolate & butter into a mixing bowl. Place the coffee & water in a small saucepan over high heat & bring to a boil. Once boiling, add in the thickened cream & stir over medium-low heat for 3 minutes or until the cream is hot but not boiling. Remove from heat & let infuse for 5 minutes.
- Pour the cream & coffee mixture through a fine sieve into the chocolate & butter, discard the ground coffee. Mix the coffee cream mixture into the chocolate & butter just until the chocolate has melted & smooth.
- Pour into the chilled base & place back into the fridge for 1 to 1 ½ hours or until fully set.
- Place egg whites into a stand mixer & beat using the whisk attachment until it starts to froth. Add in the sugar & continue to beat until the peaks are stiff & glossy.
- Spoon meringue over the set chocolate & swirl with a spatula to form cracks & a decorative pattern.
- Use a kitchen blow torch to toast the meringue until golden brown all over (this step is optional but is recommended), slice & serve. Dig in.


Leave a Reply