
Introduction to Cast Iron Apple Crisp
As the leaves turn golden and the air turns crisp, there's something irresistible about indulging in a warm, homemade dessert. Enter the cast iron apple crisp, a delightful combination of tender, spiced apples and a crunchy oat topping that captures the essence of fall. This dish not only showcases the bounty of apple orchards but also offers a nostalgic experience that warms the heart.
Why is Cast Iron Apple Crisp the Perfect Fall Dessert?
Imagine the smell of sweet apples mingling with cinnamon wafting through your kitchen—it's pure autumn bliss! This recipe is straightforward, making it ideal for both seasoned bakers and novices alike. Plus, the cast iron skillet provides even heat distribution, ensuring your crisp bakes perfectly every time.
Another advantage? The toppings are flexible! You can personalize it with your favorite nuts or even a hint of nutmeg to elevate the flavor profile. Served warm with a scoop of vanilla ice cream or a dollop of whipped cream, this dish transforms any gathering into a cozy celebration. For those interested in more apple recipes, check out resources from The Applegate and Apple Hill Growers for inspiration.
Ready to create a fall-favorite? Let’s dive into the full recipe!

Ingredients for Cast Iron Apple Crisp
Creating a delightful cast iron apple crisp starts with fresh, wholesome ingredients. Let’s break down what you’ll need for the perfect blend of flavors!
Essential ingredients for the filling
The heart of any great apple crisp lies in its filling. For this recipe, you’ll need:
- 6 medium apples - Choose your favorites like Honeycrisp or Granny Smith for the perfect tartness.
- 3 tablespoons unsalted butter - This adds richness to the filling.
- ⅓ cup brown sugar - Provides a lovely caramel flavor that balances the tart apples.
- 2 teaspoons ground cinnamon - The quintessential spice for warm, comforting desserts.
- ⅛ teaspoon Diamond Crystal kosher salt - A pinch of salt enhances all the sweet flavors.
For more on selecting the best apples, check out this guide from The Spruce Eats.
Topping ingredients for an irresistible crunch
Now, let’s make that crunchy topping that makes a cast iron apple crisp so irresistible:
- 1 ¼ cup old-fashioned oats - These give a chewy texture.
- 2 tablespoons all-purpose flour - Helps bind the topping together.
- 5 tablespoons cold unsalted butter, cut into pieces - Ensures a flaky, buttery crunch.
- ⅓ cup brown sugar - Just like in the filling, this sweetens the topping.
- ⅛ teaspoon Diamond Crystal kosher salt - Again, to elevate the flavors.
- A sprinkle of ground cinnamon - Because you can never have too much cinnamon!
With these essential ingredients, you're just a few steps away from a deliciously comforting dessert that will make your kitchen smell amazing! You can always explore variations on these ingredients—perhaps adding nuts or a dash of vanilla extract for extra flavor!
Preparing Cast Iron Apple Crisp
Making a delicious cast iron apple crisp is a wonderful way to celebrate the flavors of fall. There’s nothing quite like the combination of tender apples and a crunchy topping, all baked to perfection in your trusted cast iron skillet. Let’s dive into the steps!
Prepping the Apples
Start by selecting your apples! You can use a mix of sweet and tart varieties like Honeycrisp, Granny Smith, or Empire for a tasty balance. After peeling, coring, and cutting about six medium apples into bite-sized pieces, toss them into a large mixing bowl. This will allow the apples to release their juices as you prepare the rest of your ingredients.
Make the Filling in Your Skillet
Next, melt some butter! Place your cast iron skillet over medium-low heat and add 3 tablespoons of unsalted butter. As it melts, whisk in ⅓ cup of brown sugar, 2 teaspoons of ground cinnamon, and a pinch of kosher salt. This fragrant mixture will become the heavenly coating for your apples. Once combined, pour it over the apple slices and toss to ensure they are nicely coated. Now, return the apple mixture to the skillet, increase the heat to medium, and let it cook for about 5 minutes until the apples just begin to soften.
Prepare the Topping Mixture
While the apples are cooking, it’s time for the crunchy topping! In a separate medium bowl, combine 1 ¼ cups of old-fashioned oats, 2 tablespoons of all-purpose flour, and ⅓ cup of brown sugar. Add 5 tablespoons of cold butter, cut into pieces, and mix it all together with your hands or a pastry cutter. Remember, it’s perfectly fine to have some small lumps of butter for that fabulous flaky texture!
Assemble the Crisp in the Skillet
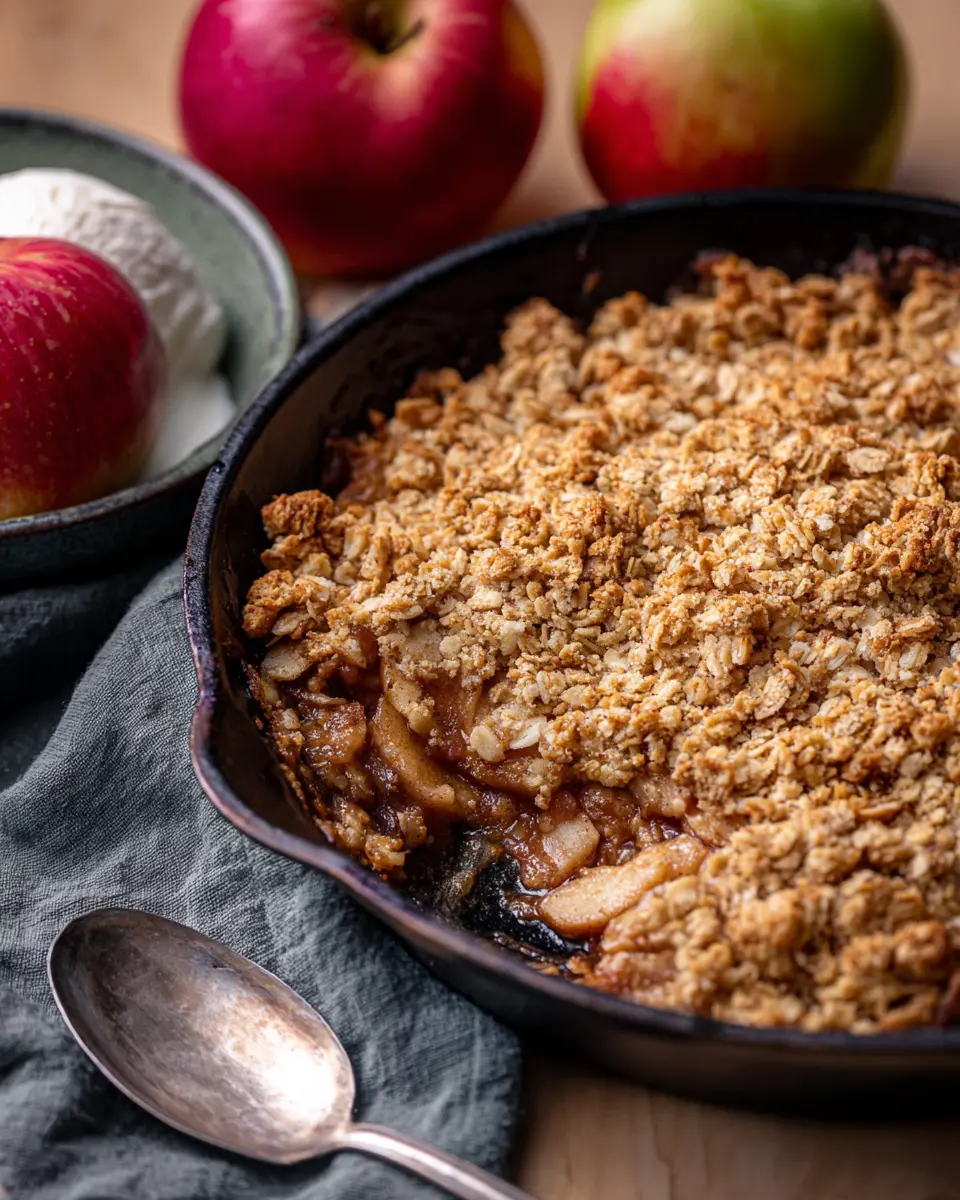
Now it’s assembly time! Evenly distribute your topping mixture over the apples in the skillet, and don’t forget to sprinkle a little extra cinnamon on top. This step is crucial—it’s what transforms your dish into a memorable cast iron apple crisp.
Bake to Perfection
Preheat your oven to 350°F and pop that skillet in! Bake it for about 35-40 minutes until the apples are tender, bubbling at the edges, and the topping is golden brown and crunchy. This is where the magic happens—the aromas will be absolutely irresistible. After baking, let it rest for about 30 minutes. This allows all the flavors to meld beautifully before you dive in.
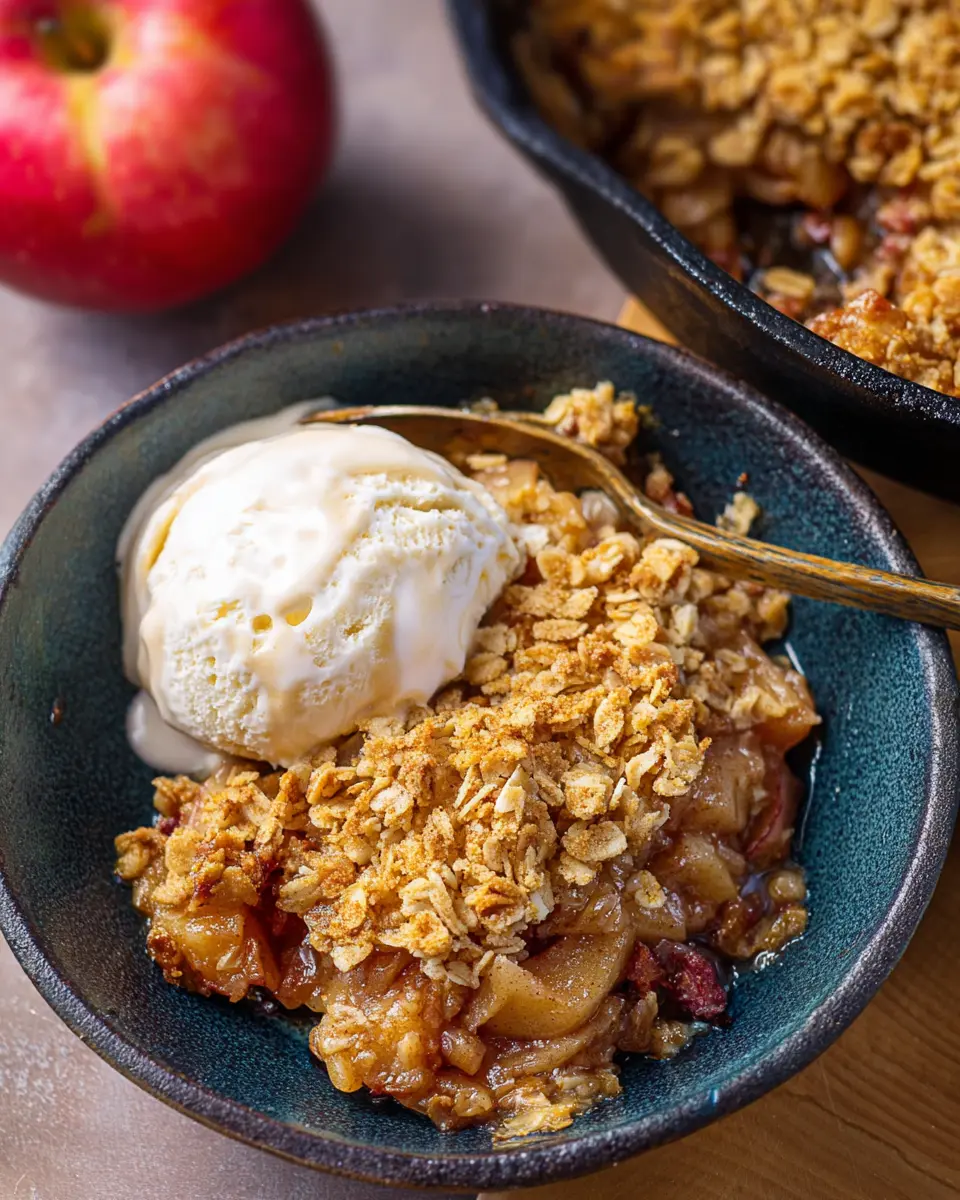
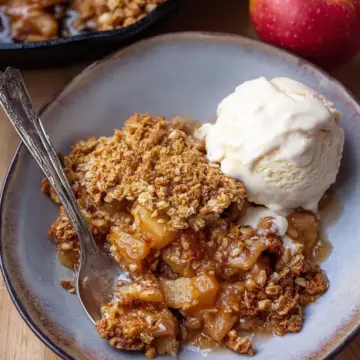
Once it’s cooled slightly, serve your cast iron apple crisp with a scoop of vanilla ice cream or a dollop of whipped cream for an extra treat. Trust me, your friends will thank you for this delightful dessert!
Variations on Cast Iron Apple Crisp
Gluten-Free Options for the Topping
If you're looking to make a gluten-free cast iron apple crisp, it’s easier than you might think! Swap out the all-purpose flour in the topping for gluten-free oat flour or almond flour. You can also add some ground nuts like almonds or pecans for added flavor and crunch. Always double-check that your oats are labeled gluten-free to avoid any cross-contamination.
Fun Flavor Twists with Nuts and Spices
Elevate your cast iron apple crisp by incorporating a few fun twists. Consider tossing in some chopped walnuts or pecans for a delightful crunch. For added depth, sprinkle in some nutmeg or a touch of ginger with the cinnamon. You can even use dried cranberries or raisins for a fruity contrast. Each variation brings a new experience, making this classic dessert all the more exciting!
Experiment and enjoy your personalized version of this timeless recipe!
Cooking Tips and Notes for Cast Iron Apple Crisp
Selecting the Best Apples for Your Crisp
For a truly delicious cast iron apple crisp, opt for a mix of tart and sweet apples. Try using Honeycrisp, Granny Smith, and Braeburn apples for the best flavor balance. Avoid varieties like Red Delicious, which can turn mushy and lose their texture during baking.
Adjusting the Sugar and Spice Levels
Feel free to adjust the sweetness of your apple crisp by varying the brown sugar. If you prefer a more caramelized flavor, use dark brown sugar. For spice, start with the recommended cinnamon and add more based on your taste. A pinch of nutmeg can also elevate the flavor!
Tips for Even Baking in Your Cast Iron Skillet
To guarantee even baking, make sure your cast iron skillet is properly preheated before adding the apple mixture. Rotate the skillet halfway through the baking time to promote uniform cooking. For a crunchy topping, broil for the last few minutes, but keep an eye on it to prevent burning. Enjoy!
Serving Suggestions for Cast Iron Apple Crisp
The joys of pairing with ice cream or whipped cream
Imagine diving into a warm slice of cast iron apple crisp, the sweet, spiced apples complementing the crunchy oat topping. Now, envision adding a generous scoop of creamy ice cream or a dollop of fluffy whipped cream on top. The fusion of warm and cold creates a delightful contrast that elevates this classic dessert. Plus, the richness of the ice cream counterbalances the tartness of the apples, making each bite an irresistible treat. For an added twist, consider a drizzle of caramel sauce or a sprinkle of nuts for extra texture and flavor.
Creative serving ideas for gatherings
When hosting friends or family, serving your cast iron apple crisp straight from the hot skillet adds a cozy, rustic charm. Pair it with varied toppings—think chopped nuts, shredded coconut, or even a dusting of powdered sugar—to create a dessert bar vibe. Set out bowls of ice cream, whipped cream, and sauces to let guests customize their servings. This interactive approach not only engages your guests but also accommodates different tastes and dietary preferences, ensuring everyone gets to enjoy this delightful fall favorite. For more serving ideas, check out Food Network for inspiration!
Time Breakdown for Making Cast Iron Apple Crisp
Making a delightful cast iron apple crisp is a breeze when you know how long it takes:
-
Preparation time: 10 minutes
Prepare your apples and mixing bowls while the oven preheats. It’s quick and satisfying! -
Cooking time: 40 minutes
Once everything is in the skillet, let it bake to golden perfection. -
Total time: 1 hour 20 minutes
Include a 30-minute cooling period to allow the flavors to meld beautifully.
In just over an hour, you'll have a warm, comforting dessert that's perfect for sharing. Need some tips on selecting the best apples? Check out this guide on apple varieties.
Nutritional Facts for Cast Iron Apple Crisp
Calories per serving
A satisfying serving of this cast iron apple crisp packs approximately 250 calories. Perfect for enjoying a delicious dessert without derailing your healthy eating plan!
Protein content
While not a primary source of protein, each serving contains about 3 grams. Pair it with a scoop of Greek yogurt for an easy protein boost!
Dietary fiber
With about 4 grams of dietary fiber per serving, this dish contributes to your daily fiber needs. The oats provide a great source of whole grains, promoting digestive health.
For more insights on the health benefits of apples, check out Healthline.
FAQs about Cast Iron Apple Crisp
Can I use frozen apples for this recipe?
Absolutely! If you're short on time or fresh apples aren't available, frozen apples work just fine in this cast iron apple crisp. Just remember to thaw and drain them a bit to avoid extra moisture ruining your crisp topping.
What if I don't have a cast iron skillet?
Not a problem! While a cast iron skillet gives that rustic touch, you can substitute with any oven-safe dish like a glass or ceramic pie pan. Just keep an eye on the baking time, as different materials heat differently!
How can I store leftovers?
If you have any scrumptious leftovers (which is pretty unlikely!), store them in an airtight container in the fridge for up to three days. You can reheat the entire dish in the oven at 350°F until warmed through, or microwave individual portions for a quick treat anytime. For tips on reheating, you can refer to reliable sources like The Kitchn. Enjoy your crisp on its own or topped with ice cream for an extra indulgent dessert!
Conclusion on Cast Iron Apple Crisp
To wrap it up, cast iron apple crisp is not just a dessert; it's a cozy experience that elevates any gathering. Not only is it simple to prepare, but its warm, buttery flavors will surely impress your guests. Serve it warm with a generous scoop of ice cream, and enjoy!
Cast Iron Apple Crisp
Equipment
- Cast Iron Skillet
- mixing bowl
- pastry cutter
Ingredients
Filling
- 6 medium apples peeled, cored and cut into small pieces
- 3 tablespoons unsalted butter
- ⅓ cup brown sugar light or dark
- 2 teaspoons ground cinnamon
- ⅛ teaspoon Diamond Crystal kosher salt
Topping
- 1 ¼ cup old fashioned oats
- 2 tablespoons all purpose flour
- 5 tablespoons cold unsalted butter cut into 5 pieces
- ⅓ cup brown sugar
- ⅛ teaspoon Diamond Crystal kosher salt
- to taste ground cinnamon sprinkle on top
Instructions
Prepping the Apples
- Preheat the oven to 350F.
- Add cut up, peeled and cored apple slices to a large mixing bowl and set aside.
Make the Filling
- Preheat a 10 inch cast iron skillet over medium low heat and melt the butter for the filling.
- Once the butter is melted, whisk in brown sugar, cinnamon and salt.
- Pour the butter mixture over the apples in the mixing bowl and toss until the apples are well coated.
- Add the apples and butter mixture back into the skillet and turn the heat up to medium. Stir occasionally while it cooks for 5 minutes, until the apples begin to soften. Remove the pan from the heat, but keep the apple mixture in it.
- After the apples are partially cooked, cut the 5 tablespoons of butter into 5 separate pieces.
Make the Topping
- Add all the toppings EXCEPT the ground cinnamon into a medium mixing bowl. Combine ingredients using either your hands or a pastry cutter. It is okay to have small lumps of butter throughout the mixture.
- Top the apples in the skillet with the topping evenly and sprinkle on the cinnamon. Place in the oven.
Bake
- Cook for 35-40 minutes, until the apples are tender, slightly bubbling and the topping is crunchy.
- Allow to rest and cool at room temperature for about 30 minutes before serving.


Leave a Reply