
Introduction to Easy Homemade Crusty Bread
There's something undeniably special about baking easy homemade crusty bread right in your kitchen. Not only does it fill your home with a cozy aroma, but it also gives you that warm, primal satisfaction of creating something from scratch. Whether you're a budding baker or someone seeking a new hobby, this recipe is approachable for all skill levels.
Why make crusty bread at home? For starters, there’s the taste. Nothing compares to the freshness of bread that’s just come out of the oven, with its golden, crispy crust and soft interior. Plus, making bread at home can be more affordable than purchasing gourmet loaves at the store. According to recent studies, homemade bread can cost less than $2.00 for a large batch, making it both a delightful and economical choice.
Moreover, it’s a fantastic way to impress family and friends. Imagine serving a fresh loaf alongside a homemade soup or a simple salad; it elevates any meal and adds a touch of sophistication. And if you’re looking to elevate your baking skills, experimenting with bread introduces you to the wonderful world of yeast and fermentation, leading to endless culinary possibilities. So, let’s dive into making this delightful crusty bread!
Why Make Crusty Bread at Home?
- Freshness: The taste of freshly baked bread is unmatched.
- Expense: Homemade bread is cost-effective and saves you money.
- Impressiveness: Homemade bread serves as an excellent centerpiece for meals.
- Skill Development: Baking bread enhances culinary skills and understanding of ingredients.
For more insights on the benefits of homemade bread, check out this National Baking Association resource.
Ingredients for Easy Homemade Crusty Bread
Essential ingredients for the perfect crusty bread
Crafting easy homemade crusty bread starts with a few essential ingredients that come together beautifully. You’ll need:
- Water: 3.25 cups of lukewarm water (around 100° F) is ideal for activating the yeast.
- Yeast: 1.5 tablespoons of dry active yeast gives your bread that perfect rise.
- Flour: 6.5 cups of flour, preferably bread flour, for a chewy texture.
- Salt: 1.5 tablespoons of kosher salt adds flavor and strengthens the dough.
These basic components create a magical recipe that many bakers swear by. Want to dive deeper into the science of bread-making? Check out this article on the Craftsmanship of Bread.
Tools you'll need for baking
Having the right tools on hand makes the process of baking less daunting and more enjoyable. Gather these essentials:
- Large mixing bowl: For combining your ingredients.
- Heavy-duty whisk: To ensure an even mix without lumps.
- Loaf pans: Two are necessary unless you plan to save part of the dough for later.
- Pizza peel: For easy transfer of the loaf into the oven.
- Instant-read thermometer: To check your water temperature and ensure perfect baking conditions.
With everything ready to go, you’ll be set for a rewarding baking experience. Now, let's create a loaf you'll be proud to serve!
Preparing Easy Homemade Crusty Bread
Baking easy homemade crusty bread can be one of the most satisfying things you'll ever do in your own kitchen. Not only does it fill your home with a delicious aroma, but the taste of freshly baked bread is simply unbeatable. So, let’s roll up our sleeves and dive into the process!
Combine Water and Yeast
The first step is crucial: dissolve your yeast in lukewarm water. Use about 3.25 cups of water at around 100°F (you can use a thermometer if you're unsure). Sprinkle in 1.5 tablespoons of dry active yeast and give it a gentle stir until everything is fully mixed. This isn’t just about combining; you’re waking up the yeast, which is the cornerstone of our bread’s rise. Allow this mixture to sit for about 5-10 minutes until it becomes foamy—this foaming action signals that your yeast is alive and ready to work its magic.
Mix in Flour and Salt
Now that your yeast is primed and ready, it's time for the fun part—mixing the dough! Gradually stir in 6.5 cups of flour (bread flour is ideal) along with 1.5 tablespoons of kosher salt. Use a heavy-duty whisk or a wooden spoon and mix until everything is just combined. Don’t over-mix; it’s all about uniting the ingredients without making the dough too tough. If you're a visual learner, check out videos on artisan bread-making for additional tips!
Allow Dough to Rise
After your dough is mixed, cover the bowl with a kitchen towel and let it rise in a warm spot for about 2 hours. The dough should double in size, and this is where the magic happens! Feel free to grab a book or catch up on your favorite show while waiting—your patience will pay off.
Shape the Dough into Loaves
Once your dough has risen, dust a surface lightly with flour to avoid sticking. Gently turn out the dough and divide it in half if you prefer two loaves, or keep it whole for one larger loaf. Shape each half into a loaf, rounding the top as you go. If you're not ready to bake both right now, the remaining dough can be stored in the fridge for up to two weeks—perfect for fresh bread on demand.
Rest and Prepare for Baking
Place your shaped loaves onto a pizza peel that's lightly dusted with cornmeal. Give them another light dusting of flour and, using a serrated knife, make three slashes across the tops. This doesn’t just look amazing; it allows the bread to expand while baking. Cover them again with your kitchen towel and let them rest for about 40 minutes.
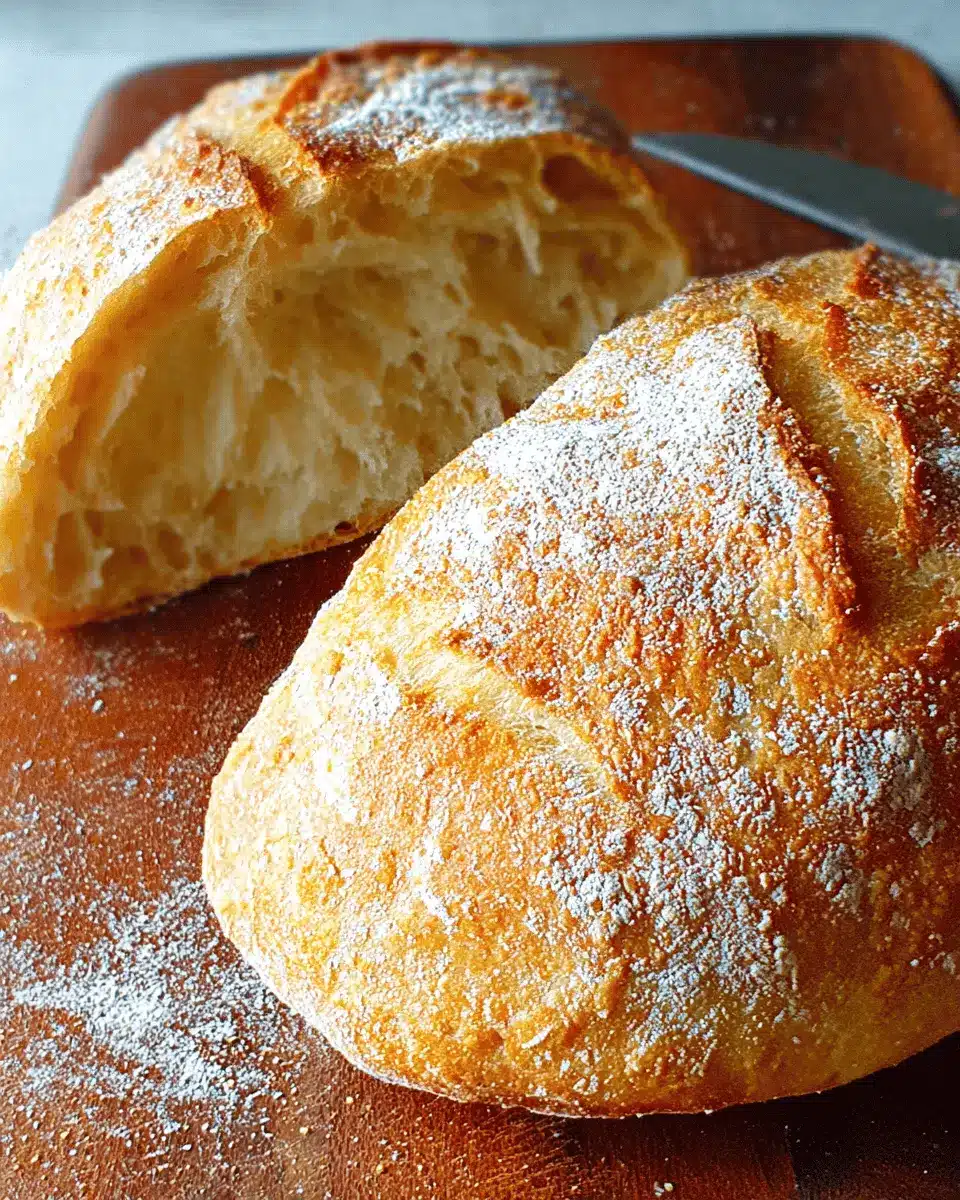
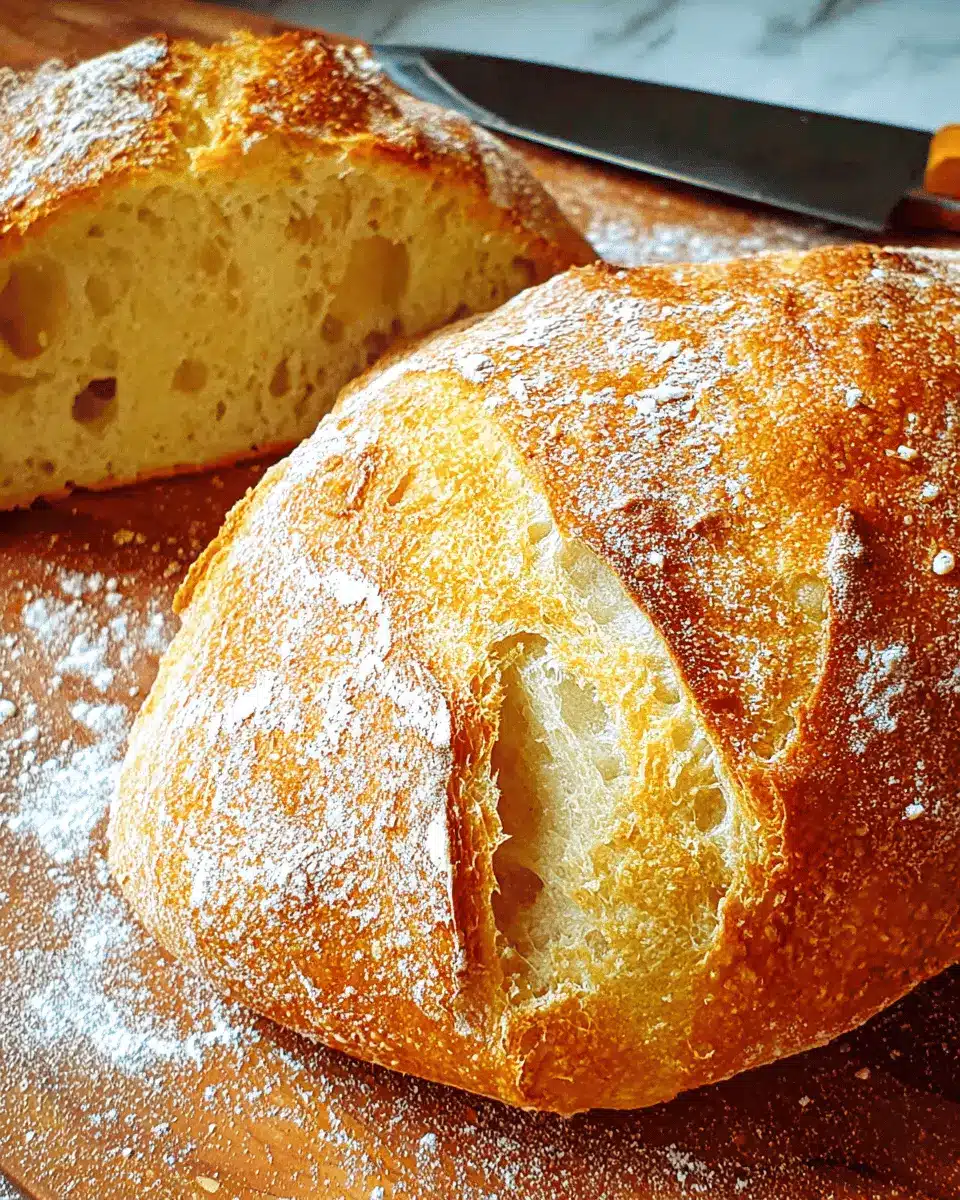
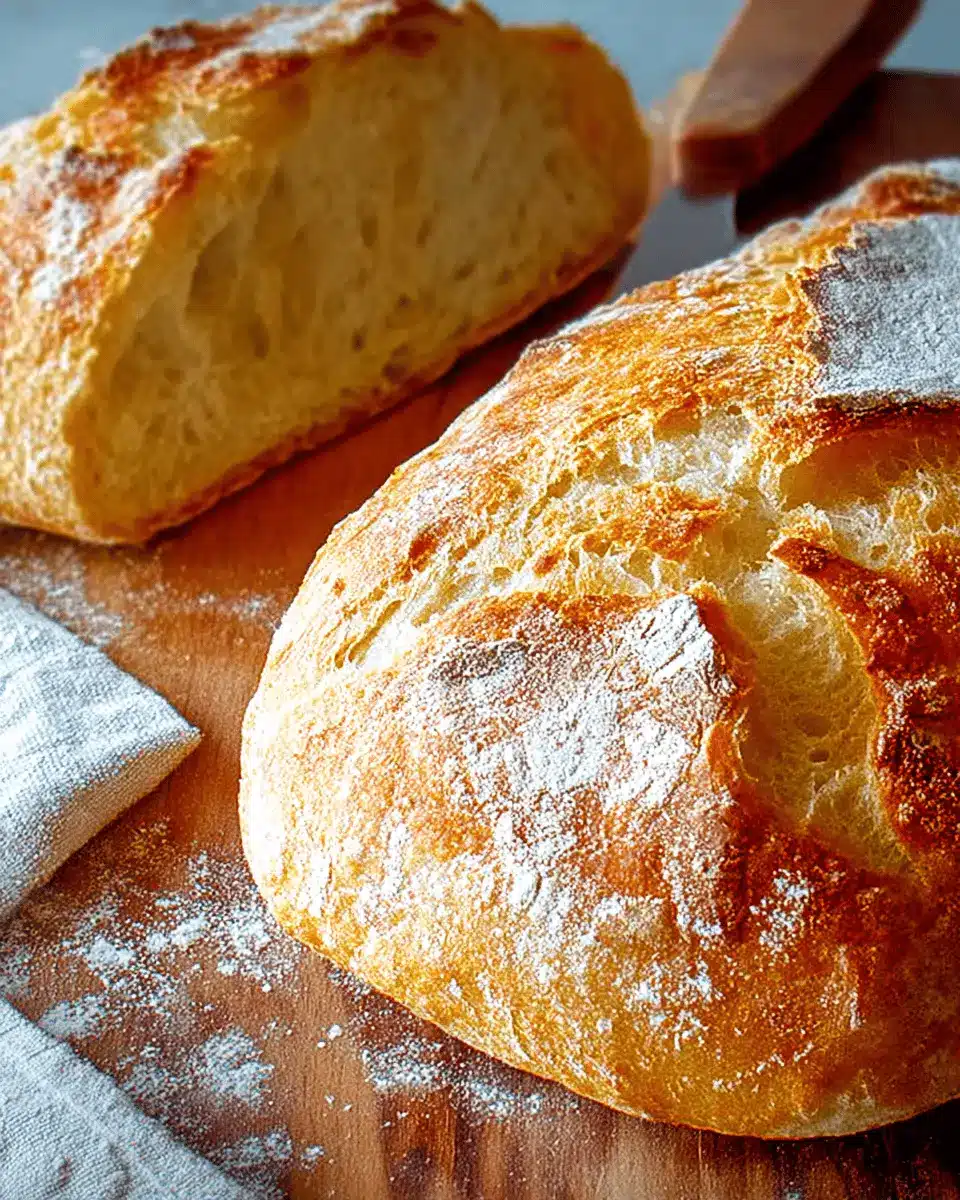
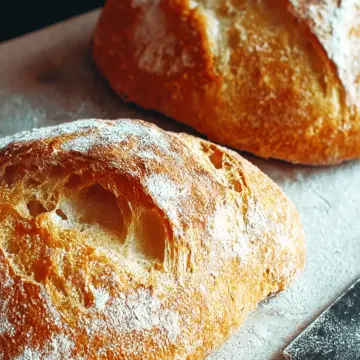
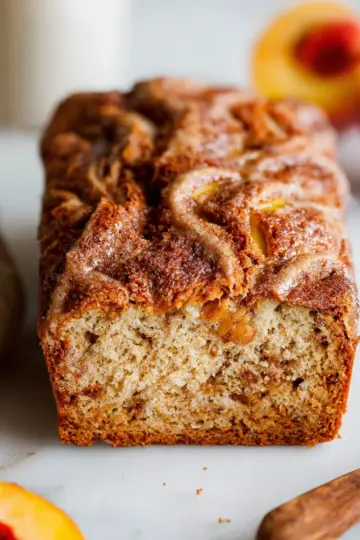
Bake Your Bread to Perfection
Preheat your oven to 450°F and place a baking stone (or heavy skillet) on the center rack. The heat is vital for that perfect crust! Once ready, slide your dough onto the hot stone and toss a cup of hot water into a pan on the bottom rack to create steam. Close the oven door quickly to trap that steam—trust me, it’s the secret to a fantastic crust. Bake for about 30 minutes until golden brown, and don’t rush the cooling process; let it rest for a few minutes before slicing. Enjoy your labor of love with some butter or your favorite spread!
Baking easy homemade crusty bread is not only a skill; it’s a delightful experience. So grab this recipe and get started—you won’t regret it!
Variations on Easy Homemade Crusty Bread
Herb-infused Crusty Bread
Why not elevate your easy homemade crusty bread with fresh herbs? Adding rosemary, thyme, or even oregano to the dough can provide an aromatic punch that complements the crust beautifully. Simply mix 2 tablespoons of your favorite chopped herbs into the dough while combining the flour and salt. This vibrant twist can transform your regular loaf into an impressive centerpiece for dinner parties or cozy family meals.
Adding Cheese for Extra Flavor
Cheese lovers, rejoice! You can turn this simple bread into a cheesy delight by folding in 1-2 cups of shredded cheese like cheddar, mozzarella, or even feta right after mixing the flour and salt. This addition not only enhances the flavor but also introduces a lovely gooey texture that melts in your mouth. For an extra touch, sprinkle some cheese on top before baking for a golden, crispy crust—perfect for dipping in soups or enjoying with your favorite spreads.
Experimenting with these variations can truly customize your homemade crusty bread experience. Happy baking!
Baking Notes for Easy Homemade Crusty Bread
Tips for Success
Baking easy homemade crusty bread can be a rewarding experience; here are some tips to ensure you achieve that perfect loaf:
- Prepare Your Workspace: Organize all ingredients and tools before you start. This makes the process smoother and prevents mistakes.
- Temperature Matters: Always use lukewarm water (about 100°F) for dissolving yeast; too hot can kill it. To check, a simple thermometer can help.
- Monitor Your Oven: Know how your oven behaves. It might need slight temperature adjustments to achieve a beautifully baked crust.
Common Mistakes to Avoid
Even seasoned bakers have off days. Here are some common pitfalls to steer clear of:
- Skipping the Proof: Failing to proof your yeast can lead to dense bread. Always check it's active and frothy before use.
- Ignoring Dough Texture: If your dough feels too wet, don't hesitate to add a little more flour. The goal is a soft yet manageable consistency.
- Neglecting Steam: The steam bath is crucial for that crusty exterior. Don’t forget to place a pan of hot water in the oven while baking.
Baking is all about honing your technique and learning through practice. Treat each baking session as a chance to improve and enjoy the process! For even more insightful tips, you can check out resources from King Arthur Baking or Breadtopia for expert advice.
Serving suggestions for Easy Homemade Crusty Bread
Creating your easy homemade crusty bread is just the beginning—now let's elevate your dining experience!
Best accompaniments for your homemade bread
- Butter: A generous spread of salted butter adds a delightful richness.
- Olive oil & balsamic vinegar: Perfect for dipping, this combo adds a burst of flavor.
- Cheese: Pair with your favorite cheeses like aged cheddar or creamy goat cheese.
- Turkey bacon: Crispy turkey bacon makes an indulgent topping or side.
Ideal dishes to pair with crusty bread
Enjoy your crusty bread alongside:
- Soups: A warm bowl of tomato basil or hearty minestrone is a match made in heaven.
- Salads: Rustic bread complements fresh greens, especially with citrus vinaigrette.
- Charcuterie boards: Add slices of chicken ham and seasonal fruits for a delightful spread.
With these suggestions, your homemade bread will shine at any meal! For more inspiration, check out The Spruce Eats for creative pairings.
Time Details for Easy Homemade Crusty Bread
Preparation Time
Making your easy homemade crusty bread starts with just 15 minutes of prep. Gather your ingredients, mix them together, and that's it—you're on your way to delicious bread!
Rise Time
The dough will need about 2 hours for the first rise. This is when those amazing flavors develop. After shaping your loaves, give them another 40 minutes to rest for the perfect texture.
Baking Time
Once fully risen, the baking takes around 30 minutes. The aroma will fill your kitchen, making it hard to resist!
Total Time
From start to finish, you’re looking at around 3 hours and 25 minutes. Most of this time is hands-off, allowing you to do other things while your bread is rising or baking. For tips on timing, you can check out Bakerpedia.
Embrace the process and enjoy every bite of your homemade creation!
Nutritional Information for Easy Homemade Crusty Bread
When whipping up your easy homemade crusty bread, knowing what you're putting into your body can make all the difference. Here's a quick breakdown of the nutrition:
Calories
Each slice of this delightful bread contains about 125 calories, making it a satisfying yet light addition to your meals.
Protein
With approximately 3 grams of protein per serving, this bread provides a modest boost to your daily intake—great for energy!
Sodium
Keep an eye on your salt with around 438 mg of sodium per slice; you can adjust the amount of kosher salt for a healthier option.
Feel free to explore more about the nutritional benefits of homemade bread by checking out resources like Healthline or The Cleveland Clinic. Eating well doesn't have to be complex, and this crusty bread is a delightful way to enjoy the simplicity of cooking!
FAQs about Easy Homemade Crusty Bread
How can I tell if my bread is crusty?
To assess the crustiness of your bread, gently tap the bottom of the loaf. A hollow sound often indicates a properly baked crust. Visually, a golden-brown color and a rustic appearance are also telltale signs of a crusty exterior. Don’t forget to let your bread cool for a few minutes before slicing—this enhances the texture!
Can I freeze homemade bread?
Absolutely! Freezing your easy homemade crusty bread is a great way to preserve freshness. Once the bread has cooled fully, wrap it in plastic wrap and then in foil to prevent freezer burn. To enjoy later, simply thaw at room temperature, or pop slices in the toaster for a quick refresh.
What should I do if my bread doesn't rise?
If your bread fails to rise, the culprit could be inactive yeast. Always check your yeast’s expiration date, and consider proofing it before mixing with other ingredients. If your dough is overly dry, adding a little warm water can help. Remember to keep the dough in a warm, draft-free spot during the rising process for optimal results! For more tips on troubleshooting, check out resources like King Arthur Baking.
Conclusion on Easy Homemade Crusty Bread
In conclusion, making easy homemade crusty bread is an enjoyable experience that combines simplicity with delicious results. Whether you’re a novice or a seasoned baker, this recipe allows you to create a hearty loaf perfect for any meal. Don’t forget to share your success, and happy baking!
Easy Homemade Crusty Bread
Equipment
- large mixing bowl
- Heavy duty whisk
- Loaf pans
- Pizza Peel
- instant-read thermometer
Ingredients
- 3.25 cups lukewarm water about 100° F.
- 1.5 tablespoon dry active yeast
- 6.5 cups bread flour if you have it.
- 1.5 tablespoon kosher salt May use less if desired.
Instructions
- Combine water and yeast and stir until the yeast is dissolved. Add flour and salt and mix until thoroughly combined.
- Allow the dough to rise for 2 hours at room temperature, covered with a kitchen towel.
- Apply a light dusting of flour over the dough and divide it in half and shape into 2 loaves, rounding the top. If you only want to make one loaf of bread at this time, store the unused dough in the refrigerator, covered, for up to 2 weeks until ready to use.
- Place the unbaked loaf(s) on pizza peel that is lightly dusted with cornmeal. Apply light dusting of flour over top and cut three slashes into top of dough, using a serrated knife. Cover dough with kitchen towel and allow to rest for 40 minutes.
- Preheat oven to 450° F with baking stone on the center rack. When bread is ready to go in the oven, slide the dough off pizza peel onto hot stone. Place 1 cup hot water into oven broiler (or other oven safe pan), on bottom rack of oven. Quickly close oven door to create a steam bath within the oven. This will help produce a crisp outer crust.
- Bake for 30 minutes and allow to cool slightly before slicing. Enjoy!


Leave a Reply