
Introduction to Garlic-Swirl Rolls
Why Homemade Rolls Make a Difference in Your Meals
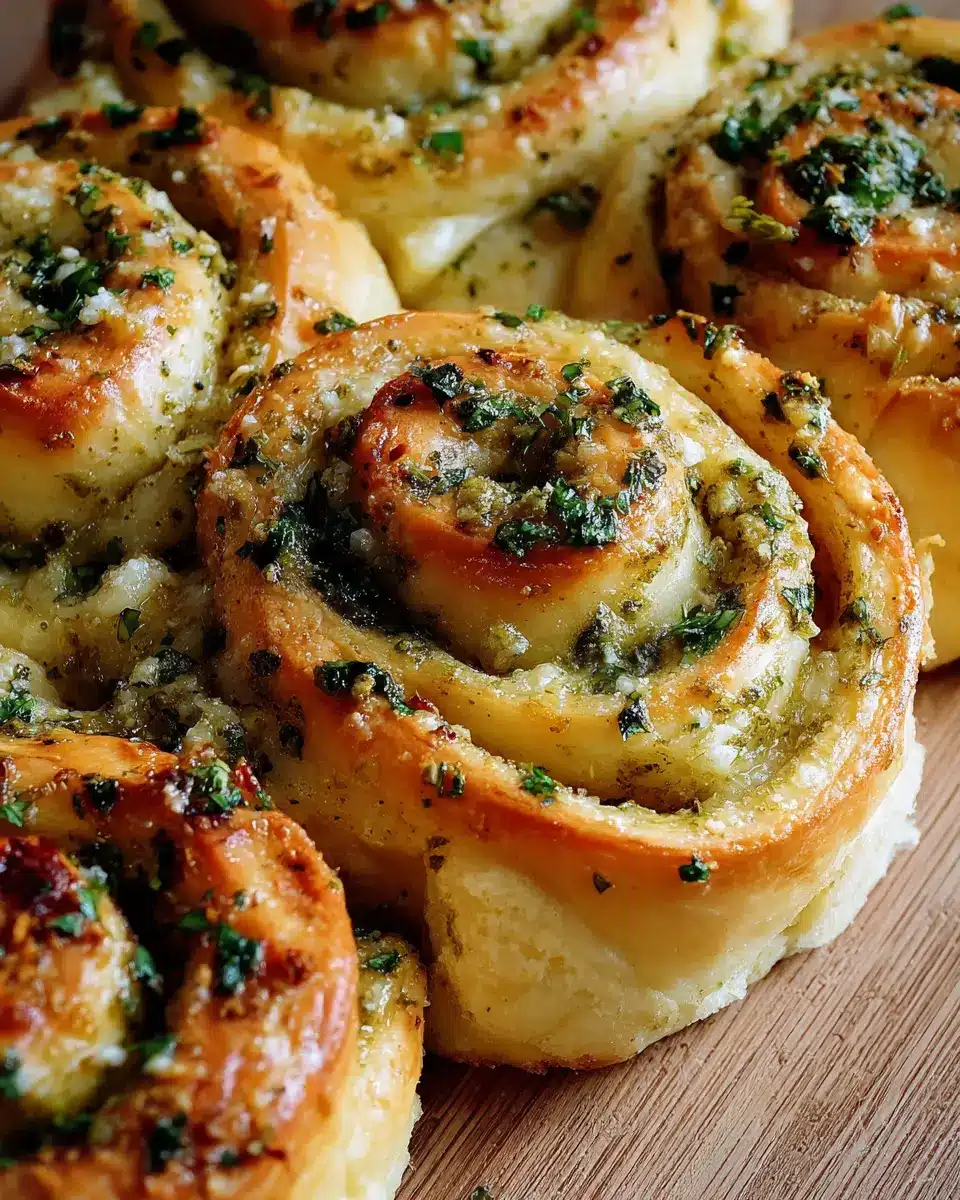
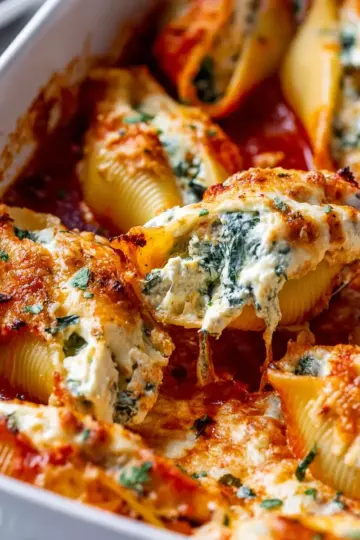
Have you ever pulled apart a warm roll, the savory scent of garlic filling the air, only to discover that it’s extraordinarily soft and buttery? That's the magic of homemade garlic swirl rolls. Unlike store-bought options, these rolls are crafted from scratch, allowing you to control both the ingredients and the flavors.
When you prepare garlic swirl rolls at home, you’re not just making a side dish; you’re elevating your entire meal. Freshly baked goods offer a comforting warmth that can transform even the simplest of dinners into something special. Think about it—there’s really nothing like the satisfaction of serving up fluffy rolls that you’ve created from start to finish.
Furthermore, baking at home can be a rewarding experience. It's a chance to unplug from the hustle and bustle of daily life and engage with a process that results in deliciousness. Plus, you can customize them to fit your taste—whether you prefer a squeeze of lemon zest for brightness or an extra sprinkle of cheese for that lovely savory note.
Enjoying these rolls can turn your next dinner or gathering into an unforgettable occasion. So let’s get started on this flavorful adventure with our scrumptious garlic swirl rolls! Discover the full recipe and embrace the joy of homemade baking.
Ingredients for Garlic Swirl Rolls
If you’re ready to dive into making the ultimate garlic swirl rolls, you’re in the right place! Let’s gather those essential ingredients to create these soft, buttery delights that will elevate any meal.
For the Dough
To achieve the perfect dough, you'll need a few pantry staples:
- Cooking spray: For greasing your baking dish.
- All-purpose flour: About 4 to 4 ¼ cups, plus extra for rolling. This gives our rolls that tender texture.
- Granulated sugar: 2 tablespoons, which helps to feed the yeast.
- Active dry yeast: One packet (2 ¼ teaspoons) is crucial for that fluffy rise.
- Kosher salt: 1 ½ teaspoons to enhance the flavors.
- Warm water: 1 cup, ideally around 110°F for yeast activation.
- Olive oil: ¼ cup adds richness.
- Large eggs: Two whole and one egg yolk for a moist dough.
For the Flavorful Filling
Let’s not forget the delicious filling that really makes these rolls sing:
- Unsalted butter: 1 ½ sticks (¾ cup) to make them wonderfully rich.
- Garlic: 8 cloves, minced to pack that signature punch.
- Fresh parsley: About ½ bunch, finely chopped for a refreshing touch.
- Parmesan cheese: 1 ounce (around ½ cup), finely grated for that cheesy goodness.
- Kosher salt and black pepper: ½ teaspoon and ¼ teaspoon, respectively, for seasoning.
Gather these ingredients, and you’ll be well on your way to impressing your friends and family with homemade garlic swirl rolls! For more tips on how to perform well in bread-making, check out resources on bread baking techniques from Food Network.
Preparing Garlic-Swirl Rolls
Making your own garlic swirl rolls is not only a delightful culinary adventure but also fills your home with an irresistible aroma that will have everyone gathering in the kitchen. Let's break down this mouthwatering process step by step!
Gather and Prep Your Ingredients
Before diving into the roll-making action, take a moment to gather all your ingredients. You’re going to need:
-
For the dough:
-
Cooking spray
-
4 to 4 ¼ cups all-purpose flour (plus extra for rolling)
-
2 tablespoons granulated sugar
-
1 (¼-ounce) packet active dry yeast (about 2 ¼ teaspoons)
-
1 ½ teaspoons kosher salt
-
1 cup warm water
-
¼ cup olive oil
-
2 large eggs and 1 large egg yolk
-
For the filling:
-
1 ½ sticks (¾ cup) unsalted butter (softened)
-
8 cloves garlic (minced)
-
½ bunch fresh parsley (chopped)
-
1 ounce Parmesan cheese (finely grated)
-
½ teaspoon kosher salt
-
¼ teaspoon freshly ground black pepper
Coating your baking dish with cooking spray is also essential; it prevents those tasty rolls from sticking.
Mixing the Dough
Start by combining the flour, sugar, yeast, and salt in your stand mixer (or a large bowl if you're kneading by hand). Then, whisk them until well incorporated! In a separate bowl, mix the warm water, olive oil, and eggs. Gradually add this wet mixture to your dry ingredients while your mixer is on low speed. For great results, knead until the dough is smooth and elastic—about 7 to 8 minutes. If it sticks, sprinkle in a wee bit more flour as needed. This step is crucial for that perfect texture!
Letting the Dough Rise
Once kneaded, transfer your dough to a greased bowl, cover it with plastic wrap, and let it rise in a warm environment for about 1 ½ hours, or until it's nearly doubled in size. This rising step is vital; it gives your rolls that delightful fluffiness.
Crafting the Garlic Filling
While your dough is rising, it’s time to whip up the scrumptious garlic filling. You'll want to make sure your butter is nice and soft, then mix in the minced garlic, parsley, grated Parmesan, salt, and pepper. The flavor combo here is what makes these garlic swirl rolls unforgettable.
Shaping the Rolls
Once your dough has risen, punch it down gently and roll it out into a rectangle about 24x10 inches. Spread half your garlic filling over the surface before rolling it tightly into a log shape. Use a bench scraper to help release the dough if it sticks, and pinch the seam tight!
Second Rise and Baking
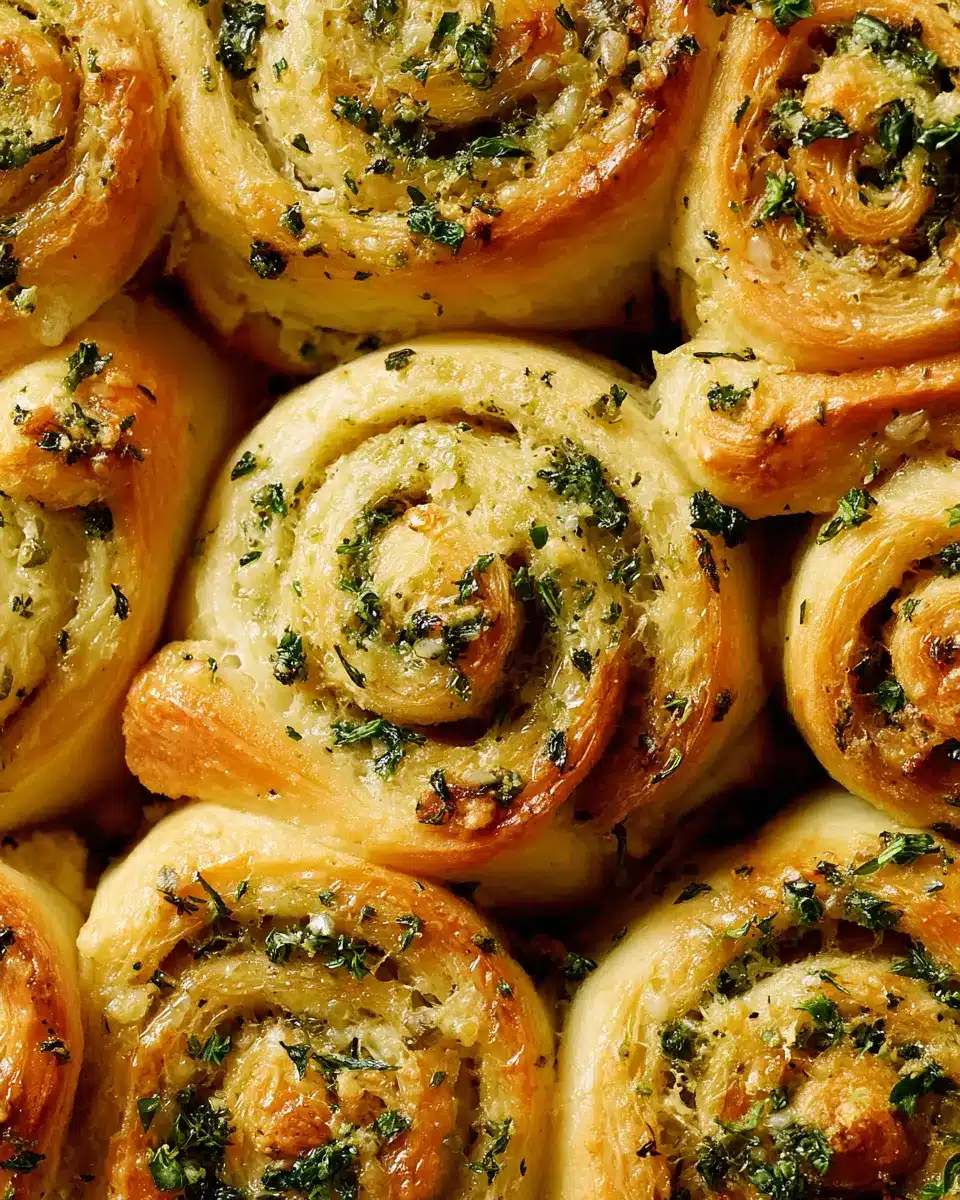
Cut your log into 15 equal pieces and arrange them cut-side up in a greased 9x13-inch baking dish. Give them a loose covering with plastic wrap and let them rise for an additional 25 minutes. Meanwhile, preheat your oven to 350°F. Once puffed and golden brown, bake your rolls for 30-35 minutes. Finally, spread the remaining garlic butter over the top as soon as they come out of the oven.
And that’s how you prepare delicious garlic swirl rolls! These are perfect for sharing at parties, alongside hearty soups, or just as a delightful snack. Don’t forget to enjoy them fresh out of the oven! For more irresistible bread recipes, check out this guide on baking essentials. Happy baking!
Variations on Garlic Swirl Rolls
Garlic Rolls with Herbs
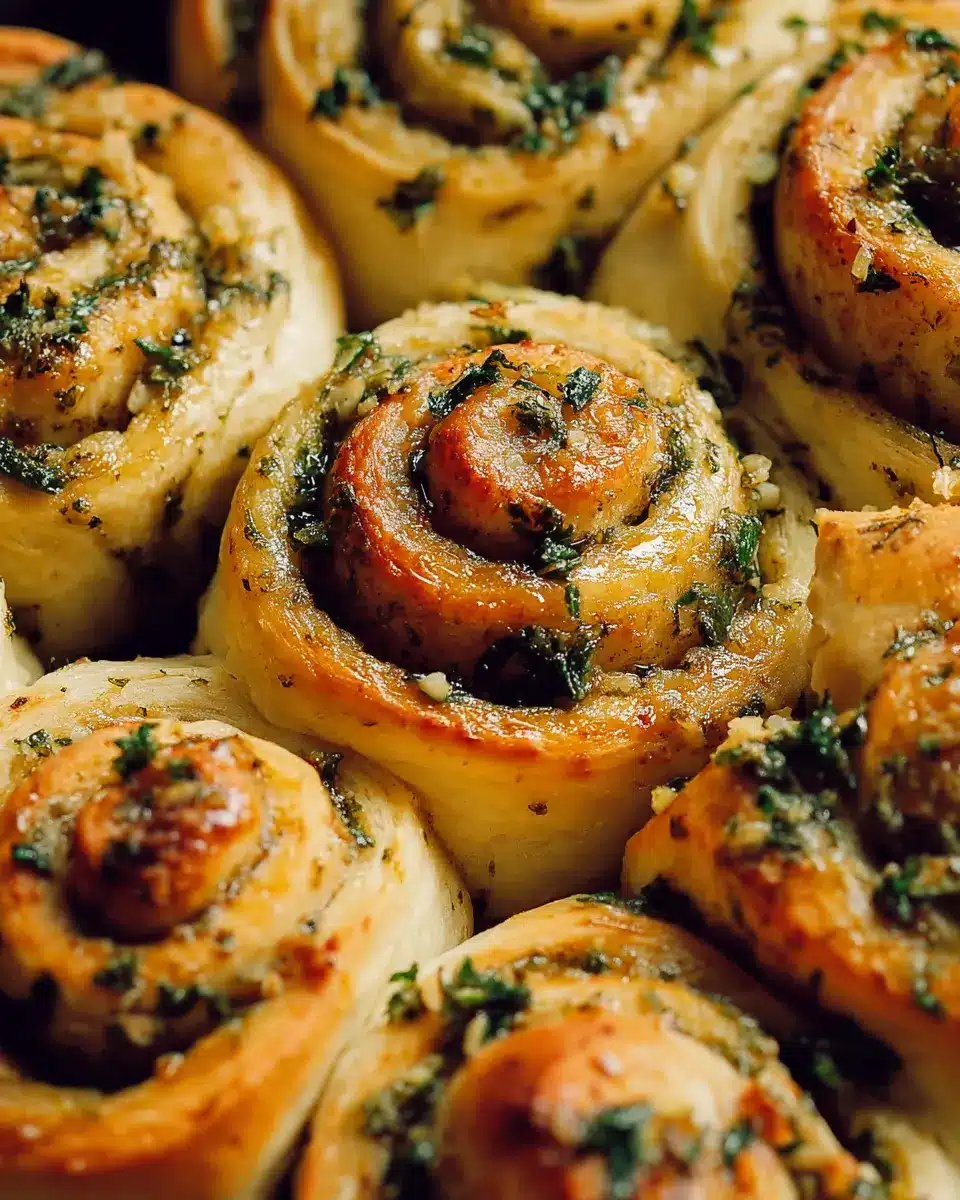
Elevate your classic garlic swirl rolls by incorporating a medley of fresh herbs like rosemary, thyme, or oregano into the filling. Simply chop them finely and mix them with the buttery garlic blend for a delightful aromatic twist. This not only enhances the flavor but also adds a lovely pop of color to the rolls.
Cheesy Garlic Swirl Rolls with Added Fillings
For a heartier version, try adding cheese and your favorite fillings! Incorporate shredded mozzarella or crumbled feta into the garlic butter mixture. You can also toss in Turkey Bacon or Chicken Ham for a bit of savoriness. The result? A gooey, cheesy delight that takes your garlic swirl rolls to the next level. Why not experiment with your favorite ingredients? You can't go wrong! For more inspiration on customizing rolls, check out this herb guide.
Cooking tips for Garlic Swirl Rolls
Perfecting dough consistency
Achieving the right dough consistency is key to making fluffy garlic swirl rolls. When mixing your ingredients, remember that the dough should be smooth and slightly tacky, yet not overly sticky. If the dough clings to your fingers, it may need a bit more flour. Adding flour gradually, about one tablespoon at a time, allows you to find that perfect balance. Be patient during the kneading process; this is where you build strength and texture!
Baking tips for golden-brown rolls
To get that delightful golden-brown finish, preheat your oven properly and place the rolls in the center rack for even baking. Consider brushing the tops with a little melted butter right before baking; this adds color and enhances flavor. Keep an eye on them towards the end of baking—every oven is different! When the garlic swirl rolls are puffed and golden, they’re ready to come out. Don’t forget to slather on that remaining garlic-butter mixture while they’re still warm for a mouthwatering finish. Happy baking!
For more tips on baking, check out King Arthur Baking for expert advice and recipes!
Serving suggestions for Garlic Swirl Rolls
Pairing with soups and salads
Garlic swirl rolls are a delightful addition to many meals! They pair beautifully with hearty soups like minestrone or creamy tomato basil—just imagine dunking a warm roll into rich broth. For a light lunch, enjoy them alongside a crisp salad, perhaps a classic Caesar or a vibrant Greek salad. The rolls’ buttery garlic flavor complements fresh greens and tangy dressings, enhancing every bite.
Creative uses for leftover rolls
If you find yourself with extra garlic swirl rolls, don’t let them go to waste! These rolls can be revived as delicious garlic bread; simply slice them in half, spread on a bit of butter, and toast until golden. You can also use them to create a savory bread pudding—just cube the rolls and mix with eggs, milk, and your favorite vegetables for a comforting dish. Another fun idea? Make mini sliders with turkey bacon or chicken ham, adding fun toppings to spice things up.
For more recipe ideas and food pairings, check out resources like Serious Eats for inspiration!
Time Breakdown for Garlic Swirl Rolls
Preparation Time
Prepare for deliciousness! You'll need about 20 minutes to whip up the dough and filling. This includes the time it takes to gather your ingredients and get everything mixed.
Baking Time
Once your rolls are all set in the baking dish, let the oven work its magic for around 30 to 35 minutes. You'll be greeted with golden, mouth-watering garlic swirl rolls in no time!
Total Time
From prep to plate, you’re looking at approximately 2 hours. This includes rising time for that fluffy dough, so grab a snack, put your feet up, and let the aroma of garlic fill your kitchen.
For more tips and tricks on making the perfect garlic-inspired recipes, check out Cooking Light or Serious Eats.
Nutritional Facts for Garlic Swirl Rolls
When preparing your garlic swirl rolls, it's important to keep in mind their nutritional value. Here's a quick overview:
Calories
Each roll contains approximately 200 calories, making them a delightful but moderate treat.
Protein
You can expect around 5 grams of protein per roll, contributing to a balanced diet when enjoyed as part of your meal.
Sodium
With about 300 mg of sodium per roll, these delicious garlic-infused treats are perfect for occasional indulgence.
For more detailed insights into your eating habits, consider checking out Nutrition.gov for great resources on meal planning and nutrition tips. Whether you're enjoying these rolls as part of a family dinner or a cozy night in, they are sure to impress!
FAQs about Garlic Swirl Rolls
Can I use whole wheat flour?
Absolutely! Substituting whole wheat flour for some or all of the all-purpose flour will give your garlic swirl rolls a nutty flavor and a bit more fiber. Just keep in mind that whole wheat flour can absorb more liquid, so you might need to slightly adjust the water and oil content in the recipe. Start with 50/50 and see how you like the texture.
How can I store leftover rolls?
To keep your garlic swirl rolls fresh, store any leftovers in an airtight container at room temperature for up to three days. If you need them to last longer, consider freezing them! Just wrap tightly in plastic wrap and then place in a freezer bag. They can be frozen for up to three months—simply thaw and reheat when you’re ready to enjoy.
What to do if my dough doesn’t rise?
If your dough doesn’t rise, it could be that your yeast is old or the water temperature was too hot or too cold. Always test your yeast in warm water (110°F is ideal) with a bit of sugar; if it bubbles, it’s alive! If the dough doesn’t rise after the recommended time, try giving it more time in a warmer spot, or consider starting over to achieve that soft, fluffy texture you expect.
Conclusion on Garlic Swirl Rolls
In conclusion, garlic swirl rolls are an irresistibly delicious addition to any meal. Their fluffy texture, combined with rich garlic and herb flavors, makes them perfect for sharing—whether at a family dinner or a relaxed gathering with friends. Don't forget to enjoy them warm for the ultimate flavor explosion!
Garlic-Swirl Rolls
Equipment
- stand mixer
- 9x13-Inch Baking Dish
- Rolling Pin
- sharp knife
Ingredients
Dough
- 4 cups all-purpose flour plus more for rolling
- 2 tablespoons granulated sugar
- 1 packet active dry yeast (2 ¼ teaspoons)
- 1.5 teaspoons kosher salt
- 1 cup warm water
- ¼ cup olive oil
- 2 large eggs
- 1 large egg yolk
Filling
- 1.5 sticks unsalted butter (¾ cup)
- 8 cloves garlic
- 0.5 bunch fresh parsley
- 1 ounce Parmesan cheese finely grated (about ½ cup)
- 0.5 teaspoon kosher salt
- ¼ teaspoon freshly ground black pepper
Instructions
Preparation
- Coat a 9x13-inch baking dish with cooking spray. Place 1 ½ sticks unsalted butter for the filling in a medium bowl and let sit at room temperature to soften while you make the dough.
- Make the dough: Place 4 cups of the all-purpose flour, 2 tablespoons granulated sugar, 1 packet active dry yeast, and 1 ½ teaspoons kosher salt in the bowl of a stand mixer fitted with the hook attachment and whisk to combine.
- Place 1 cup warm water, ¼ cup olive oil, 2 large eggs, and 1 large egg yolk in a medium bowl and whisk to combine. Turn the mixer speed on to low and slowly pour in the egg mixture. Increase the speed to medium-low and knead until the dough is smooth, soft, and forms a ball, 7 to 8 minutes.
- Gently remove the dough from the bowl and coat the bowl in cooking spray. Tightly cover the bowl in plastic wrap and let rise in a warm place until nearly doubled in size, about 1 ½ hours.
- Make the filling: Prep the following, adding them to the bowl of softened butter: Mince 8 garlic cloves. Finely chop ½ bunch of fresh parsley leaves and finely grate 1 ounce Parmesan cheese. Add ½ teaspoon kosher salt and ¼ teaspoon black pepper and stir and smash together to combine.
- When the dough is ready, punch it down and transfer onto a lightly floured work surface. Flour a rolling pin and roll the dough into a 24x10-inch rectangle (about ¼-inch thick).
- Spread half of the filling onto the dough. Starting at the long end closest to you, roll the dough up tightly into a log. Pinch the seam together at the top.
- Position the log seam-side down. Cut crosswise into 15 pieces with a sharp knife or piece of unflavored dental floss. Arrange the cut rolls cut-side up in the baking dish, 5 across and 3 down. Loosely cover in plastic wrap and let rise at room temperature for 25 minutes.
- Uncover and bake until puffed, golden-brown, and a toothpick or skewer inserted in several spots comes out clean, 30 to 35 minutes.
- Immediately spread the remaining butter mixture over the knots and let it melt.


Leave a Reply