
Introduction to Grilled Cheese Roll Ups
The Delightful Twist on a Classic Sandwich
Have you ever thought about how to elevate the classic grilled cheese sandwich into something even more fun? Enter grilled cheese roll ups! This delightful twist not only satisfies your cheese cravings but also adds a playful element to a beloved favorite.
In just 15 minutes, you can whip up these crispy, cheesy treats that are perfect for parties, snacks, or even a cozy night in. The beauty of these roll ups lies in their versatility. Use any cheese you love, and get creative with fillings. Imagine adding some turkey bacon or chicken ham for a flavorful twist, or perhaps experimenting with different breads, like whole grain or sourdough.
With just a few steps—flattening the bread, adding cheese, rolling it up, and toasting it in a pan—you can achieve that perfect crispy crust while keeping all the melty goodness inside. Trust us, these turn an ordinary lunch into an extraordinary experience! To dive into this scrumptious recipe, grab your ingredients and let’s get cooking. If you're interested in exploring more delicious variations, check out resources like Serious Eats or Food Network for inspiration.
Ingredients for Grilled Cheese Roll Ups
Essential ingredients for delicious roll ups
Crafting the perfect grilled cheese roll ups requires just a few essential ingredients that come together in harmony. Here’s what you need:
- 8 thick slices of soft white bread: The foundation of your roll-ups! Soft breads provide a deliciously fluffy texture.
- 8 slices of cheddar or American cheese: These cheeses melt beautifully, achieving that gooey perfection we all crave in a grilled cheese.
- 3 tablespoons of melted butter: This adds flavor and gives the roll-ups their irresistible golden crust. You might find you want a bit more to brush on before grilling.
These ingredients create a classic grilled cheese flavor that appeals to both kids and adults alike.
Optional add-ins for extra flavor
Feeling adventurous? Enhance your grilled cheese roll ups with some optional add-ins! Here are a few ideas that can take your rolls to a new level:
- Turkey Bacon or Chicken Ham: Adding these proteins can turn your roll-ups into a heartier snack or meal.
- Sliced tomatoes or avocados: Fresh veggies can bring a refreshing taste and a pop of color.
- Spices and herbs: A sprinkle of garlic powder, Italian seasoning, or cilantro can add a unique twist.
Experimenting with these extras can help you discover new flavor combinations that you’ll crave again and again. Happy cooking!
Preparing Grilled Cheese Roll Ups
Creating grilled cheese roll ups is not just about making a delicious snack; it’s about the joy of transforming a classic into something new and exciting! Follow this simple guide to have a fun time in the kitchen while whipping up these crispy, cheesy delights.
Gather Your Ingredients
Before diving into the cooking process, start by gathering your ingredients. For these grilled cheese roll ups, you will need:
- 8 thick slices of soft white bread
- 8 slices of either cheddar or American cheese
- 3 tablespoons of butter, melted (or as required)
Having everything ready will help the process flow smoothly. You may want to get your hands on high-quality cheese and fresh bread for the best flavor. Check out this resource on cheese types if you want to learn more about the best options.
Prepare the Bread
Now that you’ve got your ingredients lined up, it’s time to prepare the bread. Slice off the crusts from each piece. This step is essential for getting that perfect roll-up effect. Once the crusts are gone, take a rolling pin and flatten each slice. You want them to be not too thin but enough to roll easily. This method not only gives your grilled cheese roll ups a uniform appearance but also enhances their texture.
Assemble the Cheese Roll Ups
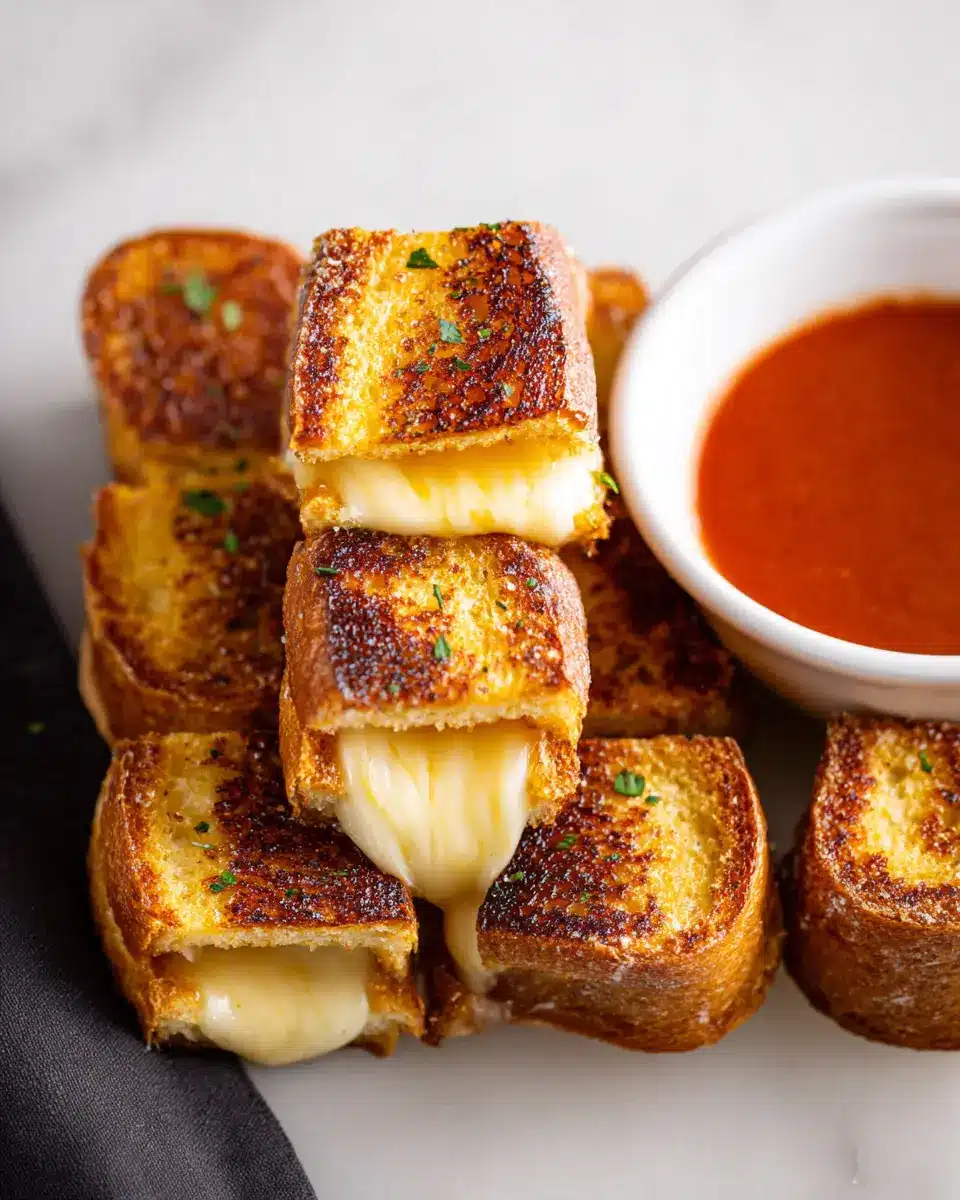
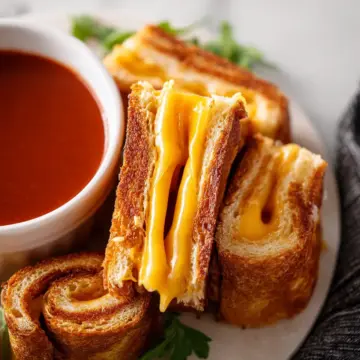
Now comes the best part—assembling the cheese roll ups! Lay a slice of cheese on each bread slice, leaving a small strip of bread at one end. This is important; it acts as a “seal” when you roll them up. Once you add the cheese, carefully roll each slice from the cheese-filled end to the uncheesed end. Once rolled, brush that little strip with melted butter to help keep the roll ups together. Don’t forget to secure the seam side down so they keep their shape.
Cook to Perfection
Next, it’s time to cook your creations. Heat a dry pan over low-medium heat and place the roll ups seam-side down. Brush more butter on all sides for that crispy, golden finish. Cook until they’re golden brown and cheese starts to ooze out. You might need to do this in batches, depending on your pan size. Use tongs to turn them frequently and achieve an even cook.
Enjoy Your Tasty Creation
Once cooked, remove the roll ups from the pan and let them cool for a minute before you dig in. You can serve them as is or pair them with your favorite dipping sauces. Ketchup or a homemade marinara sauce is a classic choice. Isn’t it satisfying to enjoy a tasty creation that’s both comforting and playful? With these grilled cheese roll ups, you’re bound to impress anyone fortunate enough to be on the receiving end of your culinary skills!
Variations on Grilled Cheese Roll Ups
Grilled cheese roll ups are an incredibly versatile dish, perfect for customizing to your taste! Here are a couple of fun variations that add a unique twist to your classic recipe.
Add a Twist with Turkey Bacon
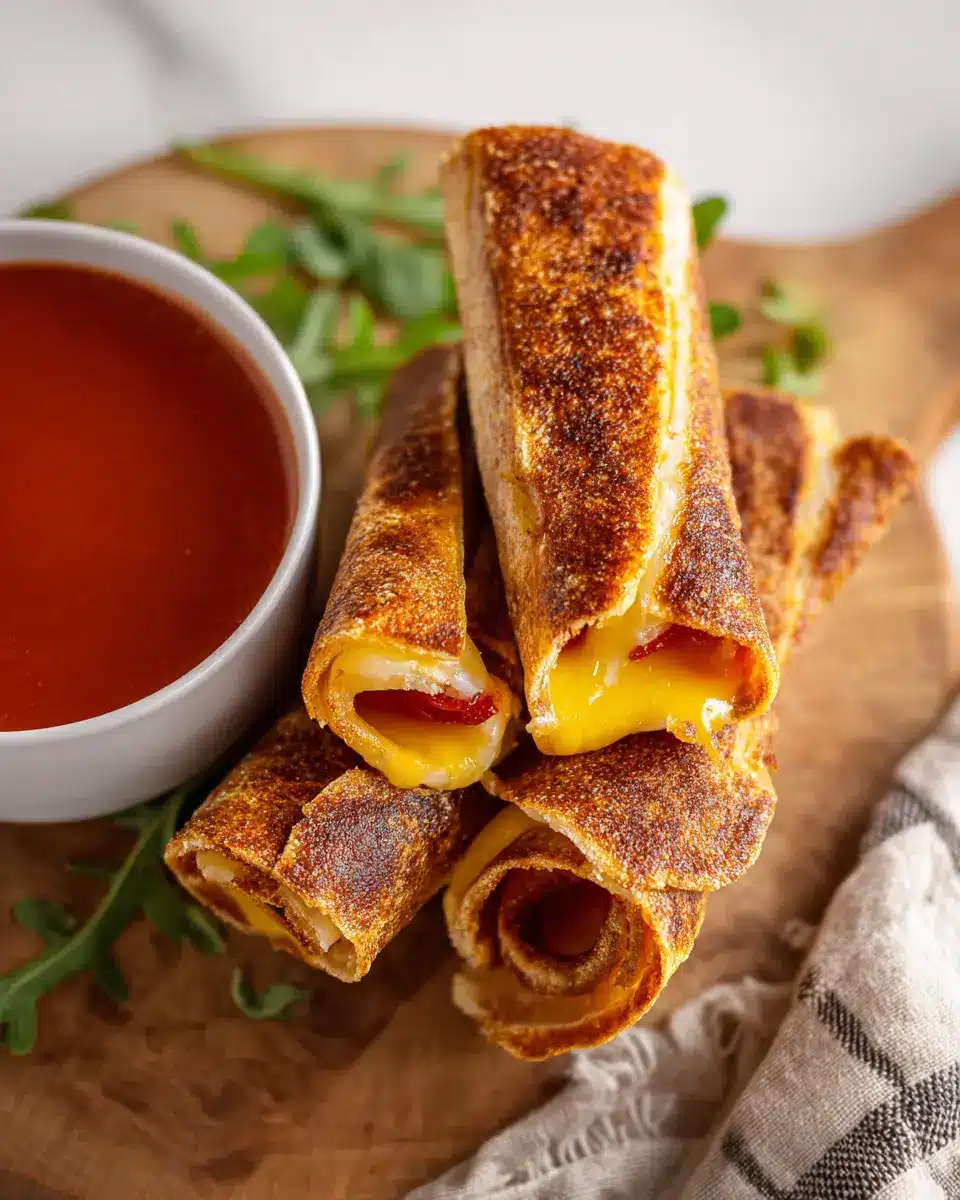
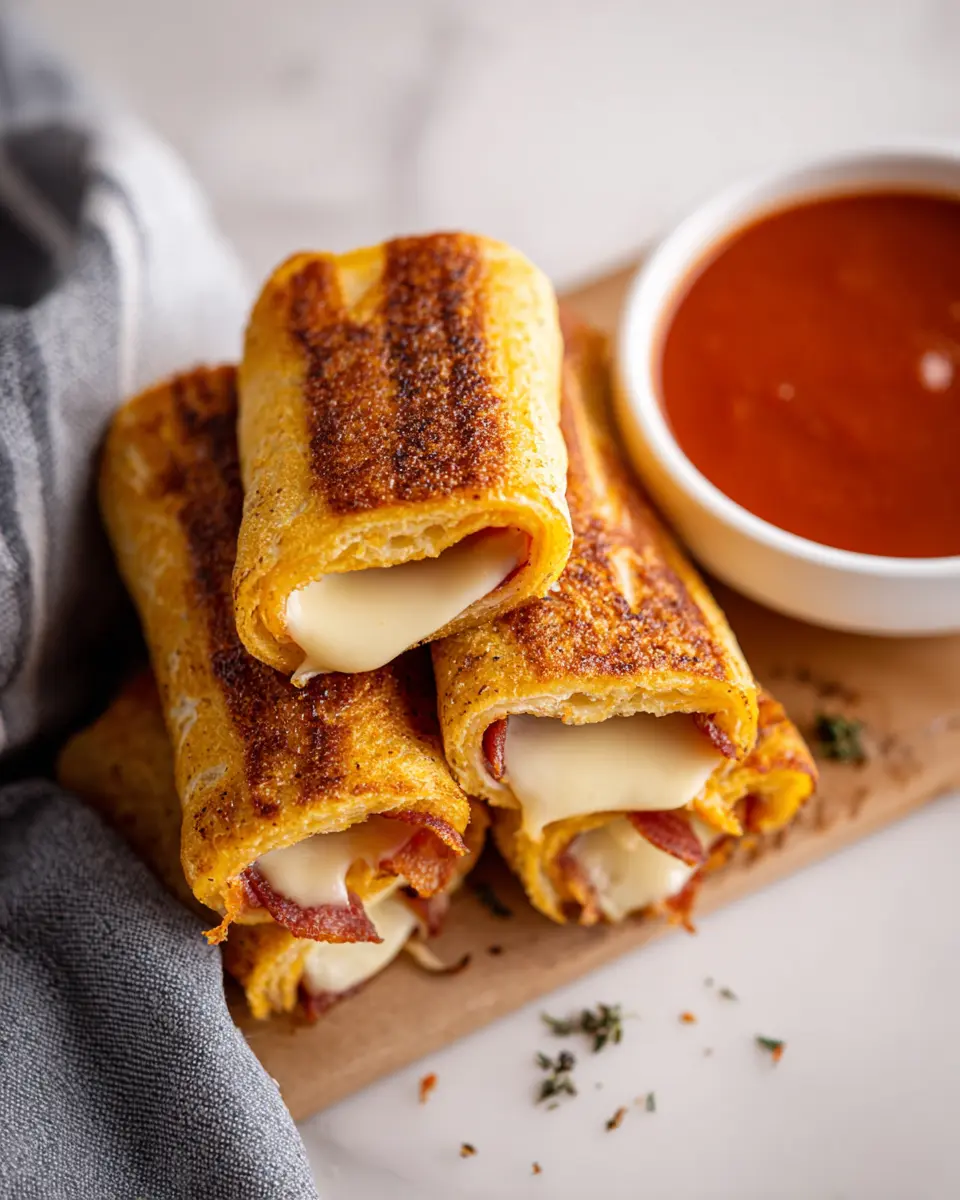
For a delightful crunch and a savory flavor, try adding crisp turkey bacon to your grilled cheese roll ups. Simply cook the turkey bacon until crispy, then chop it into small bits before rolling it inside your cheese-stuffed bread. This variation not only enhances the taste but also adds a fun texture that pairs beautifully with the gooey cheese. Plus, it’s a great way to sneak in some extra protein!
Introduce Chicken Ham for a Savory Touch
If you're looking to elevate your grilled cheese roll ups even further, consider the savory addition of chicken ham. This lean protein complements the melty cheese perfectly and brings a subtle, rich flavor to every bite. Just layer a slice or two of chicken ham alongside your cheese before rolling up. You might find that this twist becomes a new favorite in your household!
Explore these ideas and let your creativity shine! For more twists on classic recipes, check out this guide on flavor combinations that will inspire you to keep experimenting in the kitchen.
Cooking Notes for Grilled Cheese Roll Ups
Tips for Achieving the Perfect Crunch
To create that satisfying crunch in your grilled cheese roll ups, consider using a good quality bread like a thick sourdough or Texas toast. Make sure your pan is preheated—this allows for even cooking. A little extra butter creates that delightful golden crust, so don’t be shy when brushing your roll-ups!
Ideas for Maintaining Gooey Cheese
For that glorious, gooey cheese interior, use slices that melt well, like cheddar or American cheese. Placing the cheese in the center also helps it stay melty as you cook. If you really want to amp up the flavor, add a dash of garlic powder or herbs to the butter before brushing it onto your roll-ups. Enjoy experimenting!
Serving suggestions for Grilled Cheese Roll Ups
Creative dips to enhance your meal
Grilled cheese roll ups are already delightfully cheesy, but dipping them in something special can elevate the experience. Try a zesty marinara or classic ranch dressing for a fun twist. For a gourmet touch, a homemade spicy garlic aioli or creamy avocado dip could add an exciting new layer to your meal. If you're feeling adventurous, a tangy tangy balsamic reduction also works wonders!
Pairing with fresh salads or soups
To round out your grilled cheese roll ups meal, consider pairing them with a light, fresh salad. A crisp arugula and cherry tomato salad with balsamic vinaigrette adds color and crunch. Alternatively, a comforting bowl of tomato soup complements the warmth of the roll ups beautifully and offers a nostalgic charm. This creates a balanced meal that's delicious and satisfying!
Tips for Making Perfect Grilled Cheese Roll Ups
Choosing the Right Type of Bread
The bread you choose can elevate your grilled cheese roll ups. Opt for thick, soft white bread, such as Pullman or sandwich bread, to achieve that perfect texture. This bread holds the cheese without tearing, ensuring a delightful bite every time. For a twist, try sourdough or whole wheat for added flavor!
Managing Heat for Even Cooking
To get those golden, crispy edges without burning, maintain a low to medium heat while cooking your roll ups. This allows the cheese to melt evenly inside while the bread crisps up on the outside. Turn them frequently with tongs for consistent browning. Patience is key—your taste buds will thank you!
Time Details for Grilled Cheese Roll Ups
Preparation Time
Getting started on these grilled cheese roll ups is a breeze! You'll need about 5 minutes to gather your ingredients and cut the crusts off your bread.
Cooking Time
Once prepped, these tasty bites only take 10 minutes to cook until they’re golden and delightfully cheesy.
Total Time
In just 15 minutes, you can whip up a batch of these fun roll ups for a quick snack or meal. Perfect for those busy weeknights or when friends drop by unexpectedly!
For more quick and easy recipes, check out Food Network or Taste of Home for inspiration!
Nutritional Information for Grilled Cheese Roll Ups
Calories per Serving
Each serving of these delightful grilled cheese roll ups packs in about 369 calories. It's a satisfying option for a quick meal, especially if you're looking for comfort food that won't weigh you down too much.
Key Nutrients
These roll ups are not just delicious but also provide some essential nutrients:
- Protein: 18g, great for muscle repair.
- Calcium: 502mg, essential for healthy bones.
- Sodium: 610mg, which adds flavor but should be monitored if you’re watching your salt intake.
As you enjoy these grilled cheese roll ups, think about pairing them with a fresh salad or some grilled vegetables to enhance your meal's nutritional profile. For more insights on healthy eating, check out Harvard Health's nutrition articles.
Keep in mind that while they do have a good amount of fat, it’s a balance. You can always modify the fillings to add in veggies or lean meats like Turkey Bacon for an added nutrient kick! What’s your favorite twist for this classic dish?
FAQs about Grilled Cheese Roll Ups
Can I use different cheeses for variation?
Absolutely! The beauty of grilled cheese roll ups lies in their versatility. While classic options like cheddar or American cheese are crowd-pleasers, don’t hesitate to experiment with other cheeses. Gouda, mozzarella, or even a spicy pepper jack can elevate the dish. Mixing cheeses can also create a delightful flavor explosion—try combining sharp cheddar with creamy brie for a rich experience!
How do I store leftover roll ups?
If you have any grilled cheese roll ups left, simply place them in an airtight container once they’ve cooled down. They can be stored in the refrigerator for up to three days. For an easy reheating method, pop them in the oven or air fryer until heated through. Alternatively, you can enjoy them cold for a unique snack!
What are some good side dishes to serve with roll ups?
Pair your grilled cheese roll ups with a variety of sides for a complete meal. Classic tomato soup is a go-to, but you might also enjoy a refreshing salad or some crispy sweet potato fries. Want to add some protein? Serve them alongside sliced turkey bacon or chicken ham for an extra tasty touch!
Conclusion on Grilled Cheese Roll Ups
Creating grilled cheese roll ups at home brings joy to both cooking and eating. This delightful twist on a classic highlights the pleasure of homemade food, inviting you to relive carefree childhood days. Share these simple yet scrumptious bites with loved ones for an unforgettable taste experience!
Grilled Cheese Roll Ups
Equipment
- Rolling Pin
- Pan
- Tongs
Ingredients
Bread and Cheese
- 8 slices thick slices of soft white bread
- 8 slices cheddar or American cheese
- 3 tablespoons butter melted (or as needed)
Instructions
Preparation
- One at a time, cut the crusts off of each slice of bread, then use a rolling pin to flatten them.
- Add a slice of cheese to each slice of bread, making sure you leave a small strip of bread showing at the end of the slice of bread to brush with butter.
- Tightly but carefully roll up each slice of bread to the end, brush with butter, then roll shut and place seam-side-down.
- Brush butter all over the roll.
- Add roll ups to a dry pan seam-side-down over low-medium heat and fry until golden all over with the cheese starting to leak out. Use tongs to frequently turn them. You may need to do this in two batches depending on the size of your pan.
- Remove from pan and serve immediately.


Leave a Reply