
Introduction to Red Velvet Cake Recipe
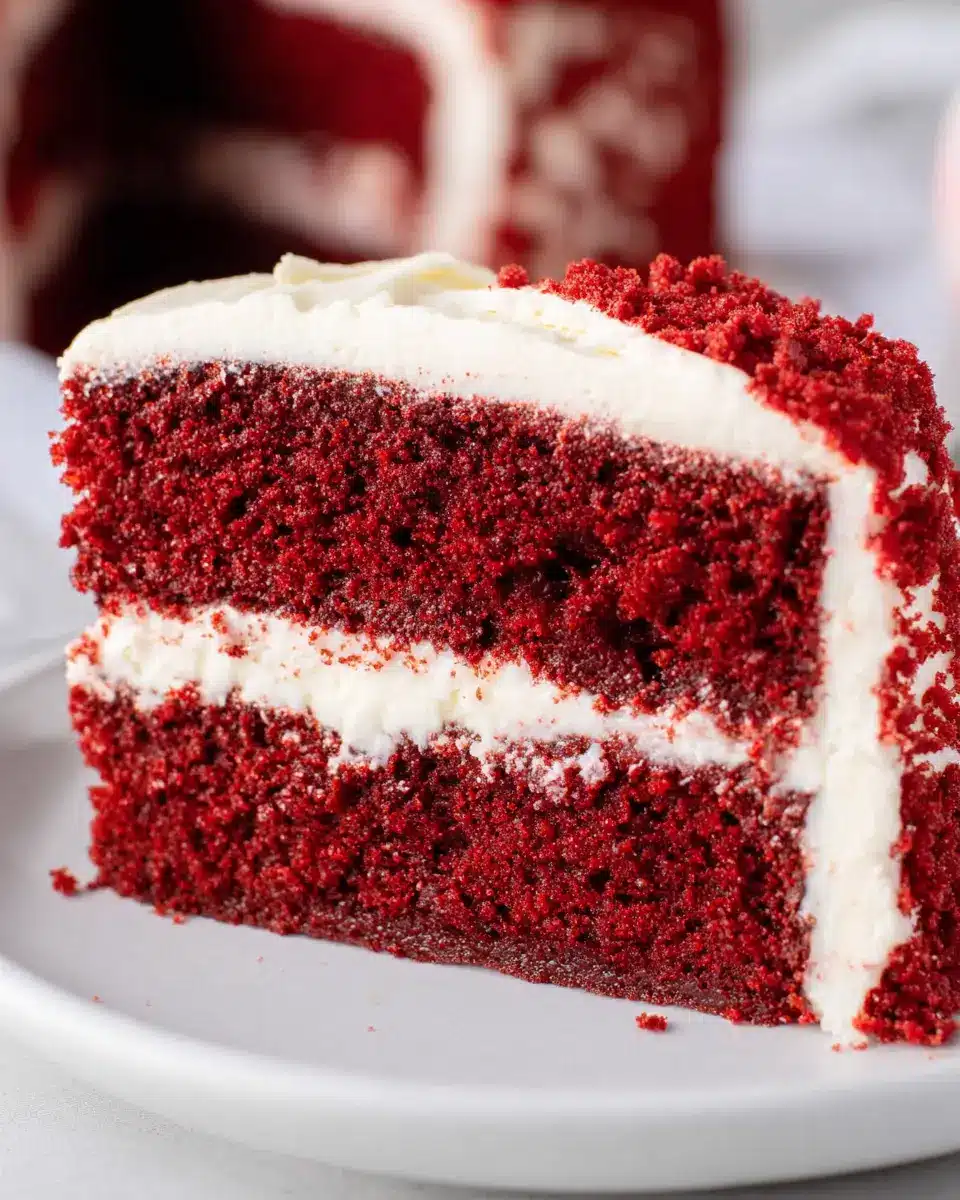
If you’ve never tried a red velvet cake, you’re in for a treat! This enticing dessert perfectly balances rich flavor with a soft, velvety texture. So, why is red velvet cake a favorite among dessert lovers? For many, it’s more than just the striking color. The subtle hint of cocoa combined with a touch of tanginess from buttermilk creates an unforgettable flavor profile that’s extraordinary yet comforting.
Traditionally appearing on special occasions, red velvet cake captures attention not only for its taste but also for its visual appeal. The bright red hue contrasts beautifully with the fluffy cream cheese frosting that complements it so well. It’s the ideal centerpiece for birthdays, anniversaries, or any festive gathering.
Additionally, red velvet cake has a fascinating history, tracing back to the early 20th century. Many believe it originated in the kitchens of hotels in the Southern United States (explore more about its history here).
As you prepare to dive into our red velvet cake recipe, you’ll discover that creating this masterpiece can be straightforward and enjoyable. Perfecting this dessert not only boosts your baking confidence but also gives you an impressive dish to share with friends and family. Let the baking adventure begin!
Ingredients for Red Velvet Cake
Essential ingredients for the cake
Creating the perfect red velvet cake recipe starts with the right essentials. Here's what you'll need:
- All-purpose flour (14 ounces): This forms the structure of your cake.
- Granulated sugar (14 ounces): The sweetness that balances the cocoa and enhances flavor.
- Cocoa powder (2 tablespoons): Just enough to give it that subtle chocolate essence.
- Salt (1 teaspoon): Enhances flavors.
- Baking soda (1 teaspoon): Helps the cake rise while adding a lovely texture.
- Large eggs (2, room temperature): Provides moisture and richness.
- Vegetable oil (4 ounces): Keeps the cake moist.
- Buttermilk (8 ounces, room temperature): Adds that signature tang to your cake.
- White vinegar (1 tablespoon): Works with baking soda to create a soft, airy crumb.
- Unsalted butter (6 ounces, melted but not hot): Adds richness and depth.
- Vanilla extract (1 teaspoon): A timeless flavor enhancer.
- Red food coloring gel (1 tablespoon): The star of the show, giving your cake its iconic hue.
Key ingredients for cream cheese frosting
The red velvet cake recipe wouldn’t be complete without its velvety counterpart — the cream cheese frosting. Here are the must-have ingredients:
- Cream cheese (12 ounces, softened): The creamy base that defines this frosting.
- Unsalted butter (8 ounces, softened): Ensures a smooth and rich texture.
- Vanilla or orange extract (½ teaspoon): Adds a wonderful flavor twist.
- Salt (¼ teaspoon): Balances the sweetness.
- Powdered sugar (26 ounces, sifted): Sweetness and a smooth finish.
With these ingredients, your red velvet cake will be the talk of any gathering. Now, let’s get baking! If you’re looking for a detailed guide on perfecting your technique, this resource can be very helpful.
Preparing the Red Velvet Cake
Baking a red velvet cake is a delightful journey filled with rich flavors and beautiful presentations. Let’s walk through the essential steps to ensure your cake turns out moist and velvety with a luscious cream cheese frosting.
Preheat and Prepare Your Pans
Before anything else, preheat your oven to 350°F (175°C). This first step is crucial as an adequately heated oven will help your cake rise beautifully. While waiting for the oven, prepare two 8" x 2” cake pans by greasing them with cake goop or your preferred non-stick spray. This will make it easier to remove the cakes once they’re baked. Some bakers swear by parchment paper for an extra layer of assurance—consider this if you are aiming for perfection!
Mix the Wet Ingredients
In a medium bowl, combine the eggs, vegetable oil, buttermilk, white vinegar, unsalted butter, vanilla extract, and red food coloring. Mix these wet ingredients until they are well combined. This vibrant mixture sets the stage for the beautiful color of your cake. Don’t rush! Take a moment to enjoy the blend of colors as you whisk.
Combine the Dry Ingredients
Grab your stand mixer and in its bowl, blend together the all-purpose flour, granulated sugar, cocoa powder, salt, and baking soda. Note that the cocoa powder is what gives your red velvet cake that subtle, rich flavor. Stir at low speed for a few seconds to incorporate the ingredients, ensuring a uniform base for your cake batter.
Make the Cake Batter
Now, it’s time to unite the wet and dry ingredients. Pour the wet mixture into your dry ingredients and mix at medium speed until the batter is smooth and fully incorporated—this should take about a minute. Be sure to scrape down the sides of the bowl to mix in anything that might be sticking. If you’re curious about the science behind mixing flour and sugar, check out this informative article from the American Chemical Society.
Bake the Cake Layers
Evenly divide the cake batter between your prepared pans. Bake for 35 to 40 minutes, or until a toothpick inserted in the center comes out clean. The tops of your cake should bounce back when lightly touched. This is where the magic happens! Your kitchen will soon fill with a tantalizing aroma that I just can’t get enough of.
Cool the Cakes Properly
After baking, let the cakes cool in their pans for about 10 minutes. Then, turn them out onto a cooling rack to cool completely. If you want to frost your cake later today, pop the layers into the freezer for about an hour to firm them up. This trick not only makes frosting easier but helps keep the moisture in.
Prepare the Cream Cheese Frosting
For that irresistible finishing touch, whip up your cream cheese frosting. Start by blending softened unsalted butter until it’s smooth. Add in the softened cream cheese and mix until both are well incorporated. Gradually add in sifted powdered sugar, one cup at a time, until you reach your desired sweetness and consistency.
Frost and Decorate the Cake
Once your cakes are completely cool, it's time for the fun part: frosting! Spread an even layer of frosting between the cake layers and then around the entire cake. Feel free to get creative with decorations—think sprinkles, berries, or even fresh flowers. Your beautiful red velvet cake is now ready to impress!
With these simple steps, you’ll create a stunning red velvet cake that not only looks impressive but tastes out of this world. Happy baking!

Variations on Red Velvet Cake
Gluten-Free Red Velvet Cake
Who says everyone can't enjoy a classic red velvet cake? With a few simple swaps, you can create a gluten-free red velvet cake that’s just as delicious! Replace the all-purpose flour with a gluten-free blend, and ensure it contains xanthan gum for that perfect texture. This variation allows your gluten-sensitive friends to indulge without worry.
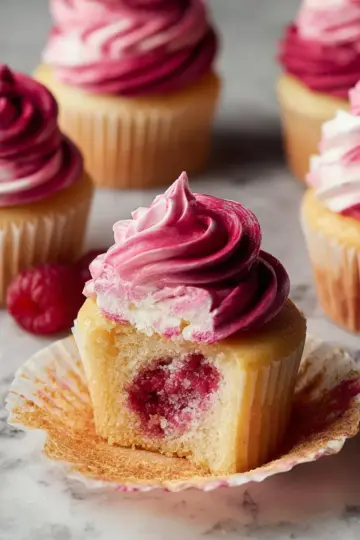
Red Velvet Cupcakes
If you love bite-sized treats, consider making red velvet cupcakes! This version of the red velvet cake recipe allows for individual servings and is perfect for parties. Simply divide the batter among muffin tins and reduce the baking time to about 20 minutes. Top each cupcake with cream cheese frosting and a sprinkle of cocoa powder for a delightful touch!
For more tips on baking variations, check out Serious Eats for detailed guides and insights!
Baking notes for Red Velvet Cake
Tips for ingredient temperature
To achieve the perfect texture for your red velvet cake, it's essential to bring all your ingredients to room temperature. Eggs, buttermilk, and butter should be slightly warmed. This prevents the batter from curdling and ensures a smooth mix, yielding that desirable velvety finish.
Secrets to perfect frosting
For your cream cheese frosting, ensure the butter and cream cheese are fully softened before mixing. This will create a lump-free consistency and allow for a seamless blend with the powdered sugar. Be careful not to over-mix; just combine until smooth for that luscious, creamy topping that perfectly complements your red velvet cake recipe.
For more frosting tips, check out Baker’s Journal!
Serving suggestions for Red Velvet Cake
Ideal pairings and presentation ideas
When it comes to enjoying your red velvet cake recipe, don’t underestimate the power of presentation and pairing! This luscious cake shines best alongside complementary flavors.
-
Accompaniments: Serve with a scoop of vanilla ice cream or a dollop of whipped cream for a delightful contrast. Fresh berries, like raspberries or strawberries, add a refreshing tartness that balances the cake's sweetness.
-
Beverage Pairings: Brew a cup of rich coffee or a fragrant herbal tea to elevate your dessert experience. A glass of cold milk never goes out of style, either!
For presentation, consider stacking layers and piping the cream cheese frosting decoratively. Garnish with chocolate shavings or a sprinkle of edible gold for a touch of elegance. Transforming your cake from simply delicious to visually captivating makes it perfect for any occasion!
Tips for Making the Perfect Red Velvet Cake
Common Pitfalls to Avoid
When following your red velvet cake recipe, keep an eye on a few common missteps! Overmixing the batter can make the cake dense, so mix just until combined. Additionally, skipping the chilling step can lead to a messy frosting process – trust me, chilling helps the layers firm up and makes frosting a breeze.
Best Practices for Moistness and Texture
For a truly irresistible cake, don’t skimp on ingredients! Use room temperature eggs and buttermilk for better emulsion. Also, consider weighing your ingredients; it’s more precise than measuring cups and ensures a consistent outcome. Finally, wrapping warm layers in plastic wrap traps moisture beautifully, keeping your masterpiece moist even after freezing. For further tips, you might check out resources like America's Test Kitchen.
Time Details for Red Velvet Cake
Preparation Time
Preparing your delicious red velvet cake recipe only takes about 10 minutes. This is when you’ll gather and mix all your ingredients, ensuring that everything is ready for baking.
Baking Time
Once your cake batter is prepped, pop it in the oven! The baking time is approximately 30–40 minutes. Keep an eye on it, and check for doneness with a toothpick.
Total Time
From start to finish, your total time investment will be around 1 hour and 40 minutes. This includes prep, baking, and chilling the cake, giving you ample time to clean up and maybe even enjoy a quick break!
This cake is well worth the effort—it’s an American classic that’s sure to impress at any gathering. Don’t forget to check out our frosting tips for the best results!
Nutritional Information for Red Velvet Cake
Calories per Serving
Indulging in this decadent red velvet cake recipe? Each serving contains approximately 446 calories, making it a delightful treat not just for special occasions but for any dessert-loving day.
Nutritional Breakdown
Understanding what you're enjoying is key! Here’s a quick look at the nutritional components:
- Carbohydrates: 59g
- Protein: 3g
- Fat: 22g
- Saturated Fat: 15g
- Cholesterol: 54mg
- Sodium: 305mg
- Potassium: 59mg
- Sugar: 45g
- Vitamin A: 480IU
- Calcium: 32mg
- Iron: 1mg
This overall breakdown helps you appreciate the balance of flavors while keeping an eye on dietary intake. For more information on cake ingredients and their benefits, you might check out the USDA FoodData Central for deeper insights! 🍰
When savoring this red velvet cake recipe, remember that it's all about balance—enjoy this classic in moderation, and don't hesitate to share it with friends and family!
FAQs about Red Velvet Cake
What makes red velvet cake red?
The signature red hue of red velvet cake primarily comes from the reaction between cocoa powder and acidic ingredients like buttermilk and vinegar. In traditional recipes, the use of beet juice or red food coloring enhances this vibrant color. If you want an intense red without natural dyes, opting for a gel food coloring is the way to go!
Can I substitute ingredients in the recipe?
Absolutely! You can easily adapt this red velvet cake recipe:
- Buttermilk: If you don’t have buttermilk, mix 1 tablespoon of vinegar with 1 cup of milk and let it sit for a few minutes.
- Vegetable Oil: You can use melted coconut oil or unsalted butter instead.
- Flour: For a gluten-free version, consider using a 1:1 gluten-free flour blend.
How should I store leftover red velvet cake?
To keep your red velvet cake fresh, store it in an airtight container at room temperature for up to three days. If you plan to keep it longer, refrigerate it for up to a week, or freeze slices wrapped tightly in plastic wrap for up to three months. Just remember to let it thaw in the fridge overnight before serving!
Conclusion on Red Velvet Cake
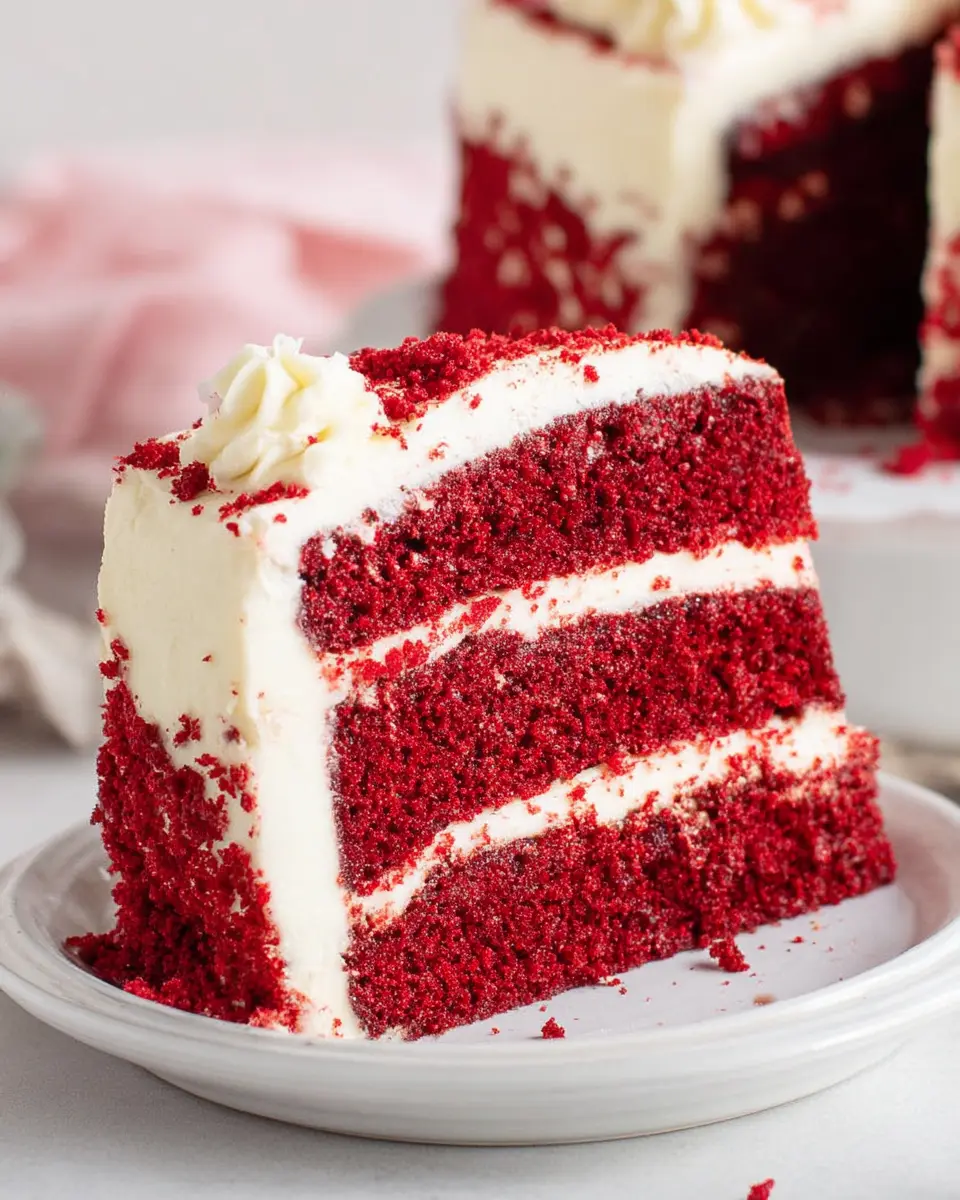
In summary, this red velvet cake recipe not only delivers a stunning visual appeal but also offers a delightful blend of flavors that’s sure to impress. Whether for a special occasion or just a sweet indulgence, this cake paired with luscious cream cheese frosting is a guaranteed crowd-pleaser. Enjoy baking!
Red Velvet Cake Recipe
Equipment
- stand mixer
- 8" x 2” cake pans
- Mixing Bowls
- whisk
Ingredients
Red Velvet Cake Ingredients
- 14 ounces all-purpose flour
- 14 ounces granulated sugar
- 2 Tablespoons cocoa powder
- 1 teaspoon salt
- 1 teaspoon baking soda
- 2 large eggs room temperature
- 4 ounces vegetable oil
- 8 ounces buttermilk room temperature
- 1 Tablespoon white vinegar
- 6 ounces unsalted butter melted but not hot
- 1 teaspoon vanilla
- 1 Tablespoon red food coloring gel food coloring
Cream Cheese Frosting Ingredients
- 12 ounces cream cheese softened
- 8 ounces unsalted butter softened
- 0.5 teaspoon vanilla extract or orange extract
- 0.25 teaspoon salt
- 26 ounces powdered sugar sifted
Instructions
Red Velvet Cake
- Preheat your oven to 350°F and prepare two 8" x 2” cake pans with cake goop or your preferred pan release.
- Combine the eggs, vegetable oil, buttermilk, vinegar, butter, vanilla, and red food coloring in a medium bowl and set it aside.
- Combine the flour, sugar, cocoa powder, salt, and baking soda in the bowl of your stand mixer with the paddle attachment. Mix this on low speed for a few seconds to combine.
- Add the liquid ingredients to the dry and mix on medium speed until the batter is fully incorporated and smooth (about 1 minute). Don't forget to scrape the bowl to ensure all the ingredients are evenly mixed.
- Divide the cake batter evenly between the prepared cake pans.
- Bake the cakes for 35-40 minutes until a toothpick inserted in the center comes out clean and the tops bounce back when lightly touched.
- Cool the cakes in the pans for about 10 minutes, then flip them out onto a cooling rack to finish cooling.
- If you are going to layer and frost the same day, pop the cake layers into the freezer for about an hour, no need to wrap them. Otherwise, wrap the layers in plastic wrap and freeze them for up to a week.
- Place the softened butter in the bowl of your stand mixer with the whisk attachment. Mix on low until it is smooth and lump-free.
- Add in the softened cream cheese and combine on low until smooth and completely homogeneous. Scrape the bowl to make sure it is all incorporated.
- Add in the sifted powdered sugar one cup at a time, mixing on low to avoid throwing powdered sugar out of the bowl.
- Add the vanilla extract and salt and mix until just combined and smooth. Do not over-mix.
- After your cakes are fully cooled, decorate as desired.
Leave a Reply